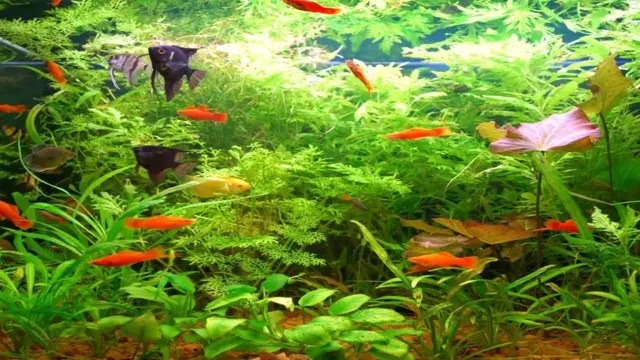
If you want to add a touch of personality to your aquarium, a vinyl aquarium background is a great option. Not only can it improve the overall aesthetic, but it can also provide your fish with a sense of security as they hide amongst the scenery. But if you’ve never applied a vinyl background before, the process can seem intimidating.
Don’t worry, though – it’s actually quite easy! In this blog post, we’ll walk you through everything you need to know about how to apply a vinyl aquarium background. From preparation to application, we’ve got you covered. So let’s dive in!
Materials You’ll Need
If you’re looking to spice up your aquarium, a vinyl background is an excellent way to do so! Here are the materials you’ll need to get started: first, measure the dimensions of your aquarium to determine the size of your vinyl sheet. You’ll also need a pen or marker to trace the outline of your aquarium onto the vinyl sheet, so make sure you have those as well. Next, grab some scissors or a sharp utility knife to cut the vinyl sheet to size.
Additionally, you’ll need a clean rag and some soapy water to wipe down the back of the aquarium before applying the vinyl sheet. Finally, you’ll want a squeegee or credit card to smooth out any bubbles once the vinyl is on the tank. With these fundamental materials, applying the vinyl aquarium background will be a breeze.
Vinyl aquarium background
If you’re looking to spruce up your aquarium, a vinyl aquarium background is an easy way to add a pop of color and texture to your underwater world. Here are the materials you’ll need to create your own vinyl aquarium background: Firstly, you’ll need to choose your vinyl. You can either buy pre-made aquarium backgrounds or choose a vinyl sheet that you like and cut it to size.
You’ll also need a ruler, scissors, a pencil, adhesive spray, and a clean cloth. Before you begin, clean the back of your aquarium with the cloth to remove any dust or debris. Next, measure the height and length of your aquarium and mark your vinyl sheet accordingly.
Once you have your measurements, cut the vinyl to size using the scissors. Apply adhesive spray to the back of the vinyl and carefully press it onto the back of your aquarium. Smooth out any air bubbles or wrinkles with your hand or a clean cloth.
Once you’re done, you’ll have a beautiful vinyl aquarium background that’s sure to wow your fish and guests alike.
Scissors
Scissors are an essential tool for any crafter, tailor, or DIY enthusiast. When it comes to cutting fabric, paper, or even hair, having the right pair of scissors can make all the difference. To ensure your cuts are precise and smooth, it’s important to have high-quality scissors.
The materials you’ll need are scissors that are sharp and durable, comfortable to hold in your hand, and suited to the task at hand. Depending on your project, you may need different types of scissors. For example, dressmaking scissors are longer and have a sharp point, making them perfect for cutting through fabric, while embroidery scissors have a smaller blade and pointed tip, making them easier to maneuver around detailed sections.
Whatever type of scissors you need, investing in high-quality materials will make your crafting experience much more enjoyable and productive.
Measuring tape
When it comes to taking accurate measurements for your sewing projects, a measuring tape is an essential tool to have. To get started, you’ll need a standard measuring tape, which typically measures 60 inches or 150 centimeters long. You’ll also want to look for a measuring tape that is flexible and easily retracts, so you can quickly and accurately measure your fabric.
Additionally, it’s helpful to have a measuring tape with both metric and imperial measurements, so you can switch back and forth between the two. When selecting your measuring tape, it’s important to choose a high-quality one that won’t easily bend or break, so you can rely on its accuracy time and time again. With the right materials on hand, you’ll be well on your way to crafting beautiful, well-fitted garments with ease.
Squeegee or credit card
When it comes to DIY window cleaning, one of the most important things to remember is to have the right tools on hand. One of the most crucial materials is the squeegee or credit card. The squeegee is a handheld tool with a rubber blade that is ideal for wiping away excess water and cleaning solution from the surface of your windows.
It comes in various sizes, and you can choose the right one depending on the size of the window you’re cleaning. On the other hand, a credit card or plastic scraper can also be used to remove excess water from the window surface, especially when cleaning smaller windows or hard-to-reach areas. It’s important to note that when using a credit card or scraper, you should take care not to scratch the window surface.
Aside from the squeegee or credit card, you’ll also need a bucket, cleaning solution, a lint-free cloth, and some old newspapers to achieve a sparkling clean window. You can easily make your own cleaning solution using household items such as vinegar and water or dish soap and water. Remember that cleaning your windows regularly will not only enhance the look of your home but also ensure that you enjoy natural light without any obstruction.
Thus, always have the right tools and materials on hand, and don’t hesitate to ask for professional help if you’re not comfortable doing the task yourself. (See Also: How to Do a Low Light Aquarium: Tips for Thriving Plants in Dimly Lit Tanks)
Step-by-Step Guide
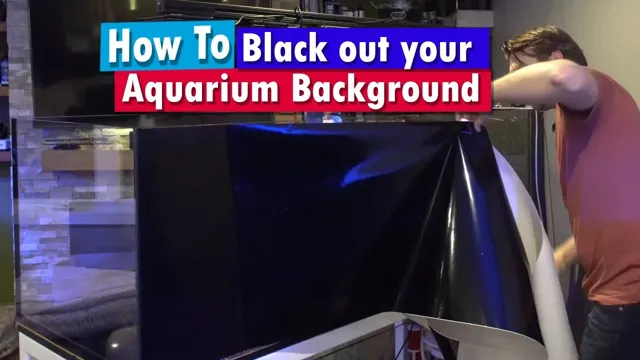
Applying a vinyl aquarium background is a simple task that can make a huge difference in the overall look of your tank. The first step is to measure your aquarium and purchase the appropriately sized background. Next, clean the aquarium glass with a non-abrasive cleaner to ensure that the vinyl will stick properly.
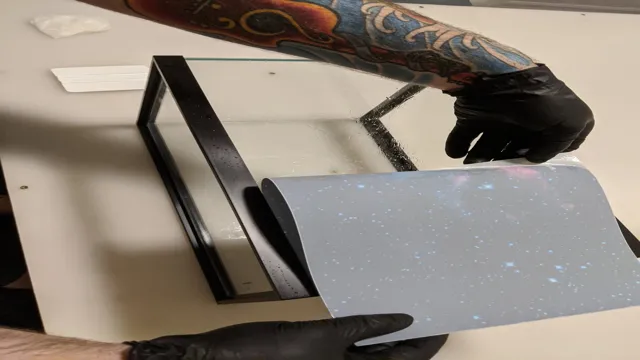
Once the glass is clean and dry, carefully peel the backing off of the vinyl and slowly apply it to the back of the aquarium. Use a credit card or squeegee to smooth out any air bubbles or wrinkles. If you have excess vinyl, simply trim it with a pair of scissors or a hobby knife.
That’s all there is to it! With just a little bit of time and effort, you can transform the look of your aquarium with a beautiful vinyl background.
Measure the dimensions of your aquarium
When it comes to setting up a new aquarium, measuring the dimensions should always be your starting point. It’s important to know the exact length, width, and height of your tank to ensure that you choose the right equipment and décor. Here’s a step-by-step guide to measuring your aquarium.
First, use a tape measure or ruler to measure the length of your tank from one end to the other. Then, measure the width from one side to the other. Be sure to measure at the widest point, as some tanks may be wider at the top than the bottom.
Finally, measure the height of the tank from the bottom to the top. Keep in mind that water level will affect the overall height. Once you have these measurements, you can start choosing the right filter, heater, lighting, and other equipment for your aquarium.
So, grab your measuring tools and get started!
Cut the vinyl aquarium background to size
Cutting a vinyl aquarium background to size is a simple process that requires little more than a sharp pair of scissors and a bit of elbow grease. First, you’ll need to measure the dimensions of your aquarium and purchase a vinyl background that matches those dimensions. Once you have the vinyl, lay it out on a flat surface and use a ruler or straight edge to mark the edges of your aquarium on the vinyl.
Then, carefully cut along the lines you’ve marked, using long, smooth cuts to ensure a clean edge. If your background has any specific shapes or cutouts for filters or equipment, you may need to make adjustments to the vinyl to accommodate those features. With a little patience and attention to detail, cutting and installing a vinyl aquarium background is a simple DIY project that can make a big difference in the overall aesthetics of your aquarium.
Peel off the backing of the vinyl aquarium background
When it comes to adding an extra pop of color to your aquarium, a vinyl aquarium background can be a great option. However, the process of putting it on can feel a bit daunting, especially when it comes to peeling off the backing. But don’t worry – it’s not as hard as it seems! To start, make sure your aquarium is clean and dry.
Then, gently peel off the backing of the vinyl background, taking care not to rip or tear it. It may help to have a partner hold the background in place while you peel off the backing. Once the backing is removed, carefully align the background with the back of your aquarium and smooth out any bubbles or creases.
And that’s it – you now have a beautiful new addition to your aquarium! So if you’re looking to give your fish a new and exciting environment they’ll love, try adding a vinyl aquarium background today.
Align the top of the background with the top of the aquarium
If you want to create a visually stunning aquarium, it’s important to pay attention to every detail – including the background. One common mistake people make when installing an aquarium background is not aligning it properly. To make sure you get it right, follow these simple steps.
First, measure the height of your aquarium and then cut your background to match. Next, make sure that the top of the background aligns perfectly with the top of the aquarium. This is important because if the background isn’t aligned correctly, it can make your entire aquarium look unbalanced.
Once you’ve lined up your background, use aquarium-safe tape to fasten it to the back of the tank. By taking the time to align your background correctly, you’ll be able to create a beautiful, cohesive look for your aquarium. So, don’t overlook this important step when designing your underwater oasis.
Use a squeegee or credit card to smooth out any air bubbles
When applying decals or stickers, it’s not uncommon to end up with air bubbles trapped underneath the surface. These can be unsightly and take away from the overall appearance of your design. Thankfully, there’s a simple solution: a squeegee or credit card. (See Also: How to Make Decorations Safe for Aquariums: Your Ultimate Guide)
Once you’ve placed the decal where you want it, use the squeegee or card to gently smooth out any air bubbles. Start from the center and work your way outwards, applying even pressure as you go. This will help push any trapped air towards the edges of the decal, allowing it to escape.
Keep going until the entire surface is smooth and bubble-free. With a bit of patience and a steady hand, you can achieve a professional-looking finish every time. So don’t be afraid to give it a try! Your decal will thank you for it.
Trim any excess vinyl using scissors
When it comes to crafting with vinyl, it’s essential to know how to trim any excess vinyl you’ve applied to your project. Excess vinyl can make your project look sloppy or unfinished, but don’t worry, it’s an easy fix. After you’ve applied your vinyl to your project, take a good pair of scissors and carefully trim off any excess vinyl around the edges.
Try to keep your cuts as close to the edges of your design as possible, while also being careful not to cut into your actual design. It’s better to make several small cuts than one big one, as you’ll be more likely to maintain the integrity of your design that way. Once you’ve trimmed off all the excess vinyl, clean up any remaining small pieces or debris with a tweezers or sticky tape.
And there you have it, a clean, professional-looking vinyl project!
Tips and Tricks
Applying a vinyl aquarium background may seem like a daunting task, but with a few tips and tricks, it can be a quick and easy process. First, be sure to clean the back of the aquarium thoroughly to remove any dirt or debris. Next, measure the dimensions of the tank and cut the vinyl background to fit.
One helpful strategy is to apply the vinyl while the aquarium is still wet to help prevent air bubbles. Use a credit card or plastic scraper to smooth out any bubbles or wrinkles as you go. If you do end up with air bubbles, don’t worry! Simply use a needle or pin to puncture the bubble and smooth it out.
Remember to take your time and work slowly and carefully to ensure a smooth and even application. With these tips in mind, you can easily transform the look of your aquarium with a beautiful vinyl background.
Clean the aquarium before applying the background
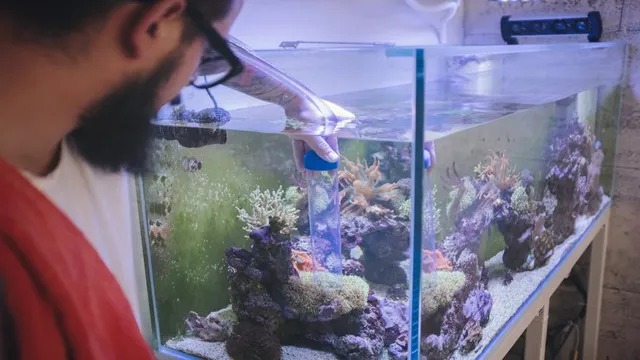
Cleaning your aquarium is an essential step to take before applying a background. Not only will it ensure that your background sticks properly, but it will also make the aquarium itself look fantastic. Firstly, remove all the decorations and ornaments from the aquarium.
Then, use a siphon or gravel vacuum to clean the substrate and remove any debris or waste. Next, use an algae scrubber to clean the inside walls of the tank and remove any algae buildup. Lastly, clean the filter and any other equipment.
Once the aquarium is clean and dry, you can begin to apply your chosen background. By cleaning the aquarium before applying the backing, you will reduce the likelihood of any air bubbles or debris getting trapped between the background and the glass. This will ensure that your background looks great and lasts longer.
Additionally, having a clean aquarium will benefit the health of your fish and other aquatic organisms, by removing harmful bacteria and waste buildup. So, take the time to clean your aquarium before applying a background, you won’t regret it!
Apply the background when the aquarium is empty
If you own an aquarium, then you know that changing up the background can make a huge difference in the overall look and feel of your tank. But what do you do when the aquarium is empty? Applying the background before adding in the fish and decorations can actually make the process a lot easier. For one, you won’t have to worry about accidentally trapping fish or decorations behind the background.
Plus, you can easily adjust the positioning of the background without disturbing any of your aquatic residents. Trust me, it’s much easier to do this step when the tank is empty rather than trying to maneuver around everything inside the tank. So, don’t be afraid to spruce up your aquarium by applying a new background – just remember to do it before you add in any fish or decorations!
Use a hairdryer to soften the vinyl and make it more pliable
Vinyl car wraps are an excellent way to refresh the look of your car without the hassle of a full repaint. However, wrapping a car takes effort and requires skill. One challenge you might face is making the vinyl conform to complex shapes.
Fortunately, there is a simple trick you can use to make the vinyl more pliable and easier to work with – a hairdryer. When you heat the vinyl with a hairdryer, it softens and becomes more elastic, making it easier to stretch and manipulate around curves and contours. Plus, heating the material also helps to activate the adhesive, ensuring a better bond to the car’s surface. (See Also: How to Disassemble an Aquarium: Step-by-Step Guide for Easy Removal)
Just be sure not to overheat the vinyl, as this can cause damage. With this simple tip, you’ll be able to wrap your car like a pro!
If bubbles persist, use a needle to puncture them and smooth them out
Bubbles can be a big problem when applying any kind of adhesive material. Whether you’re using stickers or wallpaper, bubbles can make it look unsightly. If bubbles persist, don’t worry! There’s a simple trick to fix them.
All you need is a needle. Using a needle, gently puncture the bubble and smooth it out. This will release the air and allow the adhesive to bond properly.
It’s important to make sure you’re being gentle with the needle to avoid causing any damage to the material. With this quick fix, you’ll be able to enjoy a smooth finish without any unsightly bubbles. So, the next time you’re struggling with bubbles, grab a needle and give them a quick puncture.
Your walls (or any other surface) will thank you!
Conclusion
In conclusion, applying a vinyl aquarium background is easier than you think! Just be sure to thoroughly clean the back of the tank and use a credit card to smooth out any air bubbles. And if all else fails, just remember: a little bit of patience and a lot of fish puns can go a long way in making your aquarium look fin-tastic!”
FAQs
What materials do I need to apply a vinyl aquarium background?
To apply a vinyl aquarium background, you’ll need the following materials: a clean, dry surface, water, a squeegee or credit card, and the vinyl background itself.
Can I apply a vinyl aquarium background on a wet surface?
No, it’s important to have a completely dry surface before applying the vinyl background. Moisture can prevent the vinyl from properly adhering to the surface.
How do I clean the surface before applying the vinyl aquarium background?
Use a mild soap and water to clean the surface thoroughly. Make sure the surface is completely dry before applying the vinyl background.
Can I use any type of vinyl for an aquarium background?
No, it’s important to use a vinyl specifically designed for aquarium backgrounds. Regular vinyl may contain harmful chemicals that can leach into the water and harm your fish or plants.
How do I remove air bubbles from the vinyl aquarium background?
Use a squeegee or credit card to smooth out any air bubbles. Start from the center of the background and work your way outwards to push any air bubbles to the edges.
Can I trim the vinyl aquarium background to fit my tank?
Yes, most vinyl aquarium backgrounds can be easily trimmed to fit your tank. Use a sharp pair of scissors or a utility knife to carefully cut the background to the desired size.
Will the vinyl aquarium background fade over time?
This can depend on the quality of the vinyl and the amount of sunlight the tank receives. However, most high-quality vinyl aquarium backgrounds are fade-resistant and should last for several years.

