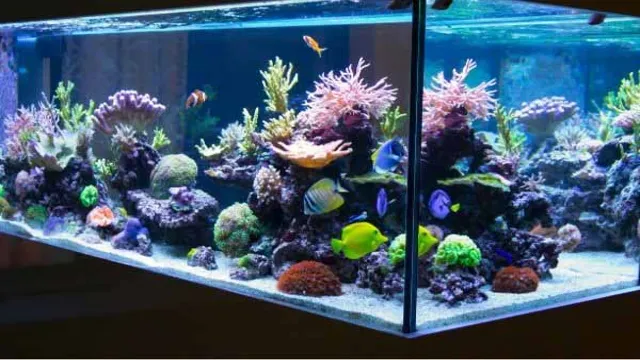
Decorating your aquarium can be just as important as the fish that inhabit it. Adding an aquarium background paper can bring life to your aquarium while also providing necessary coverage of the unsightly cords, tubes, and filters that come with tank maintenance. However, attaching the background paper takes patience and precision to ensure that it doesn’t peel or bubble.
So, how do you attach aquarium background paper? Fear not, as we’ve got you covered. In this article, we’ll give you step-by-step instructions to make the process trouble-free and reveal some tips to create a smooth and perfect finish.
Gather Materials
Attaching aquarium background paper is an essential step to help improve the aesthetic look of your aquarium. Before beginning the process, it is crucial to gather all the materials you will need. You will need an aquarium background adhesive, a squeegee, clean towels and of course the aquarium background paper.
You can find aquarium background paper in pet stores or online. Ensure you measure the tank carefully before purchasing the paper so that the size matches the dimensions of your aquarium. Once you’ve gathered the materials, it’s time to get started.
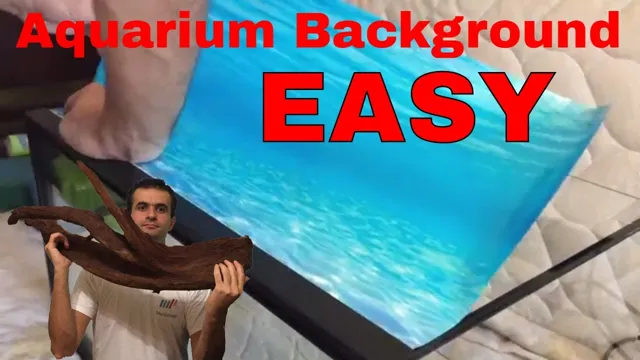
Take the aquarium background paper and spray adhesive to the back of it. Carefully place the paper on the back of the tank and use a squeegee to remove any bumps or bubbles. Ensure you use a gentle hand during the process to avoid damaging the paper.
Use the clean towels to wipe up any excess adhesive. With these simple steps, your aquarium will have the perfect background in no time.
– Aquarium background paper – Spray bottle filled with water – Scissors – Tape measure or ruler – Painter’s tape – Credit card or similar item
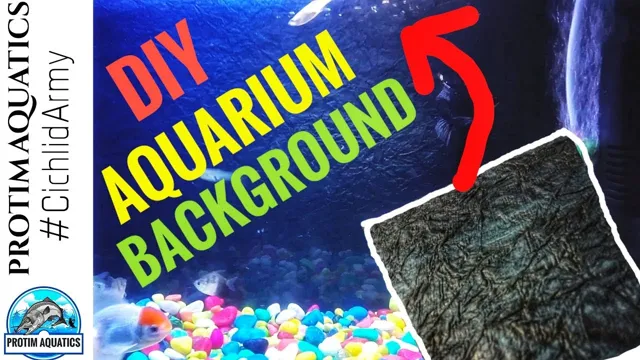
To get started on creating a beautiful aquarium background for your fish tank, you’ll need a few basic materials. First on the list is some aquarium background paper, which is available in a variety of patterns and designs to suit your preferences. Next, you’ll need a spray bottle filled with water to dampen the paper and make it easier to apply.
You’ll also want to have a pair of scissors on hand to trim the paper to fit your tank, as well as a tape measure or ruler to ensure you get the sizing just right. Painter’s tape is handy for holding the paper in place and preventing it from moving around as you work. Finally, a credit card or similar item can be useful for smoothing out any bubbles or creases in the paper to achieve a clean, professional look.
With these materials at the ready, you’ll be well on your way to creating a stunning aquarium background that will make your fish feel right at home.
Prepare the Surface
Attaching an aquarium background paper may seem like a daunting task, but with the right preparation, it can be a breeze. The first step is to prepare the surface where the paper will be attached. Ensure the surface is clean and dry before applying the adhesive.
Any dirt or moisture on the surface can hinder the adhesive from sticking and could cause bubbles or wrinkles in the paper. It’s also important to remove any obstructions such as pumps or heaters before attaching the background paper. You don’t want to apply the paper around these objects as it may lead to the paper not adhering completely and may cause air pockets.
Starting with a smooth and clean surface makes it easier to attach the paper and ensures it will stay in place for a long time. Once you have prepared the surface, you’re ready to proceed with attaching the aquarium background paper. (See Also: How to Kill Pest Snails on Aquarium Plants: Effective Ways to Control Snail Infestations)
– Clean the back glass of the aquarium with an aquarium-safe cleaner – Dry the glass with a lint-free cloth – Measure the dimensions of the tank
Preparing the surface of your aquarium is a crucial step in ensuring a clean and healthy environment for your fish. To begin, it’s important to clean the back glass of the aquarium with an aquarium-safe cleaner. This will remove any dirt or residue that may have accumulated over time and will give you a clear view of your fish.
Once you’ve cleaned the glass, dry it with a lint-free cloth to ensure that no streaks are left behind. It’s important to measure the dimensions of the tank before proceeding to the next step. This will help you determine the amount of substrate and other materials you’ll need when setting up your aquarium.
By preparing the surface beforehand, you’ll be able to provide your fish with a clean and healthy environment that they’ll thrive in. Remember, a little bit of effort in the beginning can go a long way in ensuring the success of your aquarium in the long run. So, take the time to prepare the surface properly, and you’ll be rewarded with a beautiful and healthy aquarium that you and your fish can enjoy for years to come.
Cut the Background Paper
If you’re wondering how to attach aquarium background paper, the first step is to cut it to the appropriate size. Start by measuring the height and width of the back of your tank, making sure to account for any curves or indents in the glass. Once you have the measurements, use a pair of scissors or a craft knife to cut the background paper to size.
Be sure to cut it slightly larger than the dimensions of the back of your tank to allow for some overlap and ensure complete coverage. Remember, the goal is to create a seamless and cohesive look for your aquarium, so take your time and be precise. Once the paper is cut, you can move on to the next step in the process.
– Cut the background paper to the exact size of the aquarium – Cut out openings for filters, heater, and other equipment
Cutting the background paper for your aquarium is a crucial step in creating a stunning and professional-looking aquatic environment. To achieve the desired effect, you’ll need to ensure that the paper is cut to the exact size of your aquarium and that all necessary openings for your equipment, such as filters and heaters, are accurately made. One way to achieve this goal is to use a sharp pair of scissors or a Stanley knife to cut the paper in a smooth and controlled manner.
It’s important to avoid making cuts that are too big or too small, as this can affect the overall look of your aquarium. A good tip when cutting your background paper is to take your time and ensure that you have everything measured out correctly before you start cutting. By doing so, you’ll be able to create an aquarium that showcases your fish and other aquatic animals in the best possible light, while also ensuring that your equipment operates efficiently.
Attach the Background Paper
If you want to add a personal touch to your aquarium, attaching background paper can be a great idea. The process is relatively straightforward, but it does require a bit of preparation. The first step is to measure the tank’s backside to order the correct size of the background material.
Once you have the paper, clean the tank’s backside thoroughly with a non-toxic cleaning agent to ensure the paper will adhere smoothly. Next, lay out the paper on a flat surface, facing up, and start evenly spraying water on the entire surface. Carefully peel off the backing, being sure not to crease the paper, and press the paper onto the tank’s backside.
Use a credit card or squeegee to remove any air bubbles, ensuring the paper is flat and smooth. And there you have it – a beautiful new addition to your aquarium! Remember, attaching aquarium background paper can provide an attractive and unique look to your tank, but it’s essential to use the appropriate cleaning agents and ensure the paper stays bubble-free.
– Apply a thin layer of water to the back of the aquarium glass with a spray bottle – Place the background paper on the wet glass and smooth out any wrinkles or bubbles with a credit card – Use painter’s tape to hold the paper in place while it dries – Wait at least 24 hours before removing the tape and filling the tank with water
When setting up a new aquarium, applying a background paper can add depth and visual interest to your aquatic environment. To get started, grab a spray bottle and lightly mist the back of the aquarium glass with water. This will help the paper stick to the glass. (See Also: How to Aquascape Planted Aquarium: Expert Tips and Tricks)
Next, position the background paper on the wet surface and use a credit card to smooth out any wrinkles or bubbles. Don’t worry if it looks imperfect at first, as the water will help it adhere better to the glass. To secure it in place while it dries, use painter’s tape around the edges.
It’s important to wait at least 24 hours before removing the tape and filling the tank with water to ensure that the adhesive is fully dry. Once that’s done, you can sit back and admire the new and vibrant addition to your aquarium. Don’t forget to take care of your fish and plants to ensure a healthy and thriving ecosystem.
Applying a background paper is an easy DIY project that can make a big difference in how your aquarium looks. Give it a try, and your fish will thank you for it!
Tips for Success
Attaching aquarium background paper is a simple yet crucial step in setting up your aquarium. First, make sure the background is the correct size for your tank. Next, clean the glass where the background will be placed to ensure good adhesion.
Apply a thin layer of adhesive or double-sided tape evenly across the back of the paper. Carefully align the top edge of the background with the top of the tank, then press it onto the glass gradually, smoothing out any air bubbles as you go. Take your time to ensure that the background is straight and wrinkle-free.
Once attached, allow the adhesive to dry completely before filling the tank with water. Remember to choose a background that complements your tank’s aesthetic and provides a comfortable environment for your fish. Following these easy steps will ensure a beautifully decorated and healthy aquarium for your aquatic pets to enjoy!
– Double-check the measurements to avoid cutting the paper too small or too large – Do not use too much water, as it can cause the paper to warp or buckle – Work slowly and carefully to avoid tearing the paper – Avoid using regular tape, as it may damage the paper or leave residue on the glass
If you’re looking to frame a special piece of artwork or photo, using glass with matting is a classic and elegant way to do it. However, cutting the matting and getting it just right can be a bit tricky. To avoid any mishaps, double-check the measurements before making any cuts and use a pencil to mark where you plan to cut.
When cutting, work slowly and carefully, avoiding tearing the paper. Be careful not to use too much water as it can cause the paper to warp or buckle. Lastly, to avoid damaging the paper or leaving any residue on the glass, avoid using regular tape and opt for acid-free tape instead.
With these tips, you can elevate your framing game and display your artwork or photo in a beautiful and professional way. Remember, it’s all about taking your time and being careful, but with practice, you’ll be able to master the art of matting and framing in no time.
Conclusion
In conclusion, attaching aquarium background paper may seem like an intimidating task, but with a little bit of patience and creativity, it can be a fun and rewarding experience. Just like decorating any space, the background of your aquarium can set the tone for the entire environment. Whether you choose a beautiful underwater scene or a sleek, modern design, the key is to make sure it is securely attached and free of wrinkles. (See Also: How to Get to Ripley’s Aquarium Pigeon Forge: Your Ultimate Guide)
And remember, just like a good fish tank, a well-attached background will bring joy and tranquility to you and your aquatic companions for years to come. Fish-tastic job, everyone!”
FAQs
What is aquarium background paper made of?
Aquarium background paper can be made of various materials, such as plastic, vinyl, or paper.
How do I measure the size of my aquarium background paper?
Measure the length and height of the back of your aquarium tank, and choose a background paper that matches those dimensions.
Can I attach aquarium background paper to the outside of my tank?
Yes, you can attach aquarium background paper to the outside of your tank by using double-sided tape or an adhesive spray.
Can I use regular paper as an aquarium background?
It is not recommended to use regular paper as an aquarium background because it can dissolve in water and harm your aquatic pets.
How do I remove old aquarium background paper?
To remove old aquarium background paper, use a razor blade or scraper to gently scrape it off. Be careful not to damage the glass of the tank.
Can I cut aquarium background paper to fit my tank’s shape?
Yes, you can cut aquarium background paper to fit your tank’s shape using scissors or a craft knife.
How often should I change my aquarium background paper?
You do not need to change your aquarium background paper regularly unless it becomes damaged or dirty.

