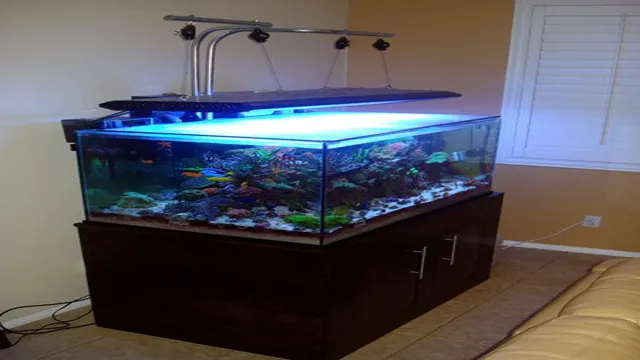
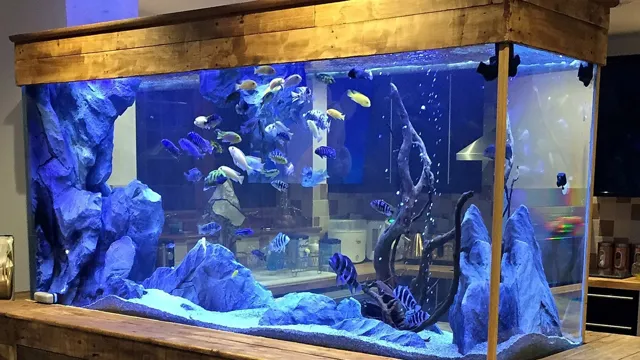
If you’re a fan of aquariums, then you know how important lighting is for the health and well-being of your aquatic pets. Not only does it help your plants grow, but it also affects the fish’s mood and overall health. However, purchasing LED light bars for your aquarium can be pricey.
Luckily, you can create your DIY aquarium LED light bar and save money while getting the same results. In this blog post, we’ll take a closer look at what LED lighting does for your aquarium, how to create your own light bar, and why it’s a cost-effective option for aquarium enthusiasts. So, let’s dive into the world of DIY aquarium lighting!
Introduction
If you’re looking to build a DIY aquarium LED light bar, you’ve come to the right place! This is a great project for those who want to customize their aquarium lighting to fit their specific needs. The process involves designing and building a light bar that will hold the LED lights in place. The size and shape of the light bar will depend on the size of your aquarium and the number of LED lights you want to install.
It’s important to choose LED lights that are suitable for aquatic environments to ensure the health and well-being of your fish and other aquatic life. By following the steps carefully, you can create a truly unique and functional LED light bar for your aquarium. Get ready to impress your fish and make your aquarium stand out with this fun and rewarding DIY project!
Benefits of Building Your Own LED Light Bar for Your Aquarium
If you’re an aquarium enthusiast, building your own LED light bar can be a great investment for your tank. Not only does it allow you to customize the lighting to your specific needs, but it can also save you money in the long run. LED lights are energy-efficient and can last for years, so you won’t have to worry about constantly replacing bulbs or paying high electricity bills.
Plus, with the ability to adjust the color and intensity of the light, you can create a more natural environment for your fish and plants. By taking the time to build your own LED light bar, you’ll not only improve the aesthetics of your aquarium but also give your aquatic inhabitants the best possible living conditions.
Materials Needed
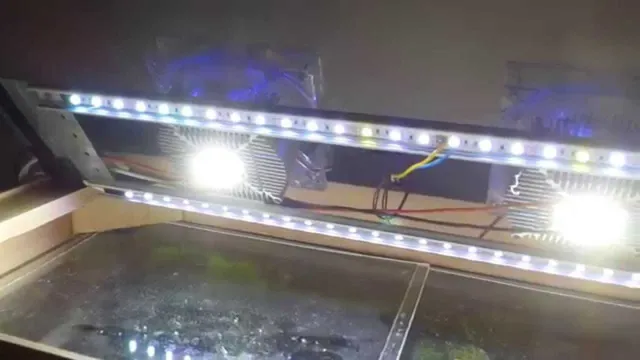
If you’re looking to build a DIY aquarium LED light bar, the first thing you’ll need is the LEDs themselves. Depending on the size of your aquarium, you’ll need a specific number of LEDs to provide adequate lighting. You can choose from a variety of colors and wattage, but it’s important to ensure that the total wattage doesn’t exceed the power supply’s capacity.
Additionally, you’ll need a power supply to regulate the voltage and current to the LEDs. A heat sink is also essential to dissipate heat generated by the LEDs, preventing damage to the circuit board or the LEDs themselves. To assemble the light bar, you’ll need a PCB board, soldering iron and solder, wires, and a waterproof housing to protect the circuit board from moisture and water splashes.
With these materials in hand, you can create a custom LED light bar that will provide both ample light and aesthetic appeal to your aquarium.
List of Materials
When it comes to starting a DIY project, having a comprehensive list of materials needed is crucial. It saves you time and minimizes the chances of you having to run to the hardware store countless times. The materials you need vary depending on the project’s complexity and your level of expertise.
Common materials include basic tools like hammers, screwdrivers, and pliers, measuring tools, safety gear, and different types of wood, nails, screws, and glue. For example, if you’re planning on building a bookshelf, you’ll need wood boards, screws, and nails. On the other hand, if you’re planning on painting your room, you’ll need paintbrushes, rollers, and paint.
It’s essential to have a clear understanding of what the project requires beforehand to avoid confusion and mistakes. So, take some time to research and find out what materials you need before starting any DIY project.
Where to Buy Materials
If you’re looking to start a new DIY project, it’s important to have all the necessary materials to ensure your project turns out the way you envision it. Depending on the type of project you’re undertaking, you may need materials such as wood, paint, screws, nails, glue, or fabric. The good news is that there are plenty of places you can purchase these materials from.
If you’re on a budget, you can typically find what you need at your local hardware store or craft store. For more specialized items, you may need to do some online shopping. Websites like Amazon or Etsy are great places to look for unique materials that may not be available at your local store. (See Also: How to Calculate Volume of Fish Aquarium: Step-by-Step Guide for Beginners)
No matter where you purchase your materials from, make sure to compare prices and read reviews to ensure you’re getting the best quality products at the best prices.
Steps to Build Your LED Light Bar
Building your own LED light bar for your aquarium is a fun and cost-effective way to enhance the visual appeal of your tank. Here are the steps to building a DIY aquarium LED light bar. First, gather your materials, including an LED strip, heat sink, power supply, and wires.
Next, measure and cut your LED strip to fit the length of your aquarium. Then, mount the LED strip onto the heat sink and attach the power supply. Be sure to test the light before fully assembling it.
Finally, secure the light bar onto your aquarium and enjoy the beautiful illumination of your aquatic pets. Creating your own LED light bar allows you to customize the lighting according to your preference, and the best part is that you can do it all on a budget! So, grab your tools and let’s get started on building your very own custom LED light bar for your aquarium.
Step 1: Measure Your Aquarium
If you’re looking to upgrade your aquarium lighting, building an LED light bar can be a cost-effective and customizable option. The first step is measuring your aquarium to determine the length of the light bar needed. This will ensure the light is evenly distributed and covers the entire tank.
Once you have your measurements, you can gather the necessary materials, such as LED strips, aluminum channels, and a power supply. Cut the aluminum channels to the appropriate length and attach the LED strips with adhesive tape. Then, connect the power supply and attach the light bar to your aquarium with brackets.
With a DIY LED light bar, you can customize the brightness and color of the lights to meet the specific needs of your aquatic plants and fish. Don’t be intimidated by building your own lighting – with a little research and effort, you can create a stunning and functional addition to your aquarium.
Step 2: Determine the Required Wattage
When building your own LED light bar, it’s important to determine the required wattage in order to ensure that your lighting system operates efficiently. Depending on your specific needs, the wattage of your LED light bar will vary. For example, if you’re using your light bar for off-roading purposes, you’ll likely need a higher wattage to ensure maximum visibility in rugged terrain.
Conversely, if you’re using your light bar for residential or commercial applications, a lower wattage may be sufficient. To determine the required wattage for your LED light bar, consider factors such as the size of your space, the distance between the light bar and the area you want to illuminate, and the level of brightness you desire. Taking the time to determine the appropriate wattage for your LED light bar will ensure that you get the most out of your lighting system in terms of energy efficiency and performance.
Step 3: Choose Your LED Strip Lights
When it comes to choosing the perfect LED strip lights for your light bar, it’s important to consider a few key factors. One of the most important things to consider is the length and size of the LED strip lights. Make sure to choose a length that fits the size of your light bar, and consider the number of LEDs per meter to ensure that you get the brightness and coverage you need.
In addition to size, it’s also important to consider the color temperature and color rendering index (CRI) of the LED lights. These factors will impact the quality of light that your light bar produces, as well as its overall aesthetic appeal. Finally, consider the brand and quality of the LED strip lights you choose, as this can impact the lifespan and durability of your light bar.
Don’t be afraid to do your research and compare different options before making a decision. With a little bit of planning and attention to detail, you can create a light bar that perfectly meets your needs and looks great too!
Step 4: Mount the LED Strip Lights to The Mounting Board
Now that we have the LED strip lights ready, it’s time to mount them to the mounting board. This step is crucial as it ensures that the LED strip lights are in place and won’t fall off during usage. To mount the strip lights, first, remove the covering of the adhesive tape on the backside of the lights. (See Also: How to Clear Up Foggy White Aquarium Water in 7 Easy Steps – SEO optimized title.)
Then, carefully place the LED strip lights on the mounting board. Make sure to align them correctly and press them firmly to ensure a strong grip. You can use a ruler or a level to ensure that the lights are mounted straight.
Moreover, you can cut the strip lights to fit the size of your mounting board if they are too long. This step might seem simple, but it’s necessary to get it right to avoid any issues down the line. Once the strip lights are mounted, it’s time to move on to the next step in building your LED light bar.
Step 5: Drill Holes and Mount LED Lights
After building the frame and assembling the LED lights on the bar, the next step is to drill holes and mount the lights. This task requires careful planning to ensure that the holes are evenly spaced and aligned with the lights. You will need a drill bit that matches the size of the screws and a quality drill to make the holes.
Begin by deciding where you want to place the lights and mark their positions on the bar. Once you have marked all the positions, drill the holes using the drill bit. After drilling, mount the lights using screws and be sure to tighten them well.
Once all the lights are fixed, ensure that they are in the correct position by testing them. This step completes the process of building an LED light bar, and you can now enjoy top-quality illumination for your car, boat, or ATV.
Step 6: Connect the Wiring
Now that you have mounted the LED light bar, it’s time to connect the wiring. First of all, disconnect the negative terminal of your car battery before proceeding to avoid electrical shock or damage to your car’s electrical system. Next, select a wiring harness to connect the LED light bar to your car’s electrical system.
The wiring harness should have an inline fuse that is suitable for your LED light bar’s power requirements. Begin by connecting the positive terminal of your LED light bar to the wiring harness, and then proceed to connect the negative terminal of your LED light bar to the wiring harness. Finally, connect the wiring harness to your car’s battery and switch on the LED light bar to ensure that everything is working correctly.
With the wiring properly connected, you’re all set to enjoy your newly installed LED light bar.
Conclusion
In conclusion, building a DIY aquarium LED light bar is both practical and rewarding. With a bit of research and effort, you can create a customized light system that not only illuminates your aquatic pets but also enhances the aesthetics of your aquarium. Not to mention the satisfaction of knowing that you built it yourself.
So, dive into the world of DIY LED light bars and brighten up your underwater world!”
Summary of DIY LED Light Bar Building Process
If you’re considering building your own LED light bar, there are a few key steps to keep in mind. First, you’ll need to decide on the size and number of LED lights you want to include. Then, you’ll need to choose a suitable aluminum housing to house the lights themselves.
Once you have these components in hand, it’s time to begin the wiring process. This involves connecting the individual LEDs to power sources and ensuring that all connections are secure. You may also want to consider adding a dimmer switch or other control mechanism to adjust the brightness of your LEDs as needed. (See Also: How to Figure Out the Square Inches of an Aquarium: A Comprehensive Guide for Beginners)
Finally, it’s important to test your light bar thoroughly to ensure that it’s functioning properly before hitting the road. With a little know-how and some careful attention to detail, you can create a custom light bar that perfectly suits your needs and preferences.
Final Thoughts
In conclusion, building your own LED light bar is a fun and rewarding project that can save you money while also giving you a customized lighting solution. Remember to carefully plan out your design, choose quality materials, and practice proper safety measures during the assembly process. It’s also important to consider the legal requirements for using your light bar on the road, such as ensuring it doesn’t blind other drivers.
By following these steps and tips, you can create a reliable and efficient LED light bar that meets your specific needs. Happy crafting!
FAQs
What materials do I need to build a DIY aquarium LED light bar?
You will need LED strip lights, an aluminum channel or heat sink, a power supply, and wiring tools.
How do I choose the right LED strip lights for my aquarium?
Look for LED strip lights that are waterproof and have a color temperature between 6,500K and 10,000K for a natural-looking aquarium.
Can I customize the length of my DIY aquarium LED light bar?
Yes, you can cut LED strip lights to your desired length and attach them to the aluminum channel or heat sink.
Do I need any special skills to build a DIY aquarium LED light bar?
Some basic wiring skills and knowledge of working with electronics are helpful, but there are many tutorials available to guide beginners.
How many LED strip lights do I need for my aquarium?
The number of LED strip lights you need depends on the size of your aquarium and the level of brightness you want. As a general rule, aim for 1 watt of LED lighting per gallon of water.
What are the benefits of using LED lights for my aquarium?
LED lights are energy-efficient, long-lasting, and offer better color and clarity for fish, plants, and coral. They also produce less heat, which can help regulate the temperature of the aquarium.
Can I use a dimmer switch with my DIY aquarium LED light bar?
Yes, a dimmer switch can help you adjust the brightness of your LED lights to suit the needs of your aquarium’s inhabitants. Make sure to choose a dimmer switch that is compatible with your power supply and wiring setup.

