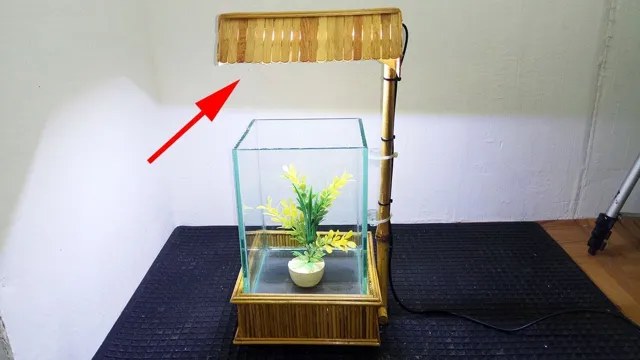
If you’re looking for a fun DIY project that will brighten up your aquarium, why not try crafting your own LED light system? Not only will your fish and plants appreciate the added illumination, but you’ll also have the satisfaction of knowing that you created a custom piece for your tank. Although the process may seem daunting, it’s actually quite straightforward with a bit of research and preparation. In this step-by-step guide, we’ll walk you through the ins and outs of making your own LED aquarium light system, from gathering the necessary materials to installing and fine-tuning the finished product.
So, grab your tools and let’s get started!
Introduction
Are you looking to create your very own DIY LED aquarium light? It may seem like a daunting task, but with the right materials and a bit of patience, it can be done! First, gather the necessary materials such as a LED strip, aluminum channel, power supply, dimmer switch, and a soldering iron. Then, it’s time to measure and cut the aluminum channel to fit the desired length, attach the LED strip to the channel, and solder the wires as needed. Don’t forget to add the dimmer switch, which allows you to adjust the brightness of the light.
With a little bit of effort, your DIY LED aquarium light will not only be functional, but it will look great as well! By following these steps and using the right materials, you can create a cost-effective and efficient LED light system for your aquarium. So, what are you waiting for? Give it a try!
Why Build a DIY LED Aquarium Light?
If you’re an aquarium enthusiast, one of the most rewarding experiences can be creating your own DIY LED aquarium light. Not only does it provide a personalized touch to your aquarium, but it can also save you money in the long run. LED lights are much more energy-efficient than traditional lighting options, and can provide your aquatic plants and inhabitants with the necessary spectrum of light they need to thrive.
Building your own LED light can also be a fun and educational project, where you can learn more about the technology and topology involved. So, why not give it a try and see the benefits of a DIY LED aquarium light for yourself?
Tools and Materials Needed
When it comes to starting a new project, having the right tools and materials at your disposal is essential. Not only does it make the job easier, but it can also enhance the quality of your work and the final result. Depending on what your project entails, you’ll need a range of tools from hand tools such as hammers, screwdrivers, and pliers to power tools like drills, saws, and sanders.
Other materials such as screws, nails, adhesives, and paints will also be needed to complete the job. It’s important to make a list of everything you’ll need before you start the project, ensuring you don’t forget anything crucial mid-way through. By having all the necessary tools and materials at your disposal, you can ensure your project runs smoothly and efficiently.
Step 1: Design a Lighting Plan
When building a DIY LED aquarium light, the first step is to design a lighting plan that suits the needs of your aquatic pets and enhances the overall aesthetic of your tank. Start by determining the size and shape of your aquarium, as well as the type of plants and animals that you plan to keep. Then, research the lighting requirements for each species and choose LED bulbs with the appropriate spectrum and intensity to meet those needs.
You can also incorporate features such as dimmers and timers to customize your lighting schedule and simulate natural sunlight cycles. By taking the time to carefully design your lighting plan, you can create a beautiful and healthy environment for your aquarium inhabitants.
Calculate the Needed Wattage and Lumens
When designing a lighting plan for your home or office, the first step is to calculate the needed wattage and lumens to achieve the desired level of brightness. Wattage refers to the amount of power consumed by a light bulb, while lumens measure the amount of light emitted by the bulb. To determine the appropriate wattage and lumens for a given space, consider the room’s size, purpose, and natural lighting conditions.
For example, a poorly-lit bedroom may require brighter bulbs than a well-lit living room or office. It’s also important to factor in the type of light fixture being used, such as recessed cans or table lamps. By taking these variables into account and consulting an online wattage/lumen calculator, you can ensure that your lighting plan is both functional and aesthetically pleasing.
Selecting the Right LEDS
When it comes to selecting the right LEDs for your lighting project, the first step is to design a lighting plan. This means taking into account the specific needs of the space, such as the intended use and the desired ambiance. Consider the layout of the room, the furniture placement, and any particular features that you want to highlight.
Once you have a clear idea of your lighting goals, you can begin to research different types of LEDs based on their brightness, color temperature, and efficiency. For example, warm white LEDs are better suited for creating a cozy atmosphere, while cool white LEDs are better for task lighting. By designing a detailed lighting plan and carefully researching your options, you can select the perfect LEDs to bring your vision to life.
Choosing the Right LED Driver
Choosing the right LED driver is crucial for ensuring that your lighting system operates efficiently and effectively. To begin the process, the first step is to design a lighting plan that takes into account your space’s specific lighting needs. This requires determining the type and amount of lighting required, as well as the desired color temperature and dimming capabilities. (See Also: How to Deep Clean a Used Aquarium: A Complete Guide for Sparkling Fish Tank)
Once you have a clear understanding of your lighting needs, you can then choose an LED driver that is compatible with your specific lighting fixtures and provides the necessary voltage and current to power your system. By taking the time to carefully plan and select the right LED driver, you can ensure that your lighting system operates at its best, providing optimum performance, and energy efficiency.
Step 2: Build the LED Light Components
Now that you have all the materials you need, it’s time to start building the LED light components for your DIY aquarium light. Begin by cutting the aluminum channel to your desired length, and then use a drill to create holes for the LED strips. Next, mount the LED strips onto the aluminum channel, making sure to evenly space them out and secure them with adhesive or screws.
Then, attach the LED driver to the channel using zip ties or adhesive pads. Finally, connect the LED strips to the driver using wire connectors. Be sure to follow the manufacturer’s instructions and use the appropriate tools and safety equipment throughout the process.
With these steps complete, you’re well on your way to creating your very own custom LED aquarium light.
Soldering and Attaching LEDS to a Board
Soldering and Attaching LEDs to a Board Building the LED light components is an essential step in creating a functional LED board. Once you have gathered the necessary materials, including LEDs, resistors, soldering iron, and solder, you can begin the process. Start by identifying the positive and negative leads of each LED and placing them on the board in the desired pattern.
Next, insert the resistors to ensure that the LEDs are not damaged by excessive currents. Soldering the components in place comes next, and this requires steady hands and patience. Carefully heat the soldering iron and apply the solder to the joints to create a secure connection between the components and the board.
Once all components are in place, double-check the connections to ensure they are secure and free from short circuits. With your newly created LED light components, you can move on to the next step of bringing your LED board to life.
Connecting Components to a Prototype Board
In order to build the LED light components of your prototype board, you’ll need a few items. Firstly, your LEDs – these can be purchased in a variety of colors and sizes, just be sure you choose the voltage and current appropriate for your project. Secondly, your resistors – these are necessary to limit the amount of current flowing through the LEDs, and ensure they don’t burn out.
Finally, some jumper wires and a breadboard to connect everything together. Before connecting anything together, it’s important to follow the datasheets for both your LEDs and resistors to determine which leg is the anode (positive) and which is the cathode (negative). Once you’ve identified these, you can begin connecting everything together.
Start by placing your LEDs in the breadboard in the desired locations. Then, connect the anode of each LED to the voltage rail using a jumper wire. Next, connect the cathode of each LED to a resistor using another jumper wire.
Finally, connect the remaining leg of each resistor to the ground rail using a third jumper wire. If done correctly, you should now be able to power up your prototype board and see your LEDs light up! It’s important to note that while LEDs do have a long lifespan, they can still burn out if not properly protected with resistors. Always double-check your connections before powering up your board to avoid any potential damage.
Step 3: Assembly
After successfully completing the wiring and soldering process, it’s now time to assemble all the components of your DIY LED aquarium light. Firstly, fix the LED strips onto the heat sink using thermal adhesive. Make sure you position them correctly and securely.
Next, attach the power supply unit to the heat sink and fasten it using screws. Connect the wires from the power supply unit to the LED strips using wire connectors. Double-check all connections to ensure they are properly connected.
Finally, attach the dimmer switch to the power supply unit using screws. Once everything is assembled, plug in the power supply unit and turn on the LED aquarium light. Congratulations! You’ve built your own DIY LED aquarium light from scratch. (See Also: How to Get Rid of Yellow Aquarium Water: Effective Tips and Tricks)
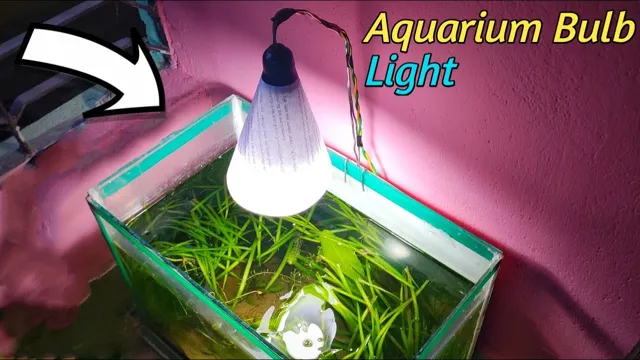
Hang it over your aquarium, and enjoy the beautiful colors of your fish and plants.
Mount the LED Lights to a Frame
After building and testing the LED lights, the next step is to mount them to a frame. This process requires a bit of patience and precision to ensure that the lights are properly aligned and stable. First, select a frame that fits your project’s specifications and ensures that it can support the weight of the LED lights.
Start by attaching the lights to the frame using screws or bolts. Be sure to evenly distribute the weight of the lights to prevent any potential damage. Once you have secured the lights to the frame, connect the wires to a power supply and test them once more to ensure everything is working correctly.
With the lights mounted and tested, you can now move onto the next steps to complete your project. Remember, take your time and ensure that everything is secure and stable for optimal functionality.
Finalize Electrical Setup and Test Light
After putting together the frame and wiring system for your DIY light, the next step in the assembly process is to finalize the electrical setup and test the light. First, you’ll need to make sure that all of your wiring is secure and properly connected. Check that all of your wires are in the right orientation and that any connections are tight and secure.
Once you’ve confirmed that everything is properly wired, it’s time to test the light. Turn on your power source and verify that your light is functioning as expected. You should be able to see the light come on and illuminate your space.
If everything is working as it should, then you’re ready to move on to the next step in the assembly process. Remember to be careful when working with electricity, and if you’re not comfortable handling these tasks on your own, don’t hesitate to ask for help from someone with more experience.
Conclusion
In conclusion, building your own DIY LED aquarium light is a fun and rewarding project that allows you to customize your aquarium lighting to meet your specific needs. With just a few basic tools and some patience, you can create a truly spectacular aquarium display that will impress both you and your fish. Think of it as a personalized light show for your underwater friends! So, why settle for a store-bought light when you can show off your DIY skills and create something truly unique? Give it a try and let your creativity shine!
Benefits of DIY LED Aquarium Lighting
DIY LED aquarium lighting is a great way to customize your aquarium lighting to meet your specific needs. Assembling your DIY LED lighting can be a bit overwhelming, but following the instructions carefully will make the process much easier. Firstly, gather all the necessary components, including LED strips, power supply, and wiring, and prepare the LED strips by cutting them to the desired length.
Next, mount the LED strips onto a heat sink for cooling purposes and attach the wiring to the power supply. Take care to ensure the wiring is properly connected to avoid any electrical shock hazards. Once everything is securely in place, turn on the power supply to check for proper functioning of the LED lighting.
Overall, the assembly process may seem daunting, but with patience and attention to detail, you can create a unique and effective DIY LED aquarium lighting system that will enhance the beauty of your aquarium.
Common Mistakes to Avoid
When it comes to assembling furniture, there are a few common mistakes that everyone should avoid. Firstly, failing to read the instructions carefully can be a huge mistake. Even if you are an experienced handyman, each piece of furniture is different and requires specific assembly.
Another mistake to avoid is missing pieces. Make sure to check that you have all the necessary parts before you begin. It can be frustrating to get halfway through the assembly process only to realize you are missing a crucial piece.
Thirdly, disregarding weight limits can be a damaging mistake. Make sure to follow any manufacturer weight or size limits to ensure that the furniture is safe to use and lasts long. Finally, be careful when using power tools. (See Also: How to Make Aquarium with Shoe Box: DIY Guide for a Fun and Budget-Friendly Fish Tank)
While they can make the assembly process quicker, they can also damage the furniture if used incorrectly. Remember that safety comes first, and always read the manual before using any tools. By avoiding these common mistakes, you can ensure a successful furniture assembly process that will last a long time.
Tips for Maintenance
Now that you’ve cleaned and inspected your machine, it’s time to put it back together. Don’t worry, reassembling your machine is a relatively simple process, especially if you took pictures and notes during the disassembly process. Start by referring to your user manual or online tutorials to make sure all the parts and screws are in the right place.
Tighten screws with a screwdriver or wrench until snug but avoid overtightening as this may cause damage. Replace any worn or damaged parts before turning on your machine. Once you’ve completed the assembly, test your machine to ensure it’s running smoothly and everything is in working order.
With regular maintenance and careful assembly, your machine should provide you with years of reliable use.
FAQs
What materials do I need to build a DIY LED aquarium light?
Some of the materials you will need include LED strips, a power supply, a heat sink, and a circuit board.
How do I determine the appropriate wattage for my DIY LED aquarium light?
You want to match your wattage to the size of your aquarium. A general rule of thumb is to use 1-2 watts of LED lighting per gallon of water.
Can I save money by building my own LED aquarium light instead of buying one?
Yes, building your own LED aquarium light can be cost-effective and allows for customization to fit your specific needs.
What color spectrum should my DIY LED aquarium light have?
A combination of blue and white LEDs will create a balanced color spectrum for your aquarium.
Is it difficult to build a DIY LED aquarium light?
With some basic knowledge of electronics and wiring, building a DIY LED aquarium light is a fairly straightforward process.
What are the benefits of using a DIY LED aquarium light?
DIY LED aquarium lights can offer cost savings, customizable features, and improved energy efficiency compared to store-bought fixtures.
Can I find tutorials or guides online for building a DIY LED aquarium light?
Yes, there are many resources available online with step-by-step instructions and videos to help guide you through the process of building a DIY LED aquarium light.

