Have you ever wanted to build your own aquarium but felt intimidated by all the materials and techniques involved? Building an aquarium with plexiglass might be the perfect option for you! Not only is plexiglass durable and lightweight, it also offers great visibility for your fish and plants. In this blog, we’ll guide you through the steps to build your own plexiglass aquarium and help you bring your aquatic dreams to life. From selecting the right materials to assembling the aquarium, we’ll cover everything you need to know to make a beautiful and functional aquarium that you can be proud of.
So let’s dive in!
Materials Needed
If you’re wondering how to build a plexiglass aquarium, you’ll need to gather a few key materials. Firstly, you’ll require plexiglass sheets, which can be found at most hardware stores, and you’ll want to pick up aquarium silicone as well. It’s crucial to use the appropriate silicone, as regular silicone may contain additives that are toxic to fish.
Additionally, you’ll want to have a glass cutter, a ruler or measure tape, and a silicone caulking gun. It’s also recommended to have a level and a piece of plywood to create a stable base for your finished aquarium. When it comes to the size of your plexiglass sheets, it’s best to plan out the dimensions of your aquarium in advance, keeping the thickness of the plexiglass in mind.
With the right materials and a bit of patience, you’ll be on your way to building your very own plexiglass aquarium in no time.
Plexiglass sheets, Acrylic Cement, Clamps, Measuring Tape, Circular Saw, Sand Paper, Silicone Sealant, Aquarium Filter
Looking to create a new project using plexiglass sheets? You’ll need a few materials to get started. First, of course, is the plexiglass itself. You’ll also want to have some acrylic cement on hand to help bond the sheets together, as well as clamps to hold everything in place while it dries.
A measuring tape will be necessary for ensuring the proper size of your project, and a circular saw can be used to cut the plexiglass down to size. Sandpaper is also a useful tool for smoothing down any rough edges. To seal your project, silicone sealant can be used to ensure a water-tight seal.
Thinking of creating an aquarium? Don’t forget an aquarium filter to keep the water clean and clear. With these essential materials, you’ll be on your way to creating unique and beautiful projects with plexiglass.
Designing Your Aquarium
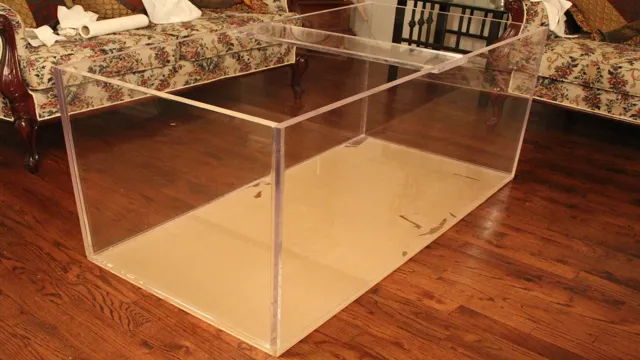
Building a plexiglass aquarium can be a fun and rewarding experience for any aquarium hobbyist. To start, you will need to carefully consider the size and shape of your aquarium before purchasing your plexiglass panels. Once you have your aquarium dimensions, you will need to cut your plexiglass to the appropriate size.
To do this, you can use a circular saw or a jigsaw equipped with a fine-toothed blade. Make sure to sand the edges of your plexiglass panels to prevent any sharp or jagged edges. Next, you will need to assemble your aquarium using a suitable adhesive or solvent cement.
Ensure that the adhesive used is compatible with plexiglass to avoid any damage. Once you have completed the assembly, you can fill your aquarium with water and add in your desired decorations, plants, and fish. With some patience and careful planning, you can enjoy your own customized plexiglass aquarium.
Determine size and shape, Draw a blueprint, Cut plexiglass sheets with circular saw
When designing your aquarium, one of the most important considerations is determining the size and shape that would best suit your needs. This is where you can let your creativity shine and come up with a unique design that blends seamlessly into your home or office decor. Once you have a clear idea of what you want, it’s time to draw up a blueprint that takes into account the dimensions, materials, and any other relevant factors. (See Also: How to Get an Aquarium in Sims 4: A Step-by-Step Guide to Adding Fish Tanks)
This will ensure that you have a clear road map to follow and can make any adjustments before proceeding with construction. When it comes to cutting your plexiglass sheets, it’s crucial to use the right tools and techniques to ensure a clean and precise cut. A circular saw is ideal for this job, as it allows you to cut through the material quickly and easily.
With a bit of care and attention, you can create a beautiful and functional aquarium that will provide hours of enjoyment for you and your fish. So, whether you’re a beginner or a seasoned aquarium hobbyist, don’t hesitate to start designing your dream aquarium today!
Assembling Your Aquarium
If you’re looking to build your own plexiglass aquarium, rest assured that with the right tools and a bit of patience, it can be done! Start by measuring and cutting your plexiglass sheets to the desired dimensions, double-checking your measurements and using a straight edge or T-square for accuracy. Next, assemble the sheets using a marine-grade silicone sealant and aquarium safe adhesive tape to hold them in place while the sealant cures. Be sure to let the sealant cure for at least 48 hours before testing your aquarium with water.
Once you’ve confirmed that your aquarium is watertight, you can add substrate, decorations, and your desired aquatic life. Remember to properly cycle your aquarium to promote a healthy and happy environment for your aquatic pets! Building a plexiglass aquarium can be a fun and rewarding project for aquarium enthusiasts with the time and dedication to see it through.
Dry fit panels, Apply acrylic cement, Clamp panels together, Smooth edges with sandpaper
Assembling your aquarium can be a daunting task, but with the right tools and materials, it can also be a fun and rewarding experience. The first step in assembling your aquarium is dry fitting the panels. This means placing the panels together to ensure they fit properly before applying any adhesive.
Once you’re sure the panels fit correctly, it’s time to apply the acrylic cement. This cement will hold the panels together and create a watertight seal. Don’t forget to clamp the panels together while the cement dries to ensure a tight bond.
After the cement has dried, you can smooth the edges with sandpaper. This will make sure there are no rough or sharp edges that could harm your fish or inhibit plant growth. By following these steps, you’ll have a beautiful and sturdy aquarium that you can be proud of.
Adding Finishing Touches
Now that you have learned how to build a plexiglass aquarium, it’s time to add those finishing touches. One of the most important steps is to ensure that all seams are watertight. Use aquarium-safe silicone to seal the seams both inside and outside the tank.
Wait for the silicone to dry completely before filling the tank with water. Once the tank is full, you can decorate it to match your style and the needs of your fish. Consider adding plants, rocks, and hiding places for your fish to explore.
Don’t forget to add an aquarium heater to maintain the water temperature and a filter to keep the water clean and clear. With these finishing touches, you can now enjoy watching your aquatic friends thrive in their new home!
Apply silicone sealant, Install aquarium filter and other features
When it comes to finishing touches for your aquarium, applying silicone sealant is an important step to ensure that there are no leaks. It’s essential to use the right type of sealant that is intended for aquarium use and to let it cure properly before filling the tank with water. Installing an aquarium filter is also crucial to maintain good water quality and keep your fish healthy. (See Also: How to Fertilize Aquarium: A Comprehensive Guide for Healthy and Thriving Aquatic Plants)
There are many different types of filters to choose from, including hang-on-back filters, canister filters, and power filters. It’s important to choose a filter that is appropriate for the size of your tank and the specific needs of your fish. Other features that can add to the aesthetics and function of your aquarium include lighting, decorations, and substrate.
When designing your aquarium, think about the natural environment of your fish and choose features that will help replicate that environment. By adding these finishing touches to your aquarium, you’ll create a beautiful and healthy home for your aquatic pets.
Maintaining Your Aquarium
If you’re looking to build a plexiglass aquarium, you’ve come to the right place. Plexiglass is a great option for aquarium building, as it’s durable and resistant to cracking or shattering. To begin, you’ll need to gather your materials: plexiglass sheets, aquarium silicone sealant, an aquarium filter, and lighting.
Then, you’ll need to cut your plexiglass to the desired sizes using a saw or other cutting tool (be sure to wear appropriate safety gear!). Once you have all of your pieces cut, you’ll need to begin assembling your aquarium using the silicone sealant as your adhesive. Make sure to leave enough time for the sealant to dry fully before adding water! Once your aquarium is fully assembled and ready to go, it’s important to properly maintain it to ensure the health and safety of your aquatic friends.
This includes routine water changes, cleaning the tank and filter, and monitoring water parameters. With proper care, your plexiglass aquarium can provide years of enjoyment and beauty.
Regular cleaning, Water testing, Replacing filter media, Monitoring temperature and humidity
Maintaining your aquarium is an important task to keep your fish healthy and happy. Regular cleaning is necessary to keep the water clear of debris and ensure a healthy environment for your aquatic pets. You should also test the water regularly to make sure the pH levels and water hardness are within the recommended range.
Replacing the filter media is another essential task that helps in keeping the water clean and healthy. Old media may contaminate the water, leading to an imbalance in the ecosystem. Keeping an eye on the temperature and humidity levels is crucial as fluctuations in these can be harmful to your fish.
It is necessary to ensure that the temperature remains stable and within the recommended range for your fish’s particular species. A humid atmosphere also helps keep the aquarium healthy and can help prevent illnesses. By following these easy steps, you can maintain a thriving aquarium for years to come.
Conclusion
So, there you have it – a step-by-step guide on how to build your very own plexiglass aquarium! With a little bit of patience and a lot of creativity, you can create a stunning habitat for your aquatic friends. Just remember, always take precautions when working with power tools and be sure to follow all safety guidelines. And if you do end up with a particularly successful aquarium, don’t forget to invite me over for a swim!”
Enjoy your custom-built plexiglass aquarium!
Maintaining your custom-built plexiglass aquarium is an essential task to ensure the health and longevity of your marine life. Regularly checking the water conditions and temperature is crucial to maintaining a balanced environment. Change the water often to prevent the buildup of harmful bacteria and other toxins.
You can also use a test kit to measure the water’s pH levels, ammonia, nitrite, and nitrate levels to ensure they stay within a safe range. Make sure to remove any debris or uneaten food that accumulates at the bottom of the tank to prevent further bacterial growth. Additionally, cleaning the inside of the tank and filters every few months will remove any algae or other buildup that may harm your marine life. (See Also: How to Glue Aquarium Lid Together: A Step-by-Step Guide for Securing Your Fish Tank)
By following these maintenance tasks, you can enjoy your custom-built plexiglass aquarium for years to come.
FAQs
What are the benefits of using plexiglass for building an aquarium?
Some benefits include increased durability, resistance to shattering, and better insulation for maintaining water temperature.
How thick should the plexiglass be for a large aquarium?
The thickness of the plexiglass depends on the size and volume of the aquarium. Generally, thicker plexiglass is recommended for larger aquariums to ensure structural integrity.
Can I use silicone to seal the plexiglass panels together?
Yes, silicone is a common sealing method for plexiglass aquariums. Make sure to use a silicone sealant that is aquarium-safe and apply it evenly to ensure a tight seal.
How do I clean and maintain a plexiglass aquarium?
To clean plexiglass, use a soft cloth or sponge with a gentle, non-abrasive cleaner. Avoid using harsh chemicals or rough materials that can scratch or damage the surface.
Can I drill holes in the plexiglass for filtration systems or other equipment?
Yes, plexiglass can be drilled using a drill bit designed for acrylic materials. Follow safety precautions and take your time to prevent cracking or damage.
How can I prevent scratches or scuffs on the plexiglass surface?
To prevent scratches, use a soft cloth or microfiber towel for cleaning and avoid contact with abrasive materials or rough surfaces.
Can I use plexiglass for saltwater aquariums?
Yes, plexiglass is suitable for both freshwater and saltwater aquariums. However, it is important to choose a thicker plexiglass for saltwater aquariums due to the corrosive nature of saltwater.


