Are you looking for a DIY project that will not only enhance the beauty of your home but also give your aquatic pets a stylish new home? A custom acrylic aquarium stand might just be the perfect solution for you! Building your own stand can be a fun and rewarding project that doesn’t require much experience or equipment. The best part is that you can customize the design to fit your personal style and any specific needs your aquatic creatures may have. In this blog post, we’ll provide a step-by-step guide on how to build an acrylic aquarium stand that will not only hold your tank securely but also impress your guests.
So, roll up your sleeves, put on your safety goggles, and let’s get started!
Materials Needed
If you’re looking to build an acrylic aquarium stand, you’ll need a few materials to get you started. Firstly, you will need the acrylic sheets of your desired thickness and dimensions. You’ll also need acrylic cement to bond the sheets together, a saw to cut the sheets into the required shapes, and a drill to make any necessary holes for cable management or filtration systems.
It’s important to measure your aquarium precisely to ensure that your stand is the perfect fit. You may also want to consider adding corner brackets or acrylic rods for extra support and stability. Building your own acrylic aquarium stand can be a fun and rewarding DIY project, and with the right materials, you can create a sturdy and stylish stand to showcase your aquatic pets.
Acrylic Sheets
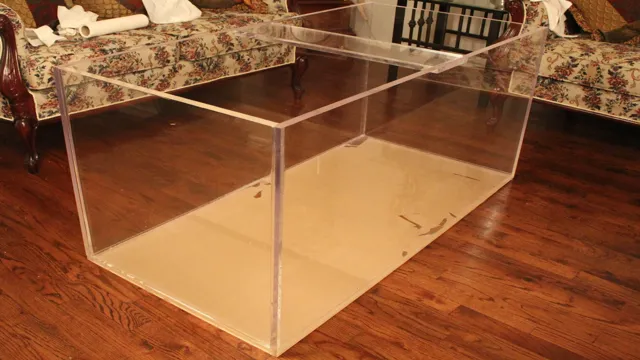
If you’re planning to use acrylic sheets for your next DIY project, it’s important to know what materials you’ll need to get the job done right. First and foremost, you’ll need the acrylic sheets themselves, which come in a variety of sizes and thicknesses. When choosing your sheets, make sure to consider the intended use of your finished project, as thicker sheets are more durable and better suited for high-impact applications.
You’ll also need a cutting tool, such as a circular saw or jigsaw, to cut your acrylic sheets to size. In addition, you’ll need sandpaper to smooth out any rough edges, as well as a drill or hole saw to create any necessary holes in the acrylic. Finally, make sure to have a cleaner specifically designed for acrylic on hand to remove any fingerprints or smudges.
With these materials at the ready, you’ll be well-equipped to create the perfect acrylic project for your home or office.
Drill and Bits
When it comes to working with drills and bits, there are a few essential materials that you’ll need to have on hand. First and foremost, you’ll need a drill, which can range in size and power depending on the job you’re tackling. It’s also important to have a variety of drill bits, as different materials require different types of bits.
HSS (high-speed steel) bits are great for drilling into metals, while masonry bits are necessary for brick and concrete. You’ll also want to have a set of wood bits for working with wooden materials. In addition to the drill and bits, it’s a good idea to have a set of clamps to hold your workpiece steady while you drill.
Additionally, it can be helpful to have a drill bit sharpener on hand to keep your bits functioning at their best. By having these materials ready, you’ll be well-equipped to handle any drilling project that comes your way. So don’t hesitate to gather up your materials and start tackling those DIY jobs today!
Clamps
Clamps When it comes to working with clamps, there are a few materials you’ll want to have on hand. The first and most obvious is the clamp itself. You’ll want to choose a clamp that is strong enough to hold the material you’re working on securely.
Depending on what you’re clamping, you may also want to consider using protective pads, which can prevent the clamp from leaving marks or indentations on the surface of the material. In addition to the clamp and protective pads, you may also want to have some lubricant on hand. This can help to reduce friction between the clamp and the material you’re working on, which can make it easier to adjust the clamp as needed.
When it comes to lubricant, you’ll want to choose a product that is safe for use with the particular materials you’re clamping. Finally, it’s always a good idea to have some spare parts on hand. This could include extra screws or jaw pads, depending on the type of clamp you’re using.
Having spare parts on hand can help to ensure that you can continue working even if a part of your clamp becomes damaged or worn out. By being prepared with the right materials, you’ll be able to get the most out of your clamps and tackle any project with ease.
Screws and Bolts
When it comes to screws and bolts, there are a few materials you’ll want to have on hand to get the job done right. First and foremost, you’ll need the screws or bolts themselves, which come in a variety of sizes and styles depending on your specific needs. It’s important to choose the right size and type for the job to ensure a secure hold and prevent damage to the materials you’re working with. (See Also: How to Increase pH in Aquarium Shell: Easy and Effective Techniques)
You may also want to have some washers and nuts on hand to complete the installation. Additionally, having some lubricant, such as WD-40, can make the installation process smoother and help prevent rust and corrosion. Finally, don’t forget the proper tools! A screwdriver or wrench may be necessary to tighten the screws or bolts, so make sure you have the right tool for the job.
With these materials on hand, you’ll be able to install screws and bolts quickly, easily, and effectively.
Measuring Tape
Measuring Tape If you’re planning on taking measurements for a project, the most essential tool you’ll need is a measuring tape. But before you go out and buy one, it’s important to know what materials you should be looking for. Generally, standard measuring tapes are made from metal or plastic, and they come in a variety of lengths from 10 to 100 feet.
It’s important to choose a tape that’s easy to read and won’t easily wrinkle or tear. Cheap tapes may get the job done, but investing in a good quality tape will ensure accurate measurements every time. Another important factor to consider is the locking mechanism of the tape.
Look for a tape that has a secure locking mechanism that will keep the tape in place when you’re taking measurements. Overall, when choosing a measuring tape, think about your project needs and invest in a good quality tape that will give you accurate and consistent measurements.
Designing the Stand
Designing an acrylic aquarium stand seems daunting, but it doesn’t have to be. Start by determining the size of the aquarium and the weight it will hold. Acrylic is lighter than glass, making it a popular choice for larger tanks.
Next, create a sketch or plan of the stand, ensuring it will be sturdy and level. Consider using thicker acrylic sheets for the base and support pillars. Use a laser cutter or saw to cut the acrylic pieces to size.
Sand the edges to prevent injury. Assemble the pieces using an acrylic adhesive, and allow it to dry for at least 24 hours. Finally, test the stand’s strength and stability before placing the aquarium on it.
Building an acrylic aquarium stand will take time and precision, but the end result will provide a beautiful display for your aquatic pets.
Determining Size and Shape
When designing a stand, one of the first things to consider is the size and shape of the area where the stand will be located. Is the space big enough to accommodate a larger stand or is it limited in size, meaning a smaller design would be better? Will the stand be a corner design or does it need to fit into a specific area where height restrictions must be taken into account? These are all essential factors to think about when determining the perfect size and shape for your stand. It is also important to consider the number of attendees expected, as this can affect the flow and design of the stand.
Ultimately, the primary goal is to create a stand that draws attendees in and engages them with your product or service. So, it’s imperative that you design a stand that is attractive, eye-catching, and easy to navigate. By taking the time to plan the perfect size and shape for your stand, you can create a compelling and effective showcase for your brand.
Cutting the Acrylic Sheets
When it comes to designing the perfect stand for your acrylic sheet, you’ll need to consider a few key factors. One of these is the actual cutting of the acrylic sheets. The first step will be to choose the correct equipment.
You’ll need a specialized saw that’s designed to cut through acrylic, as using the wrong tool is likely to result in unsatisfactory results. Once you’ve got your saw set up and ready, you can begin the process of cutting your sheets to the correct size and shape. It’s important to keep your cuts straight and precise, as any errors could result in an unstable or poorly balanced stand.
Once you’ve got your sheets cut, you’re ready to move on to the actual design process! Acrylic sheet stands are becoming increasingly popular for a variety of different purposes, from displaying artwork to organizing office supplies. If you’re looking to create your own stand, there are a few key design elements to consider. First, you’ll need to decide on the overall shape and size of the stand.
This will depend largely on the size of your acrylic sheets, as well as the intended use of the stand. From there, you can start to add in additional features, such as shelves or hooks, to make your stand even more functional. Keep in mind that the overall design should be sturdy and balanced, so that it can support the weight of your acrylic sheets without tipping over or becoming unstable. (See Also: How to Keep Aquarium pH Stable: Tips and Tricks for Optimal Water Balance)
By taking the time to carefully plan out and execute your stand design, you can create a functional and attractive display piece that will be sure to impress.
Drilling Holes for Screws and Bolts
When designing a stand, drilling holes for screws and bolts is a crucial step in ensuring its stability. It’s important to have the right size and depth for the holes so that the screws and bolts can be properly secured. First, determine the size of the screws or bolts you will be using and select a drill bit that is slightly smaller than the diameter to create a pilot hole.
Then, use a larger drill bit to create a clearance hole for the screw or bolt head. It’s important to keep the drill bit perpendicular to the surface to avoid creating angled holes that may compromise the stability of the stand. Finally, if the material is thick, consider using a countersink bit to create a recess for the screw or bolt head to sit flush with the surface.
By taking the time to properly drill the holes, you can ensure that your stand will be sturdy and reliable.
Attaching the Sheets with Clamps and Bolts
When designing a stand to attach sheets, it’s important to consider the sturdiness of the structure. Using clamps and bolts can be an effective solution to ensure the sheets stay in place. Start by selecting the appropriate clamps and bolts for the thickness and weight of the sheets.
Calculate the number of clamps needed and the placement on the stand to evenly distribute the weight and prevent any sagging or slipping. It’s also important to properly align the sheets before attaching them to ensure a clean and professional look. Lastly, consider using a rubber or foam pad between the clamp and sheet to prevent any damage.
With the right design and implementation, attaching sheets with clamps and bolts can be a simple and secure solution.
Adding Accessories
If you’re looking to add some personality and functionality to your acrylic aquarium stand, accessories can do just that. Consider options like LED lighting, power strips, and filtration systems to enhance the appearance and overall performance of your stand. For example, LED lighting can create a beautiful ambience and highlight the colors of your fish and corals.
Power strips can conveniently power all your electronics while keeping cords organized and out of the way. And a quality filtration system can ensure that the water in your tank stays clean and healthy for your aquatic pets. Don’t be afraid to mix and match accessories to create a customized look that meets your needs and fits your style.
By getting creative and adding accessories, you can take your acrylic aquarium stand from functional to fabulous in no time.
Inserting Light Fixtures
When it comes to home décor, adding the right accessories can make all the difference. One such accessory that can truly transform a room is a light fixture. Whether you’re looking to add some ambiance with a soft glow or brighten up a space with a statement piece, there’s a light fixture out there to meet your needs.
From classic chandeliers to modern pendant lights, there are a variety of options available. But before you start shopping for light fixtures, it’s important to consider the size, style, and function you’re looking for. The right light fixture can not only enhance the look of a room but also provide the perfect amount of light for the space it’s in.
So, take your time and choose wisely – you’ll be amazed at the impact a well-chosen light fixture can have on your home.
Installing Filtration System
If you’re considering adding a filtration system to your aquarium, it’s important to think about what accessories you’ll need to make the most of your new setup. While the filtration system itself is the heart of your aquatic environment, there are a few additional items you’ll want to consider to ensure your fish are healthy and happy. One accessory you may want to invest in is a gravel vacuum. (See Also: How to Get Rid of Tiny Bubbles in Aquarium: Tips and Tricks for Crystal Clear Water)
This tool makes it easy to clean debris and waste from your tank’s substrate, which can quickly build up and cause water quality problems if left unchecked. Additionally, you may want to consider adding an air stone to your aquarium. Air stones release tiny bubbles into the water, which can help increase oxygen levels and prevent the growth of harmful bacteria.
By taking the time to consider these and other accessories, you’ll be well on your way to creating a thriving, healthy aquatic ecosystem for your fish to call home.
Conclusion
In conclusion, building an acrylic aquarium stand requires patience, precision, and a steady hand. Just like keeping an aquarium, the stand is a delicate balance of form and function. But with the right tools and a bit of creativity, you can create a beautiful and sturdy stand that not only supports your underwater kingdom but adds to its aesthetic charm.
So go forth, brave DIYers, and let your aquarium stand shine like the shimmering scales of a fish caught in the perfect lighting.”
FAQs
What materials do I need to build an acrylic aquarium stand?
To build an acrylic aquarium stand, you will need acrylic sheets, solvent cement, a saw, a measuring tape, and a level.
How thick should the acrylic sheets be for the aquarium stand?
The recommended thickness for the acrylic sheets is 1/2 inch (12.7mm) or more to ensure maximum strength and stability.
Can I use regular glue instead of solvent cement for the acrylic sheets?
No, regular glue will not bond properly with acrylic sheets and may cause the stand to fall apart. Always use solvent cement specifically made for acrylics.
How do I properly measure and cut the acrylic sheets for the stand?
Use a measuring tape to mark the correct dimensions on the acrylic sheets, then use a saw with a fine-toothed blade to make precise cuts.
Should I add additional reinforcement to the stand for extra support?
It is highly recommended to add additional support, such as metal brackets or wooden crossbars, to ensure the stand can support the weight of the aquarium.
Can I paint the acrylic stand to match my decor?
Yes, acrylic is paintable, but be sure to use a paint specifically made for plastics and follow the manufacturer’s instructions.
Are there any special maintenance requirements for an acrylic aquarium stand?
To keep the stand looking new, clean it regularly with a soft cloth and mild soap. Avoid using abrasive cleaners that can scratch the acrylics.


