Maintaining a well-functioning chiller is one of the most crucial aspects of keeping your aquarium environment healthy for your aquatic pets. Not only does it help to regulate the temperatures inside your tank, but it also prevents the growth of harmful bacteria and algae that could adversely affect your fish. However, like anything in life, your chiller needs maintenance to continue working correctly.
Cleaning your aquarium chiller is a necessary task that all fish tank owners should know how to do. Not sure where to begin? Don’t worry! In this blog, we’ll show you how to clean your aquarium chiller quickly and easily, so you can keep your aquarium cool and your fish healthy. So, grab your cleaning supplies, and let’s dive in!
Introduction
Keeping your aquarium chiller clean is vital for ensuring the longevity of its lifespan and preventing your aquarium’s water from becoming contaminated. To maintain a clean chiller, it’s essential to start by disconnecting the power supply and unplugging it. Then, use a soft-bristle brush to scrub any debris or sediment from the chiller.
If the buildup is stubborn and won’t come off with a simple brush, you can resort to using a non-toxic cleaner specifically designed for aquariums. It’s crucial to ensure the cleaner is suitable for the type of chiller you have and that it’s completely rinsed off before reconnecting and plugging in the chiller. Keeping your chiller clean will maintain optimal performance and ensure your aquarium operates efficiently.
Why Cleaning Your Aquarium Chiller Is Important
Aquarium Chiller Introduction: If you’re a fish enthusiast, keeping your aquarium in top condition is crucial. The aquarium chiller is an essential piece of equipment that plays a vital role in maintaining safe living conditions for your aquatic pets. However, it’s often overlooked during routine maintenance.
Keeping your aquarium chiller clean is essential to ensure optimal performance, prevent malfunctions, and save you money in the long-term. A dirty or clogged chiller can cause your fish tank temperature to rise, putting your fish at risk and leading to the growth of harmful bacteria. Therefore, in this blog, we’ll discuss why cleaning your aquarium chiller is important.
Let’s dive in!
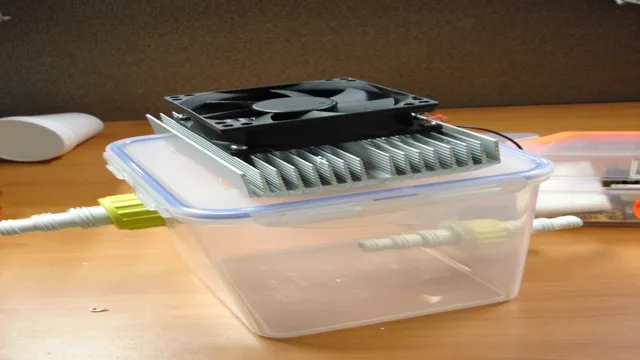
Frequency of Cleaning
When it comes to cleaning, the frequency at which you should do it can vary depending on several factors. Some people prefer to do a quick clean every day, while others opt for a deep clean once a week. The key is to find a routine that works for you and your household.
Factors that can impact the frequency of cleaning include the size of your home, the number of people living in it, the level of messiness, and any allergies or sensitivities you or your family members may have. It’s important to keep in mind that regular cleaning not only keeps your home looking tidy, but it also helps reduce the number of germs and allergens in your living space. So, whether you decide to clean every day or once a week, consistency is key.
By making cleaning a part of your regular routine, you can ensure your home stays healthy and hygienic.
Step-by-Step Guide
Cleaning an aquarium chiller may seem like a daunting task, but it is an essential part of keeping your aquarium healthy and thriving. Here is a step-by-step guide to help you clean your aquarium chiller: Firstly, turn off and unplug the chiller and allow it to fully cool down. Next, remove any debris or dirt from the chiller using a soft-bristled brush or a sponge.
Make sure to concentrate on the fins and coils as they tend to accumulate the most dirt. Then, fill a bucket with warm water and add a few drops of dish soap. Use this solution to clean the chiller thoroughly, making sure that every part of the chiller is covered.
Rinse the chiller using clean water and allow it to dry completely before plugging it back in. It’s important to clean your aquarium chiller at least once a year to ensure that it’s working at its optimum level and to prevent any potential malfunctions that could harm your aquarium inhabitants.
Step 1: Turn Off Your Chiller
Turning off your chiller is the first step you need to take when maintaining or repairing your cooling system. It’s a crucial step as it ensures that the system isn’t under any pressure before you start working on it. Turning off the chiller will also prevent any injuries or accidents that may occur from live electrical parts.
To turn off your chiller, go to the control panel and switch it off before unplugging it from the power source. You can also turn off the power at the circuit breaker if necessary. It’s essential to let the chiller sit for at least ten minutes before starting any maintenance work. (See Also: Why Do Aquariums Have Blue Lights: The Science Behind This Popular Practice)
This step ensures that the pressure in the refrigerant lines has leveled off. By turning off the chiller, you’re making the first step towards having a fully functional and efficient cooling system, which ensures that you’re maximizing the lifespan of your chiller while incurring minimum costs. So, don’t forget to turn off your chiller before any maintenance or repair work.
Step 2: Remove the Chiller from the Aquarium System
When it comes to removing a chiller from your aquarium system, there are several steps you need to follow to ensure a safe and successful removal. The second step is to remove the chiller from the aquarium system itself. Begin by unplugging the chiller from the electrical socket and then disconnect any hoses or tubing that are attached to the chiller.
Carefully loosen any clamps that are holding the chiller in place and then gently lift it out of the aquarium system. It’s important to remember to take your time and be gentle when removing the chiller to avoid damaging any equipment or disrupting the balance of the aquarium. With the chiller removed, you can now move on to the next step in the process.
By taking the time to follow each step carefully, you can ensure a smooth chiller removal process and keep your aquarium running smoothly.
Step 3: Flush the Chiller with Freshwater
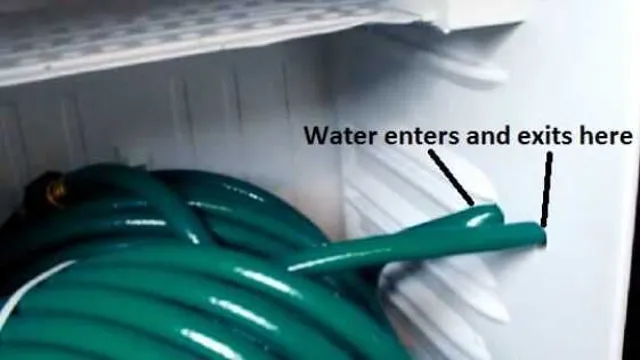
After disconnecting the chiller unit from the power source and draining the cleaning solution, the next step is flushing the chiller with freshwater. This process helps to remove any remaining debris or cleaning agents, leaving the chiller sparkling clean. To start, connect a hose to a nearby water source and place the other end into the chiller.
Turn on the water and let it run through the chiller for several minutes, ensuring every nook and cranny has been reached. Once the water runs clear, the chiller is ready to be dried and reconnected to the power source. It is essential to ensure that the chiller is completely dry to prevent any potential electrical hazards.
By following these simple steps, you can ensure your chiller is free of debris and functioning flawlessly.
Step 4: Use an Aquarium-Safe Cleaner to Remove Build-Up
After removing all of the gravel, decorations and any large debris, it’s time to tackle the build-up on the sides of your aquarium. Using an aquarium-safe cleaner is important as anything else may leave behind toxins and harm your aquatic pets. When selecting a cleaner, make sure it is specifically designed for aquarium use and does not contain any harmful chemicals such as bleach or ammonia.
Once you have your cleaner, begin by spraying the product onto a clean cloth or sponge. Avoid spraying the cleaner directly into the water as it may create potentially hazardous conditions for your fish. Start cleaning the sides of the aquarium, making sure to get any hard-to-reach areas.
Be gentle so as not to scratch the glass. It’s essential to rinse the sides of the tank multiple times with water after cleaning to ensure that all remnants of the cleaner are gone. With this step, your aquarium should be looking cleaner and clearer than ever before!
Step 5: Rinse the Chiller with Freshwater
Now that your wort has been cooled down to the desired temperature using a wort chiller, the next step is to rinse it with freshwater. This step is necessary to remove any residue or impurities that may have accumulated during the cooling process. Simply connect one end of a hose to the chiller and the other end to a faucet or another source of clean water.
Turn on the water and allow it to run through the chiller for a few minutes. Be sure to flush both the inside and outside of the chiller thoroughly. Once you’re confident that all the impurities have been removed, you can disconnect the hose and move on to the next step of the brewing process.
Remember, cleanliness is crucial when brewing beer, so take the time to rinse your equipment properly before moving on. By doing so, you’ll ensure that your beer is free from any unwanted flavors or aromas that could detract from its overall quality.
Step 6: Reinstall the Chiller in the Aquarium System
Finally, the chiller is ready to be reinstalled into the aquarium system. Before doing so, make sure the power supply is switched off to avoid any accidents. Carefully place the chiller in its designated spot and reconnect all the hoses, ensuring they are securely fastened.
Inspect the chiller for any leaks or damage before turning the power supply back on. It’s best to turn on the chiller and check its performance before adding water to the system. This will help you identify any potential issues early on and prevent damage to the aquarium. (See Also: How To Make Fish Aquarium With Paper: A Step-by-Step Guide For Beginners)
Remember to monitor the temperature regularly and make adjustments as necessary. By following these simple steps, your aquarium chiller will be up and running in no time, keeping your fish and other aquatic life healthy and comfortable.
Maintenance Tips
Cleaning your aquarium chiller is a crucial part of aquarium maintenance to ensure its longevity and efficient use. To clean your chiller, start by switching off the system and unplugging the power cord. Next, use a soft-bristled brush or a cloth to clean the exterior of the chiller, making sure to remove any dust or debris that has accumulated on the surface.
To clean the interior, drain all the water from the chiller and rinse it with fresh water. Add vinegar to the water and let it sit for about 30 minutes. This will help remove any mineral buildup.
Rinse the chiller again with freshwater before filling it back up with water and turning it on. It is important to clean your aquarium chiller periodically to maintain its efficiency and prevent any potential issues. If you find any problems during maintenance, it’s best to contact a professional to help with your chiller to avoid further complications.
By doing regular maintenance, your aquarium chiller will last longer and keep your aquarium water at the right temperature for your fish and plants.
Inspect Your Chiller Regularly
Regular maintenance is crucial for ensuring the efficient and effective functioning of chillers. They are complex machines, requiring specialized care and attention to operate at their best. The first step to ensuring their optimal performance is to inspect them regularly.
This involves checking for any leaks, unusual noises, or abnormal vibrations. Regularly cleaning the evaporator and condenser coils will ensure that they remain free from buildup, and changing the air filters is essential for maintaining good air quality. Regular inspections will also ensure that any worn or damaged parts are identified and replaced promptly, preventing further damage and reducing costly repairs.
Remember that preventative maintenance is always cheaper in the long run, and will protect your investment for years to come. By inspecting your chiller regularly, you can extend its lifespan, increase its efficiency, and save money on energy bills. Don’t neglect your chiller – give it the care it deserves, and it will serve you well.
Keep the Area Around Your Chiller Clean
Keeping your chiller clean is essential for its proper maintenance and functioning. Along with maintaining the internal components of the chiller, it’s also crucial to keep the area around it clean. The immediate surroundings can accumulate debris, dust, and dirt, which can affect the performance of the chiller.
Therefore, it’s important to clear the area around the chiller regularly, ensuring that it’s free from debris and other unnecessary elements. Cleaning the area around the chiller is not only essential for its functioning but also for the safety of the people working around it. Equipment in distal proximity can create a hazardous work environment, can negatively impact the chiller’s performance, and can be visually unappealing.
If the area is not cleaned regularly, it may invite pests such as rodents and insects, which can also damage the chiller in the long run. To keep the area around the chiller clean, make sure that it is free from any unnecessary items, dust, and debris. Regularly sweep the floor, especially near the chiller, and remove any unwanted materials that may have accumulated.
Be cautious when using cleaning agents and ensure that they are compatible with the chiller materials and finishes. The overall goal of maintaining cleanliness in and around your chiller is to ensure that it functions efficiently and safely, without any obstructions or hazards. In conclusion, maintaining and cleaning the area around the chiller is crucial for its longevity and optimal performance.
Keeping a watchful eye on the immediate surroundings of the chiller and taking a proactive measure towards cleanliness not only adds to the aesthetics of the environment but also keeps everyone who works around it safe. Stay mindful of the area around your chiller and maintain it regularly, and you’ll undoubtedly reap the long-term benefits of increased efficiency and safety.
Replace Parts as Needed
Regular maintenance is crucial for any vehicle to ensure that it runs smoothly and has a long lifespan. One important aspect of maintenance is to replace parts as needed. Wear and tear is inevitable, and parts will eventually need to be replaced. (See Also: How to Make Your Own Aquarium Air Pump: A DIY Guide for Aquarists)
It is important to pay attention to any signs of wear and to replace parts before they completely fail, which can cause bigger problems and lead to more expensive repairs. Some parts that commonly need to be replaced include brakes, tires, filters, and belts. It is also important to use high-quality parts when replacing them.
While it may be tempting to go with cheaper alternatives, low-quality parts can actually end up costing more in the long run as they may fail sooner and require more frequent replacement. By replacing parts as needed with high-quality replacements, you can keep your vehicle running smoothly and avoid costly repairs down the road.
Conclusion
In conclusion, cleaning your aquarium chiller may seem like a daunting task, but with a few simple steps, you can have your chiller running like new in no time. Remember to disconnect the power source and use a gentle cleaning solution to prevent any damage to the delicate components. And don’t forget to rinse thoroughly before reconnecting and admiring your crystal clear aquarium.
Because let’s face it, a dirty chiller is like a bad hair day- it’s just not a good look for anyone.”
FAQs
What is an aquarium chiller?
An aquarium chiller is a device used to cool down the water in an aquarium to maintain a stable temperature for aquatic life.
Why is it important to clean an aquarium chiller?
To maintain the efficiency and longevity of an aquarium chiller, it is important to clean it regularly to remove any dirt, debris, or algae build-up that can clog the filter and hinder its performance.
How often should an aquarium chiller be cleaned?
It is recommended to clean an aquarium chiller every 6-12 months, depending on the level of usage and the environment it is placed in.
What are the steps to clean an aquarium chiller?
The steps to clean an aquarium chiller are:
– Turn off and unplug the chiller
– Disconnect the hoses and remove the unit from the aquarium
– Disassemble the chiller and remove any removable parts
– Soak the parts in a cleaning solution or vinegar for 30 minutes
– Scrub the parts with a soft brush and rinse them thoroughly
– Reassemble the chiller and reconnect the hoses and plugs
– Turn on the chiller and check for any leaks or irregularities
What cleaning solution can be used to clean an aquarium chiller?
A mixture of equal parts of white vinegar and water can be used as a cleaning solution to remove dirt, debris, and algae from an aquarium chiller.
Can a chiller be cleaned without disassembling it?
While it is recommended to disassemble an aquarium chiller for thorough cleaning, some parts can be cleaned without disassembly, such as the external casing, the hoses, and the filter.
What are the signs that indicate a need for cleaning an aquarium chiller?
The signs that indicate a need for cleaning an aquarium chiller are:
– Reduced cooling performance
– Unusual noises or vibrations
– Leaks or drips
– Dirty or clogged airflow or filter.

