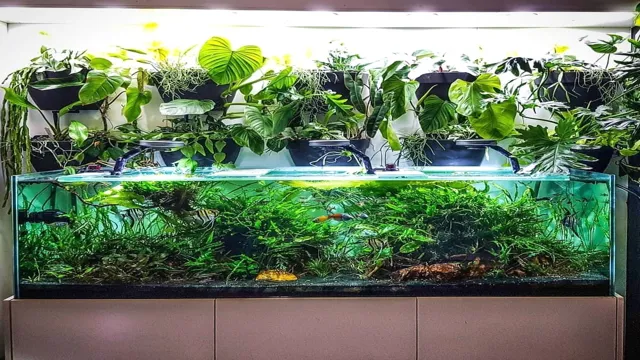
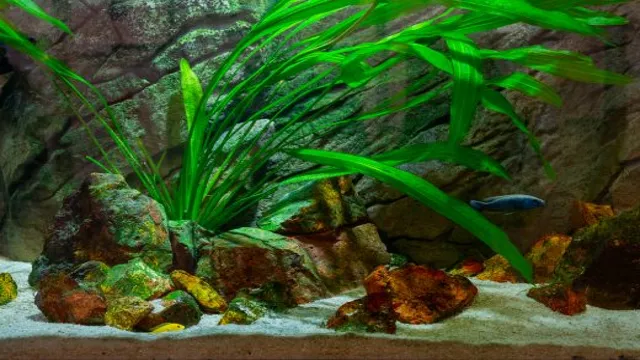
Do you want to add a touch of natural beauty to your freshwater aquarium? Driftwood is a great option to consider! Not only does it create a beautiful and natural-looking environment for your fish, but it also provides hiding spots for them to retreat to when feeling stressed. However, before adding driftwood to your aquarium, it’s important to properly clean it to ensure it’s safe for your fish. In this blog post, we’ll guide you through the steps of how to clean driftwood for freshwater aquariums.
So grab a cup of coffee and let’s get started!
Why Clean Your Driftwood?
Cleaning driftwood is essential before introducing it into your freshwater aquarium. The accumulation of dirt, bacteria, and toxins on the surface of the wood can cause harm to your aquatic pets. Moreover, driftwood often leaches tannins, which discolor the water and lower the pH level, making it acidic.
Therefore, cleaning the driftwood helps to remove any unwanted substances and minimize tannin leaching. To clean driftwood, start by scrubbing it with a stiff brush to remove any visible debris. Next, soak the wood in a container filled with water for several days until the water becomes clear.
Finally, boil the wood for at least an hour to kill any remaining bacteria and further remove tannins. With this simple process, you can make your driftwood suitable for your freshwater aquarium.
Prevent Contaminants
Driftwood is a beautiful, natural decoration that can accentuate any space. However, it’s essential to consider the potential contaminants that may come with it. Driftwood may have been in contact with various pollutants such as oil, chemicals, or bacteria that can cause harm to your health and environment.
Cleaning driftwood is a crucial step to ensure its safety and longevity. Not only does cleaning prevent harmful substances from entering your home, but it also removes any unwanted smells and stains. It’s important to use gentle cleaning methods to preserve the natural texture and color of the driftwood.
So, why clean your driftwood? To prevent contaminants, maintain its beauty, and promote a healthy living environment.
Prevent Algae Growth
Driftwood is a popular choice for aquariums and terrariums. Not only does it add a natural and rustic appeal to your setup, but it also serves as a great hiding spot for your aquatic pets. However, after some time, you may notice algae growth on your driftwood.
This not only looks unsightly but can also harm your aquatic plants and animals. That’s why it is important to clean your driftwood regularly. Algae thrives in moist environments and can quickly overrun your terrarium or aquarium if left unchecked.
By cleaning your driftwood, you can prevent this from happening and ensure a healthy and thriving environment for your pets. So, make sure to take the time to clean your driftwood every few weeks to keep it free from harmful algae.
Materials Needed
If you want to add a touch of natural beauty to your freshwater aquarium, driftwood is a great addition. It provides a natural habitat for fish, serves as a breeding ground for beneficial bacteria, and creates a stunning look. However, before adding driftwood to your tank, it is essential to clean it thoroughly.
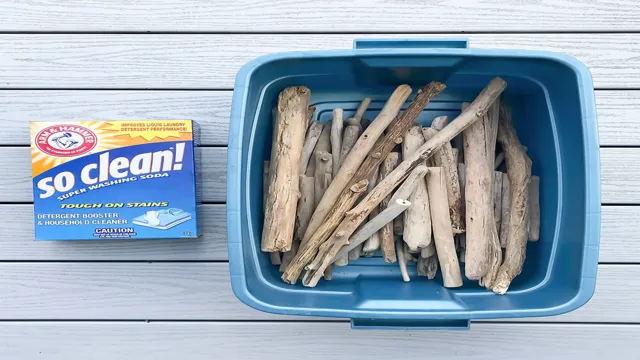
The materials you need for cleaning driftwood are quite simple. You’ll need a large bucket or container, a stiff brush, gloves, and bleach. You may also need a power washer for larger pieces of driftwood.
It’s also important to note that the amount of time and effort it takes to clean the driftwood can vary depending on how much debris it has on it. But once the driftwood is clean, it should no longer harm your fish or release unwanted substances into your aquarium. So, let’s learn how to clean driftwood for your freshwater aquarium and get started on adding a beautiful natural touch to your tank!
Bucket
When it comes to making a bucket, there are a few materials you will need to get started. The primary material, of course, is the bucket itself. You can purchase ready-made buckets from hardware stores or online retailers, or you can choose to make your own using materials like plastic, metal or even wood if you’re feeling adventurous.
If you’re making a bucket from scratch, you’ll need additional materials like screws, nails, and glue to hold it all together. Other materials you may need include a handle for the bucket, which can be made from rope or plastic, and a lid if you plan on using the bucket for storage purposes. When choosing your materials, be mindful of the intended purpose of the bucket.
Will it be used for gardening, carrying water, or holding tools? The type of material you choose will affect the bucket’s durability, weight, and overall usefulness. With a little bit of creativity and a few essential materials, you’ll be well on your way to making your own DIY bucket.
Water Hose
When it comes to watering your lawn or garden, having a reliable water hose is essential. To get started, you’ll need a few basic materials to ensure your hose is in top shape. First, you’ll need the hose itself.
It’s important to choose a hose that is durable and flexible, so it can withstand varying temperatures and resist kinks or wrinkles. Additionally, you’ll need fittings, such as connectors and couplings, to attach the hose to your spigot and other watering tools. These fittings should be made from high-quality materials, like brass or aluminum, to prevent leaks and rust.
Finally, consider investing in a hose reel or holder to help keep your hose organized and easily accessible. By gathering these materials, you’ll be equipped with everything you need to maintain a healthy and vibrant lawn or garden. (See Also: How to Clarify Water in Aquarium: 6 Effective Ways to Keep Your Fish Healthy)
Gloves
When it comes to making gloves, there are a few materials that are necessary in order to create a durable and comfortable product. Firstly, you’ll need a material for the outer layer of the gloves. This can be leather, vinyl, or a synthetic fabric such as nylon or polyester.
The type of material you choose will affect the durability, flexibility, and waterproofness of the gloves. Next, you’ll need a lining material for the inside of the gloves. This could be fleece, wool, or a synthetic material such as Thinsulate.
The lining will provide insulation and help to keep the wearer’s hands warm in colder weather. Finally, you’ll need some sort of fastener to keep the gloves secure on the hands. This could be a snap, button, or Velcro closure.
Depending on the type of gloves you’re making, you may also need additional materials such as padding or reinforcements in high wear areas. By using high-quality materials, you can create gloves that will be comfortable and long-lasting, providing protection and warmth for the wearer in a variety of different conditions.
Scrub Brush
If you’re looking to clean up tough stains and grime, a good scrub brush is a must-have tool in your arsenal. To get started, you’ll need to gather a few materials. First, you’ll obviously need a scrub brush.
Choose one with stiff bristles that can hold up to heavy use. Additional materials could include a bucket or basin of water, a cleaning solution, and gloves if you’re dealing with harsh chemicals. The type of cleaning solution you use will depend on the surface you’re cleaning, so choose the appropriate one for the job.
Some popular options include vinegar, baking soda, and commercial cleaning products. Once you have your materials gathered, you can begin the cleaning process. Use the scrub brush with firm pressure to remove stubborn stains and grime, and rinse the surface with water when you’re finished.
With the right materials and techniques, your scrub brush can be a powerful tool for cleaning even the toughest messes.
Bleach (Optional)
If you’re planning on using bleach to brighten your clothes, there are a few materials you’ll need to have ready. Firstly, you’ll need bleach itself – make sure to get the appropriate type for the fabric you’re working with. Next, you’ll need water to dilute the bleach.
It’s important to follow the instructions on the bleach bottle carefully, as using too much can damage your clothes. You’ll also want to wear gloves to protect your hands, and work on a surface that won’t be damaged by the bleach. Finally, it’s a good idea to have some baking soda or vinegar on hand in case of any spills or accidents.
Bleach can be a powerful tool for brightening your clothes, but it’s important to use it carefully to avoid any damage or discoloration.
Steps to Clean Driftwood
If you’re looking to add some natural elements to your freshwater aquarium, driftwood is an excellent choice. Not only does it provide a great aesthetic, but it also serves as a hiding place for your fish. However, before adding driftwood to your tank, it’s essential to clean it thoroughly to avoid any harmful bacteria or parasites.
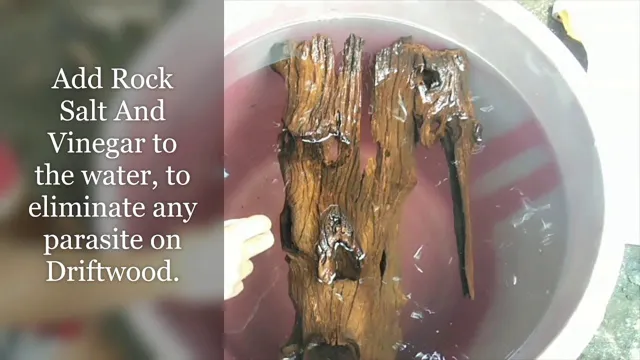
Begin by soaking the driftwood in a bucket or container filled with warm water. Change the water every day for about a week to remove any tannins, dirt, or debris. After that, boil the driftwood for a few hours to kill off any remaining bacteria or parasites.
Once boiled, let the driftwood cool and soak it again in clean water for a few more days. Rinse the driftwood thoroughly before adding it to your aquarium, and you’re good to go. With these simple steps, you can ensure that your driftwood is safe and clean for your freshwater aquarium.
Step 1: Scrub off Debris
Driftwood Driftwood is a beautiful, natural, and sustainable material that is perfect for creating rustic, nautical, or bohemian home decor. However, before using driftwood in any project, it needs to be properly cleaned to remove any debris, dirt, or algae that may be stuck to the surface. The first step in cleaning driftwood is to scrub off any loose debris using a stiff-bristled brush or a scraper.
This will help to remove any dirt, mud, or sand that may be clinging to the wood. Be sure to work gently and use a back-and-forth motion to avoid damaging the wood. If the driftwood seems too fragile or delicate, try using a soft-bristled brush instead.
After scrubbing off debris, rinse the wood thoroughly with clean water to remove any remaining dirt or debris. By following these simple steps, you can ensure that your driftwood is clean, ready to use, and looks as natural as possible in your decor.
Step 2: Soak Driftwood in Water
If you’re looking to incorporate driftwood into your home decor, it’s important to clean it thoroughly before use. One of the essential steps in cleaning driftwood is soaking it in water. This not only removes any dirt or debris that may be present, but also helps to eliminate any bacteria or pests that may have taken up residence.
To soak your driftwood, start by choosing a container that’s large enough to fully submerge the wood. You can use a bathtub or a plastic bin for this purpose. Fill the container with water until the driftwood is fully covered. (See Also: How to Make a Sealant for Aquariums at Home: A Step-by-Step Guide)
You can add a small amount of bleach to the water to help sanitize the wood, but be sure to dilute it properly and avoid using too much. Depending on how dirty the wood is, you may need to soak it for several days or even up to a week. Be sure to change the water daily, and use a soft brush to gently scrub the wood to remove any stubborn dirt or grime.
After soaking, rinse the wood thoroughly with clean water and allow it to dry completely before use. By taking the time to thoroughly clean your driftwood, you’ll not only create beautiful decor pieces but also ensure that they’re safe for use in your home. Incorporating driftwood into your home can add a natural and rustic touch that’s sure to impress.
Step 3: Rinse Driftwood with Water Hose
Driftwood is a versatile material that is great for a variety of DIY projects. However, before you start using it, it’s essential to clean it thoroughly. One of the crucial steps in this process is rinsing the driftwood with a water hose.
Start by placing the driftwood in a large bucket or basin. Then, using a hose with moderate water pressure, rinse the wood thoroughly. Pay close attention to any cracks or crevices where dirt or debris may be trapped.
As you’re rinsing, gently rub the surface of the wood with a soft-bristled brush to help remove any stubborn dirt or grime. Once you’ve thoroughly rinsed the wood, set it aside to dry completely before using it in your project. Remember, cleaning driftwood may seem like a hassle, but it’s essential to ensure that your finished project looks great and stays in good condition for years to come!
Step 4: Optional- Use 1:20 Bleach Water Solution
Driftwood If you’ve gathered driftwood from the ocean or a river, you’ll want to ensure that it’s properly cleaned before using it for crafts or decor. Step four of the cleaning process involves using a 1:20 bleach water solution, which is optional but recommended if you want to completely sterilize the wood. To make the solution, mix one part bleach with 20 parts water.
Be sure to wear gloves and protective eyewear when handling bleach. Submerge the driftwood in the solution for at least 24 hours, but no longer than 48 hours, and rinse thoroughly with fresh water before using. The bleach water solution will remove any remaining dirt or bacteria and help to preserve the driftwood for future use.
Just remember to handle bleach carefully and follow all safety precautions.
Step 5: Rinse Driftwood Thoroughly
After scrubbing the driftwood, it’s time to rinse it thoroughly. Use running water to wash away all the debris and dirt from the surface of the wood. You can also use a bucket of water to rinse the driftwood, but it’s essential to change the water regularly to avoid cross-contamination.
Rinse the driftwood until the water runs clear and there’s no sign of dirt or mud. It’s crucial to remove all the dirt to prevent any bacteria or contaminants from entering your aquarium or terrarium. Skipping this step can cause harm to your aquatic pets or the plants in the terrarium, and it can also create an unpleasant odor in the long run.
Therefore, rinse the driftwood until you’re satisfied that it’s clean, and you can proceed to the next step. Remember, you don’t want the effort you put in cleaning the driftwood to go to waste, so be thorough.
Dry and Prepare for Aquarium
If you’re wondering how to clean driftwood for a freshwater aquarium, it’s essential to know that it’s not just a matter of rinsing it under water and tossing it in the tank. Proper preparation is crucial to ensure that the wood is safe for your aquatic pets and doesn’t negatively affect the water conditions. Firstly, give the driftwood a good scrub with a stiff brush and rinse it under running water to remove any visible dirt or debris.
Then, you’ll want to soak it in a container of water for a few days, changing the water every day to get rid of any tannins that may leach out of the wood and stain the water. If you notice that the water is still discolored after a few days, continue soaking and changing the water until it clears up completely. Lastly, sterilize the driftwood by soaking it in a bleach solution, rinsing it thoroughly, and letting it dry completely before adding it to your aquarium.
By following these steps, you can ensure that your driftwood is ready for use in your freshwater aquarium without any harmful effects.
Air Dry
Air drying your new aquarium equipment is an important step before adding it to your tank. This process will help remove any remaining moisture and prevent the growth of harmful bacteria or mold in your aquarium. To air dry your equipment, simply lay it out on a clean towel or rack and let it dry completely.
This process can take several hours to a day depending on the humidity in your home, so be patient and avoid rushing the process. Once your equipment is dry, it’s important to inspect it carefully for any cracks or damage that may have occurred during shipping or storage. This will ensure that your equipment is in good condition and ready for use in your aquarium.
Remember, taking the time to properly prepare your equipment will help create a happy and healthy environment for your aquatic pets.
Boil Driftwood (Optional)
If you’re looking to add driftwood to your aquarium, you may want to consider boiling it first. While this step is optional, it can help remove any harmful substances or bacteria that might be in the wood. To start, make sure the driftwood is dry, and then give it a good rinse to remove any loose debris or dirt. (See Also: How to Make Custom Aquarium: Tips and Tricks for a Beautiful Tank Setup)
Next, fill a pot with enough water to cover the wood, and bring it to a boil. Once the water is boiling, carefully add the driftwood, making sure it’s fully submerged. Let it boil for at least 30 minutes, or until the water turns a dark brown color.
After boiling, remove the wood from the pot and let it cool completely. Once cooled, you can add it to your aquarium. Boiling driftwood can be especially helpful if you have sensitive or delicate fish, as it can help ensure their health and safety in the tank.
Pre-Soak Driftwood in Aquarium Water
One critical step when preparing driftwood for your aquarium is to pre-soak it in aquarium water. Why is this necessary? Well, driftwood is porous, and soaking it beforehand helps to release any tannins or other natural compounds that could discolor your aquarium water or affect the pH levels in your tank. Not only that, but pre-soaking also helps to remove any dirt, debris, or potential pathogens that may be present on the wood surface.
To pre-soak your driftwood, fill a container with enough aquarium water to completely cover the wood. Then, soak the wood for several days to a week. As the water becomes discolored, change it out with fresh aquarium water until the wood is fully saturated.
Once the soaking process is complete, remove the driftwood and allow it to dry completely before placing it in your aquarium. Doing so will help ensure that the wood is clean and well-prepared for aquarium use, without posing any risk to your aquatic plants or animals.
Final Thoughts
In order to create a natural and appealing environment for your freshwater aquarium, incorporating driftwood as a decoration can be a great choice. However, it’s important to keep in mind that this natural material must be properly cleaned before being added to your aquarium. The best way to clean driftwood for a freshwater aquarium is to start by scrubbing it with a stiff brush and removing any loose bark or debris.
After that, boil the driftwood in water for several hours, changing the water regularly to ensure all tannins are removed. Alternatively, you can soak it in water for several weeks to achieve the same effect, but it may take longer. By properly cleaning your driftwood, you can ensure a healthy and natural environment for your freshwater fish to thrive in.
Conclusion
Cleaning driftwood for your freshwater aquarium can be a daunting task, but with a few simple steps, you can turn that dingy piece of wood into a beautiful addition to your tank. By first soaking the wood to remove any lingering debris and tannins, boiling it to sterilize and eliminate any unwanted toxins, and finally rinsing it thoroughly, you can rest assured that your aquarium’s new adornment is perfectly suitable for your aquatic friends. So next time you’re in the market for some driftwood, remember to take the time to clean it properly, your fish will thank you and you’ll have a stunning feature to admire.
“
FAQs
What is driftwood and why is it used in freshwater aquariums?
Driftwood is a piece of wood that has been washed and deposited onto a shore or riverbank. It is used in freshwater aquariums as it provides a natural and aesthetically pleasing environment for fish and other aquatic creatures.
How can driftwood be cleaned for use in a freshwater aquarium?
To clean driftwood for use in a freshwater aquarium, it should be soaked in hot water for several hours, brushed with a stiff-bristled brush to remove any dirt or debris, and then rinsed thoroughly.
Can any type of wood be used as driftwood in a freshwater aquarium?
No, not all types of wood are safe for use in freshwater aquariums. Only certain types of hardwood that have been properly cured and treated to remove any harmful substances should be used.
What are the benefits of using driftwood in a freshwater aquarium?
Using driftwood in a freshwater aquarium provides a natural and realistic environment for fish and other aquatic creatures. It also helps to balance the pH levels of the water and provides shelter and hiding spots for fish.
Can driftwood be used as a food source for fish in a freshwater aquarium?
No, driftwood should not be used as a food source for fish in a freshwater aquarium. It does not provide any nutritional value and can cause digestive issues if ingested.
What should be done if driftwood starts to rot in a freshwater aquarium?
If driftwood starts to rot in a freshwater aquarium, it should be removed immediately to prevent the spread of harmful bacteria. The water should also be tested for any changes in pH levels or other water parameters.
How often should driftwood be cleaned in a freshwater aquarium?
Driftwood should be cleaned in a freshwater aquarium whenever it starts to look dirty or begins to decay. The frequency of cleaning will depend on the type and size of the driftwood, as well as the number and type of fish in the aquarium.

