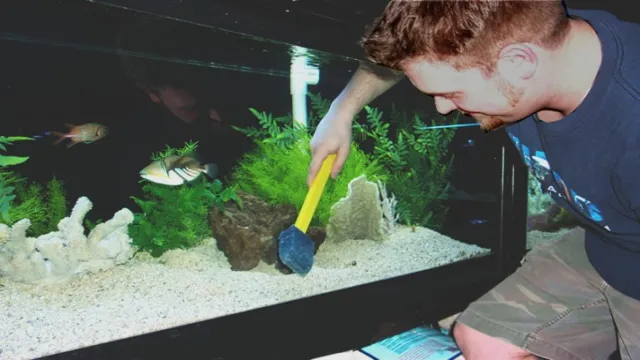
If you’re a fish-keeping enthusiast, then you know the importance of maintaining a clean and healthy living environment for your aquatic pets. However, the task of cleaning saltwater aquarium storage tanks can be quite daunting. You might be wondering where to begin and what products to use without harming your precious aquatic creatures.
Don’t worry, we’ve got you covered! In this blog, we’ll guide you through the steps of how to clean saltwater aquarium storage tanks effectively. We’ll also discuss some tips and tricks on how to keep your tank pristine and healthy for your fish to thrive. Are you ready to take the plunge to ensure that your fish live in a healthy environment? Let’s dive in!
Gather Supplies
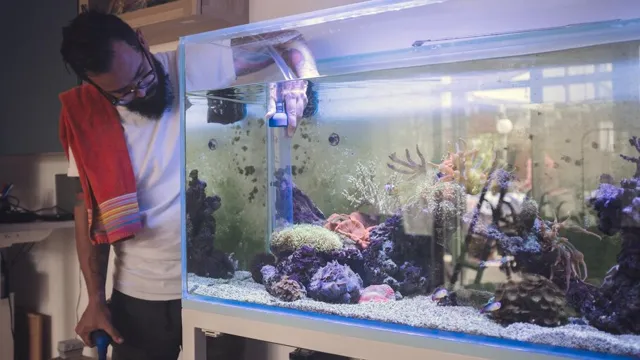
When it comes to cleaning your saltwater aquarium storage tanks, the first step is to gather all the necessary supplies. Firstly, you would need a siphon tube, which will be used to remove debris such as leftover food, dead plants and fish waste from the gravel. You would also need a bucket to collect the dirty water and a scrubbing pad or cleaning brush to clean the sides of the tank.
A water testing kit will help you ensure that the pH, nitrite, nitrate and ammonia levels are optimal. It’s also essential to have a gravel vacuum, which will be used to clean the aquarium’s substrate. Additionally, a water conditioning agent is necessary to neutralize chlorine or other harmful chemicals from tap water.
A magnetic algae scraper tool can come in handy when cleaning the inside of the tank, and a pair of long gloves can protect your skin from the aquarium’s inhabitants and chemicals. By gathering all these supplies, you can ensure your tank remains a healthy and safe environment for your fish and other marine life.
Saltwater-resistant cleaning brush
If you’re looking for a cleaning brush that is resistant to saltwater, then you’ve come to the right place. To start, gather your supplies, such as a stiff-bristled brush and a bucket of soapy water. Make sure the brush is made of materials that won’t be damaged by saltwater like nylon, plastic, or synthetic fibers.
A wooden handle may also be useful as it won’t rust or corrode in saltwater. It’s essential to have a brush that’s specifically designed for use on saltwater surfaces to ensure that it won’t scratch or damage the surfaces you are cleaning. Some brushes are specially made for use on boats, so considering that option may be wise.
Once you’ve got your brush, it’s time to move on to the cleaning process. In summary, when it comes to finding a saltwater-resistant cleaning brush, it’s all about looking for materials that won’t be damaged by saltwater and ensuring that the brush is specifically designed for use on saltwater surfaces. With the correct brush, cleaning your boat or other saltwater surfaces will be a breeze.
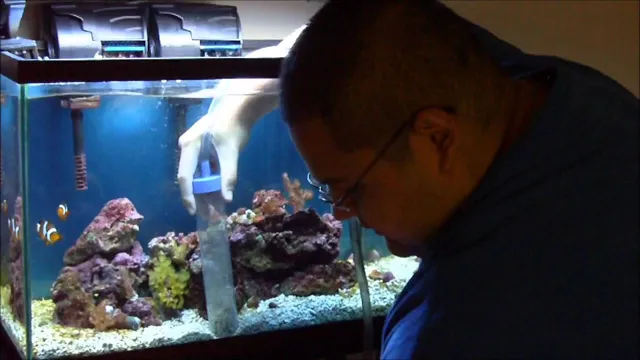
Rubber gloves
When it comes to using rubber gloves, there are a few supplies that you will need to gather. First and foremost, you will need a good pair of rubber gloves that fit comfortably on your hands. These gloves should be made from high-quality materials that are durable and long-lasting.
You’ll also need a cleaning agent to tackle whatever task you’re using the gloves for; whether that’s scrubbing dirt and grime off your floors or washing dishes in hot, soapy water. If you have sensitive skin or allergies, consider choosing gloves made of latex-free or nitrile material. Additionally, keep handy some talcum powder to sprinkle on the inside of the gloves before wearing to prevent unwanted sweat.
By gathering all of these supplies beforehand, you’ll be ready to take on whatever cleaning or household task comes your way!
White vinegar
White vinegar is a wonderful cleaning agent that you may already have in your home. Before you start cleaning with vinegar, gather the necessary supplies. You’ll need white vinegar, water, a spray bottle, and a funnel.
White vinegar has a high acidity level, and when it’s diluted with water, it can tackle many cleaning tasks. A spray bottle is an excellent way to apply the mixture, making it easy to dispense directly onto surfaces without creating a mess. When using a spray bottle, a funnel can be useful for pouring the mixture into the bottle without spilling or wasting any solution.
Once you have your supplies gathered, it’s time to get cleaning!
Bucket
The first step in any bucket project is gathering supplies. Whether you’re planning on using your bucket for gardening, cleaning, or organizing, you’ll need to make sure you have the right tools to get the job done. Start by choosing the right kind of bucket for your needs.
Do you need a large, heavy-duty bucket for hauling rocks or debris, or a smaller one for collecting tools or storing supplies? Once you’ve chosen your bucket, it’s time to gather your tools. If you’re using your bucket for gardening, you’ll want to have gloves, a trowel, a pruner, and maybe even a knee pad for comfort. Cleaning your home with a bucket requires scrub brushes, cleaning cloths, and cleaners.
Whatever your project, be sure to gather all your supplies before getting started, so you can focus on the task at hand without interruptions. By having everything you need within reach, you can work efficiently and effectively, making the most of your bucket project.
Soft towels or rags
When it comes to cleaning, having the right supplies is crucial for getting the job done efficiently and effectively. If you’re tackling a messy project, like wiping down a countertop or cleaning up a spill, it’s important to gather all the necessary supplies before you begin. One essential item you’ll need is either a soft towel or rag.
These can be used to wipe surfaces clean and absorb any spills or messes that might occur. When choosing between a towel or rag, consider the material and thickness of each. A soft towel made from cotton or microfiber is often a good choice for cleaning delicate surfaces like glass, while a thicker cotton rag might be better for handling tougher messes on floors or countertops.
No matter which you choose, make sure it’s clean and free from any debris or dirt before using it to clean. By having the right supplies on hand, you’ll be able to tackle any cleaning project with ease.
Remove Fish and Decorations
If you’re looking to clean your saltwater aquarium storage tank, the first step is to remove all fish and decorations. This will allow you to see any dirt, grime, or debris that has accumulated in the tank. Once the tank is empty, you can start by scrubbing the sides with a soft-bristled brush.
You can also use a scraper to get rid of any tough stains. Be sure to rinse the tank thoroughly with water to remove any leftover dirt or cleaning solution. It’s important to avoid using any harsh chemicals or detergents when cleaning your aquarium as they can harm your fish. (See Also: How to Apply Penn Plax Aquarium Background: Easy Step-by-Step Guide)
By taking the time to properly clean your saltwater aquarium storage tank, you can help keep your fish healthy and happy.
Transfer fish to a temporary tank
If you’re planning on transferring your fish to a temporary tank, the first step is to remove them from their current home along with any decorations. This is important because you want to make sure that the fish don’t get injured or stressed during the transfer process. To begin, turn off all equipment like filters and heaters, and then gently use a net to remove your fish and place them in a clean container.
Be sure to scoop up any decorations, including rocks and plants, as well. Once you’ve safely removed everything from the tank, it’s time to transfer them to their temporary home. Using a clean, separate container, like a plastic tub or bucket, carefully pour the water and the fish into the new vessel.
This process requires some care, but it’s worth it to ensure your fish remain healthy and happy. By taking these steps, you’ll make the move as stress-free as possible and set your pets up for a successful stay in their temporary environment.
Remove decorations and live rocks
Removing decorations and live rocks from your aquarium is an essential step in maintaining a healthy environment for your fish. Before doing so, it is important to remove all the fish from the tank and place them in a safe and suitable temporary home. Once the fish are removed, take out all the ornaments, plants, and live rocks that are present in the aquarium.
This will not only make it easier to clean the tank but will also help get rid of any excess waste or debris that may have accumulated within these items. When it comes to live rocks, they are an essential part of any aquarium ecosystem, as they provide a natural habitat for beneficial bacteria. However, over time, these rocks can become saturated with waste and debris, which could cause harm to your fish.
Therefore, it’s important to remove them from the tank and give them a thorough cleaning before replacing them. In conclusion, removing decorations and live rocks from your aquarium is an important step that should not be overlooked. Not only does it help keep your tank clean and healthy, but it also ensures that your fish have an optimal living environment.
So, do it regularly and enjoy a flourishing aquarium.
Drain the Tank
So, you’ve decided it’s time to give your saltwater aquarium storage tank a good cleaning. Where do you start? The first step is to drain the tank completely. This is important because it allows you to remove any lingering debris or waste that may be stuck on the bottom of the tank.
When draining the tank, be sure to use a siphon tube to remove all of the water. Don’t forget to turn off the filters, pumps, and heaters before you start draining. Once the tank is empty, take the time to inspect the walls and floor for any build-up or stains.
You can use a razor blade to carefully scrape off any stubborn spots. After everything has been cleaned, rinse the tank thoroughly with fresh water to remove all traces of cleaning agents. When the tank is completely dry, you can add fresh saltwater and start adding your fish and other inhabitants.
With proper care and maintenance, your saltwater aquarium storage tank will stay clean and healthy for your fish.
Remove water and any debris
Before starting any tank maintenance, the first step is always to drain the tank. To do this, you’ll need to remove any water and debris that may be inside. You can do this by opening the drain valve and letting all the water flow out.
If there is any build-up in the bottom of the tank, it’s important to remove it as well. This can be done by using a wet/dry vacuum or simply an old rag. It’s essential to do this because if you don’t, any debris or sediment left in the tank can cause water contamination, leading to a range of health problems if ingested.
Additionally, if you’re inspecting the tank for damage, any water left inside can make it difficult to spot and repair any issues that may be present. Remember, the key to a healthy and functioning tank is a thorough cleaning and regular maintenance.
Use saltwater-resistant brush to scrub the tank’s walls
When it comes to maintaining a saltwater aquarium, cleaning the tank is a critical component to ensure the health and longevity of your marine life. One key step in this process is to drain the tank regularly. By completely draining the tank, you can remove any accumulated dirt, debris, or uneaten food that may have settled on the bottom, which can harm your fish if left unchecked.
While the tank is empty, be sure to use a saltwater-resistant brush to scrub the walls and make sure to rinse thoroughly before refilling with fresh saltwater. This will prevent the buildup of algae or other harmful microorganisms that can affect the water quality and, ultimately, the health of your marine life. So, don’t forget to include tank drainage as a part of your routine aquarium maintenance to keep your marine ecosystem thriving and healthy!
Clean the Tank Components
If you have a saltwater aquarium at home, it’s important to keep it clean and maintain its components regularly. One essential step in this process is cleaning the tank components. First, unplug all equipment attached to the tank, including pumps, heaters, and filters.
Next, remove all the components like the filter media, protein skimmers, and impellers. Rinse them thoroughly with warm water, and use a soft brush to scrub off any accumulated debris, salt, and algae. Avoid using soap or harsh chemicals as they may harm the tank’s inhabitants.
Once the components are clean, reassemble them carefully and ensure they are working correctly before plugging in the equipment. Keeping the tank components clean not only ensures the health and well-being of your fish but also helps maintain the water quality and overall appearance of your aquarium.
Soak decorations in white vinegar solution
When it comes to maintaining a clean and healthy fish tank environment, cleaning the tank components is a crucial part of the process. One effective method to clean the decorations in your fish tank is by soaking them in a white vinegar solution. This will help remove any build-up or grime that may have accumulated on the decorations over time.
Simply mix one part white vinegar with two parts water and soak the decorations for at least 15 to 30 minutes. Then, use a soft brush or sponge to gently scrub away any remaining debris. Rinse thoroughly with water before placing the decorations back in the tank. (See Also: How to Delid an Aquarium: Step-by-Step Guide for Proper Maintenance)
This method is not only effective, but it’s also cost-effective and safe for your fish. So why not try it out and see the difference it makes in improving the overall cleanliness and appearance of your fish tank?
Scrub filtration system and pumps with saltwater-resistant brush
If you want to keep your aquarium clean and healthy for your fish, you need to make sure to clean the tank components regularly. One essential step to include in your cleaning routine is scrubbing the filtration system and pumps with a saltwater-resistant brush. Over time, algae and other debris can build up on these components, and the build-up can disrupt the water flow and harm your fish.
By using a brush made for saltwater use, you can scrub away the grime without damaging the equipment. Don’t forget to rinse the cleaner off thoroughly when you finish cleaning to remove any residual chemicals, and to ensure your tank remains safe and healthy for your aquatic pets. Maintaining a clean aquarium is an important part of keeping your fish healthy and happy, so make sure to work this essential cleaning task into your routine.
Taking these small steps will help ensure your aquarium stays clean, clear, and healthy for all your fishy friends!
Clean live rocks with saltwater and a brush
Cleaning the components of your tank is crucial to maintain a healthy and safe environment for your aquatic pets. One of the essential components that should be regularly cleaned are live rocks. These rocks are filled with beneficial bacteria that maintain the tank’s natural balance by breaking down waste and toxins.
However, over time, they can accumulate debris and algae, which may have a detrimental effect on your tank’s water quality. The best way to clean live rocks is by using saltwater and a brush. Saltwater is a natural disinfectant that kills harmful microorganisms without the use of harmful chemicals.
To clean the live rocks, you need to first remove them from the tank and rinse them with saltwater to remove any loose debris. Then, using a brush, gently scrub the rocks to remove any attached algae and debris. Rinse the rocks again in saltwater before returning them to the tank.
By regularly cleaning your live rocks, you can ensure that they continue to provide the necessary biological filtration to keep your tank healthy and thriving.
Rinse and Dry
One of the most important aspects of maintaining a saltwater aquarium is proper cleaning and maintenance of the storage tanks. After using the tanks, it’s crucial to rinse and dry them properly to prevent the buildup of salt and other debris that can harm the aquatic life. First, empty out any remaining water and remove any equipment such as the filter or pump.
Then, rinse the tank thoroughly with fresh water, using a non-abrasive cloth or sponge to remove any remaining residue. Next, allow the tank to air dry completely, ensuring that there’s no moisture left before putting it away for storage. By following these simple steps, you can keep your aquarium tanks clean and ready for future use.
Rinse everything thoroughly with warm water
When it comes to cleaning, ensuring that everything is thoroughly rinsed and dried afterwards is just as important as the cleaning itself. This is especially true for items that come in contact with food or used for personal hygiene. To properly rinse everything, warm water is recommended to help remove any remaining dirt or residue.
This not only ensures that the item is clean but also helps to prevent any potential contamination. Once everything is rinsed, it’s important to dry it off completely. This can be done with a clean towel or by air-drying.
Moisture left on the item can lead to the growth of mold or bacteria, which could be harmful. Whether you’re washing dishes or cleaning your body, make sure to rinse everything thoroughly and dry it off completely to ensure proper hygiene.
Air dry everything and ensure no moisture remains
When it comes to washing your clothes or other items, it’s essential to rinse and dry them properly to prevent mold and mildew from growing. After washing, always give everything a thorough rinse to remove any remaining soap residue. Next, it’s crucial to air dry everything completely to ensure there’s no moisture left.
Leaving items damp can create the perfect environment for mold and mildew to grow, which can be harmful to your health and prolong the drying process. You might be tempted to speed up the drying process by using a machine, but this could damage delicate fabrics or leave behind small lint particles. Instead, hang your items to dry in a well-ventilated area.
With a little patience, you’ll have fresh, clean items that are free from mold and mildew, and you’ll avoid any potential health hazards. So, the next time you’re doing laundry, remember to rinse and dry everything thoroughly to keep your items looking and smelling their best!
Reassemble the Tank
Now that you’ve thoroughly cleaned your saltwater aquarium storage tank using the steps we covered earlier, it’s time to reassemble it. Start by rinsing all of the tank components with fresh water – make sure there’s no residual soap or cleaning solution left behind. Carefully reattach any equipment you removed such as pumps, heaters, and filters, ensuring they are tightly secured in place.
Then, carefully add the cleaned substrate back into the tank, followed by the rocks or decorations. Be sure to arrange them in a way that provides a natural and comfortable environment for your fish and any other aquatic creatures. Finally, refill the tank with clean salt water, and let it sit for a few hours to circulate and establish the appropriate temperature before adding any fish or other livestock.
By following these steps, you’ll have a safe and healthy living space for your aquatic pets.
Place decorations and live rocks back in the tank
Now that you have thoroughly cleaned your tank, it’s time to reassemble your aquatic environment. One of the first tasks is to place decorations and live rocks back into the tank. This is a crucial step as these items help the aquarium mimic the natural environments where underwater creatures thrive.
When choosing decorations, consider the type of fish and plants that will be living in the tank. It’s also important to ensure that the decorations are clean before placing them in the tank. Using a gentle brush and warm water, scrub the objects until all the dirt and algae are removed. (See Also: How to Kill BGA in a Freshwater Aquarium: Tips and Tricks for a Clean Tank)
Live rocks play a significant role in the aquarium’s ecosystem as they help to filter and clean the water. These rocks are often home to a variety of beneficial bacteria that promote a healthy environment. When returning them to the tank, it’s essential to place them in a way that they don’t topple over and damage other items.
With the decorations and live rocks in place, your tank is ready for the next step in the setup process.
Refill with clean saltwater
Now that you’ve thoroughly cleaned your saltwater tank, it’s time to reassemble it and refill it with clean saltwater. First, you’ll want to carefully replace any equipment you removed, such as the heaters, filters, and pumps. Make sure everything is securely in place and properly connected.
Next, it’s time to add the clean saltwater. Start by filling a clean container with fresh water and then adding the proper amount of high-quality salt mix. Once the mix has dissolved, slowly add the water to your tank, being careful not to disturb anything that you’ve already put back in place.
It’s important to monitor the salinity levels as you refill, using a reliable hydrometer or refractometer, to ensure that the new water matches the salinity of the old water. Finally, top off the tank with more clean water until the water level is where it should be. Congratulations, you now have a beautifully reassembled saltwater tank ready for your marine pets to call home!
Return fish to the newly cleaned tanks
Assembling the fish tank back together is a crucial step after cleaning it. Once you have washed everything, it’s essential to ensure that the assembly is done correctly, without any leakage. First, place the base or bottom of the tank and make sure it’s levelled.
Then, assemble the sides and attach the silicone, making sure it’s sealed properly. Once the tank is fully assembled, fill it up with half water and half air to check if there are any possible leaks. After sealing any leakages, fill the tank with water and add the necessary equipment such as a filter, heater, and thermometer.
Then, rinse the plants and decorations and add them to the aquarium. Finally, it’s time to return the fish to their newly cleaned home. Acclimate them to the new water by allowing the bags to float in the water so they can adjust to the temperature and chemical composition of the water.
After some time, slowly integrate the fish to their new tank by adding a small amount of the tank water to their holding container, and repeating this every 10-15 minutes until the water in the container is mostly the tank water. Then, release the fish carefully into their new and refreshed tank. Voila! You now have a clean and healthy environment for your fish to grow and thrive.
Conclusion
In conclusion, cleaning a saltwater aquarium storage tank is essential to maintaining a healthy and vibrant aquatic environment for your beloved fish and corals. Remember to always perform regular maintenance, use the proper tools and products, and keep a watchful eye on any potential issues that may arise. And just like how the ocean is a delicate ecosystem, so too is your aquarium.
With a little patience, diligence, and some cleaning elbow grease, you’ll be able to balance both the beauty and practicality of your saltwater aquarium storage tank – much like a mesmerizing underwater showpiece. Happy cleaning!”
FAQs
What materials do I need to clean my saltwater aquarium storage tank?
To clean a saltwater aquarium storage tank, you will need a water siphon, a scrub brush, a cleaning solution (such as vinegar or specialized aquarium cleaner), and a clean towel or cloth.
How often should I clean my saltwater aquarium storage tank?
It is recommended to clean your saltwater aquarium storage tank once every 2-4 weeks, depending on the size of the tank and the number of fish you have.
Can I use soap or household cleaning products to clean my saltwater aquarium storage tank?
No, using soap or household cleaning products can harm your fish. It is best to use a specialized aquarium cleaner or vinegar and water solution.
How do I remove algae from my saltwater aquarium storage tank?
Algae can be removed from your saltwater aquarium storage tank with a scrub brush or algae scraper. You can also add algae-eating fish or snails to your tank to naturally control algae growth.
Do I need to remove the fish from the tank while cleaning?
It is not necessary to remove the fish while cleaning the tank, but it is important to make sure the cleaning solution is safe for your fish and to keep them away from the area being cleaned.
Can I reuse the water in the tank after cleaning?
Yes, you can reuse the water in your saltwater aquarium storage tank after cleaning as long as it is not contaminated or has any cleaning solution residue.
What is the best way to dry the tank after cleaning?
The best way to dry the tank after cleaning is to use a clean towel or cloth. It is important to make sure the tank is completely dry before refilling it with water and reintroducing the fish.

