Have you ever wanted to add a new filter or pump to your aquarium, but found out that the only way to do it was to cut a hole in the glass? The thought of cutting into your prized possession may be daunting, but fear not! With the right tools, precautions, and technique, cutting holes in aquarium glass can be easier than you think. Think of it like cutting a hole in a sheet of paper. Sure, the paper may be thin and fragile, but with the right tools and precision, you can make a clean cut without tearing the paper apart.
The same goes for aquarium glass – it may be thicker and more delicate than paper, but with the right approach, you can make a hole without causing damage. There are many reasons why you may want to cut a hole in your aquarium glass. Perhaps you want to add a skimmer, install a sump, or create an overflow system.
Whatever your reason may be, the process is similar. It all starts with the right tools and a steady hand. In this blog, we’ll discuss the steps involved in cutting holes in aquarium glass.
We’ll cover the necessary tools, safety precautions, and techniques needed to make a clean cut without damaging your aquarium. So, whether you’re a seasoned aquarium enthusiast or a newbie looking to make some upgrades, read on to learn how to safely and effectively cut a hole in your aquarium glass.
Why Cut Holes in Aquarium Glass?
Cutting holes in aquarium glass is often necessary for adding equipment such as heaters, filters, and aerators to provide the appropriate environment for aquatic life. It may seem daunting to cut glass, but with the right tools and techniques, it can be safely and effectively done. First and foremost, safety goggles and gloves should be worn to protect oneself from the glass shards.
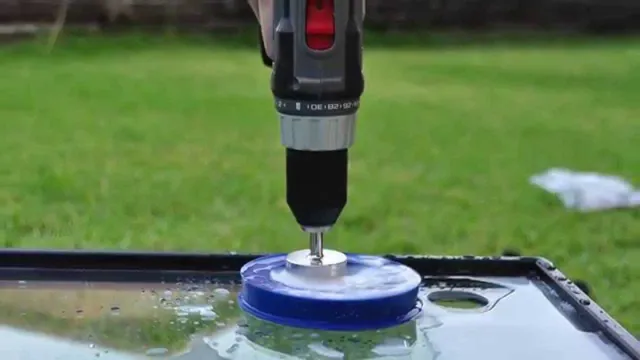
Next, measure and mark the location of the hole on the glass using a marker or masking tape. A diamond hole saw bit can be used with a drill to cut the hole, remembering to constantly apply a lubricant such as water to prevent overheating and cracking of the glass. It’s important to take your time and let the drill do the work to prevent any damage to the glass.
With patience and care, cutting holes in aquarium glass becomes a manageable task to improve the living conditions of your aquatic pets.
Improving Water Circulation
Aquariums require adequate water circulation to maintain a healthy environment for fish and other aquatic creatures. One way to improve water circulation is by cutting holes in the aquarium glass. These holes, also known as overflow holes, can help to increase water flow and prevent stagnant water.
The holes allow water to flow freely across the aquarium and promote a continuous exchange of fresh oxygen and carbon dioxide. This helps to reduce algae growth and prevent the buildup of harmful bacteria in the aquarium. Overall, cutting holes in the aquarium glass is an effective way to enhance water circulation and improve the health of your underwater pets.
Adding Filtration or Equipment
Cutting holes in aquarium glass may seem counterintuitive, but it can actually be necessary for adding filtration or equipment to your tank. Fish tanks require various forms of filtration to maintain water quality and keep fish healthy, and some of these filtration systems require a pump or other equipment to be placed inside the tank. Unfortunately, most aquariums are not designed with holes or openings for these pieces of equipment.
This is where cutting holes in the glass comes in. By creating a hole in the aquarium glass, you can run tubing or wires through it to install equipment. It’s important to note, however, that cutting glass can be dangerous and should be done with caution or by a professional.
Fortunately, there are aquariums designed specifically with holes or openings already in place for easy equipment installation. Whether you choose to cut your own holes or opt for a pre-cut tank, proper filtration and equipment are essential for the health and well-being of your aquatic pets.
Materials Needed
If you’re looking to create a custom aquarium or add some unique features to your existing one, you may need to cut holes in the glass. This can be a daunting task, but with the right materials and techniques, it can be done successfully. Firstly, you’ll need a diamond-tipped drill bit that’s the same size as the hole you want to make.
You’ll also need a silicone lubricant, masking tape, a ruler, and a steady hand. It’s important to take extra precautions when cutting holes in aquarium glass to prevent any cracks or damage to the rest of the tank. Start by marking where you want your hole to be with masking tape and measure the distance between each mark.
Then, apply silicone lubricant to the area you’ll be drilling and slowly start drilling with the diamond-tipped bit. Keep the drill at a 90-degree angle and make sure to take breaks to prevent the glass from overheating. With the right tools and techniques, cutting holes in aquarium glass can be a successful and satisfying DIY project.
Glass Cutter
If you’re planning on working with glass, whether it’s for DIY projects or professional work, having a glass cutter is essential. To get started, you’ll need a few materials to help you along the way. First and foremost, you’ll obviously need a glass cutter. (See Also: How to Make a Big Aquarium in Sims 3: Step by Step Guide and Tips)
There are a variety of glass cutters on the market, including handheld, pistol grip, and oil-fed cutters. You’ll want to choose one that fits your needs and level of experience. Next, you’ll need a steel ruler or straightedge to ensure accurate cuts.
You’ll also need a cutting mat or cardboard to place underneath the glass to prevent scratches and protect your work surface. Lastly, a pair of safety glasses is vital to protect your eyes from any glass fragments that may fly off during cutting. With these materials, you’ll be on your way to successfully cutting glass like a pro.
Masking Tape
When it comes to creating clean lines and sharp edges, masking tape is a go-to for many DIYers and professionals alike. This versatile tape can be used for all sorts of projects, from painting walls and furniture to creating intricate designs on canvases. The materials needed for masking tape work are quite simple: all you need is the tape itself and a clean surface to adhere it to.
However, it’s worth investing in high-quality masking tape to ensure it doesn’t damage the surface you’re working on or leave behind any residue. ScotchBlue™ Painter’s Tape is a popular choice for its clean release and ability to stay in place, even on curved or uneven surfaces. Simply apply the tape, making sure to press it down firmly to prevent any seeping, and start your project.
The tape will protect the areas you don’t want to paint or cover, leaving you with a perfectly clean finish every time. Don’t forget to remove the tape while the paint is still wet to avoid any peeling or tearing. With a little bit of masking tape and the right technique, your projects will look professional-grade every time.
Water Pump
If you’re planning to install a water pump at home or anywhere else, there are certain materials that you’ll need to gather first. Here are some of the most common materials required for installing a water pump. First, you’ll need a pump, which is designed to move water from one location to another.
Depending on your needs, you can choose from a number of pump types, including submersible pumps, jet pumps, and more. Another essential material needed is a pressure tank, which helps regulate the water pressure. It’s also important to have a pressure switch that will automatically turn the pump on and off when the pressure in the tank falls below a certain level.
Other materials that you may need include piping, fittings, valves, and couplings. Make sure you get high-quality materials that are compatible with your pump and that will last you a long time. In summary, when installing a water pump, you’ll need to gather several materials to ensure its proper function.
The main keyword used organically in this paragraph is “water pump.” By choosing the right materials, you can ensure that your water pump will work properly and last for years to come.
Preparation Before Cutting
If you’re looking to add a filter or overflow system to your aquarium, you may need to cut a hole in the glass. Before you grab your tools, it’s important to properly prepare before cutting to avoid any mishaps. First, you’ll want to make sure your aquarium is empty and dry to prevent water damage or accidents.
Next, measure and mark the spot where you want to cut the hole. Use a tape measure and a marker to ensure accuracy and precision. Then, use a diamond drill bit or hole saw to slowly and steadily drill the hole.
It’s important not to rush this process as rushing can cause the glass to crack. Make sure to take breaks to allow the glass and drill bit to cool down. With the proper preparation and tools, cutting a hole in your aquarium glass can be done safely and effectively.
Measuring Hole Size and Placement
When measuring hole size and placement, it’s critical to prepare before cutting. First, ensure you have the proper tools on hand, such as a measuring tape, level, and pencil. Next, double-check your measurements to ensure accuracy – even a small miscalculation can throw off your entire project.
It’s also important to consider the type of material you’ll be drilling into, as different materials may require different drill bits or hole sizes. Take the time to plan out your hole placement and double-check your measurements before you start cutting. Remember, measure twice and cut once! By taking the time to properly prepare, you’ll save yourself time and frustration down the line.
Marking Glass with Masking Tape
When it comes to cutting glass, preparation is key. One way to ensure that your cutting lines are precise is to use masking tape to mark the glass beforehand. To begin, thoroughly clean the glass with a glass cleaner and let it dry completely. (See Also: How to Cause an Ammonia Spike in Aquarium: Tips and Tricks for Fish Health)
Then, take a roll of masking tape and tear off a piece that is slightly longer than the length of the glass that needs to be marked. Place the tape onto the glass, making sure that it adheres firmly and there are no bubbles or creases. Using a marker, draw out the cutting lines on top of the masking tape.
Once you have precisely marked your cutting lines, you are ready to begin cutting. This technique not only ensures accuracy but also allows you to easily see your cutting lines without damaging the glass. So, whether you are creating custom glass pieces or simply making repairs, marking glass with masking tape is an excellent way to ensure that your project goes smoothly from beginning to end.
Cutting the Hole
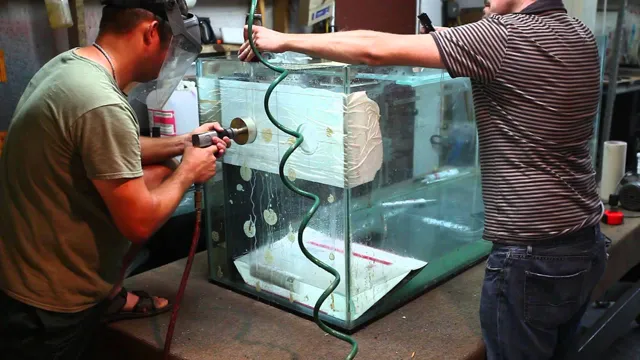
Cutting a hole in an aquarium glass can be a daunting task, but it is not impossible. The first step is to mark the spot where the hole will be cut using a marker. Then, you will need to choose the right tool to do the job.
A diamond-tipped hole saw is the most recommended one as it works well for glass and is less likely to shatter it. Before starting to cut, make sure that the glass is securely clamped down so that it doesn’t move around during the process. Begin by drilling a pilot hole and slowly increasing the size of the hole saw until the desired size is achieved.
It’s essential to keep the glass lubricated with water to prevent overheating and cracking. Once the hole is cut, use a file to smoothen the sharp edges, and you can now install the filter or any other accessory you need. Cutting a hole in an aquarium glass may seem tricky, but with the right tools and technique, it can be done with ease, making maintenance and customization of your aquarium a breeze!
Positioning the Glass Cutter
When it comes to cutting holes in glass, the positioning of the glass cutter is crucial. First, ensure that the glass is secure and won’t move around while cutting. Next, place the glass cutter at the desired starting point, making sure it’s perpendicular to the glass’s surface.
Apply firm and consistent pressure while cutting along the marked line. It’s important to keep the glass cutter lubricated with oil to prevent it from getting stuck as it moves along the glass. Cutting a hole in glass can be intimidating, but with the right technique and tools, it’s a manageable task.
Whether you’re creating a custom aquarium or adding a window to a project, the key is to take your time and be patient. With practice, you’ll quickly master the technique and be on your way to creating precise and beautiful glass creations.
Applying Pressure to Score the Glass
When it comes to cutting holes in glass, it’s all about applying pressure in the right way to score the glass. This can be a challenging process, but with the right tools and techniques, anyone can do it. To start, you’ll need a glass cutter that has a diamond tip.
This will allow for precise cuts that won’t shatter the glass. Next, you’ll need to measure and mark the spot where you want the hole to go. Once you have your mark, you can begin applying pressure to the glass with the diamond tip.
It’s important to use consistent pressure and to make multiple passes to ensure that the scoring is deep enough. Once you have a deep score line, you can use a glass breaker to carefully apply pressure to the scored area and break out the circle. Remember to wear gloves and eye protection during this process to ensure your safety.
With a little patience and practice, you’ll be cutting perfect holes in glass in no time.
Breaking the Glass Along the Scored Line
Cutting a hole in glass can be a daunting task, but with the right tools and techniques, it can be accomplished safely and efficiently. To begin, you’ll need a glass cutter and a ruler or straight edge to mark the area where the hole will be. Make sure to apply even pressure when scoring the glass along the marked line, and avoid stopping and starting in the middle of the cut as this can cause the glass to break unpredictably.
Once the line is scored, use a tapping motion to break the glass along the scored line, being careful to avoid putting too much pressure in one spot. With the glass broken along the scored line, you can then smooth out the edges with sandpaper and use diamond-tipped drill bits to create the hole in the desired size. Remember to wear protective gloves and eye wear, and take your time to ensure a clean and precise cut.
With practice and patience, cutting a hole in glass can be a rewarding and enjoyable task. (See Also: How to Check Water Quality of Aquarium: A Step-by-Step Guide for Healthy Fish)
Post-Cutting Care
Congratulations! You just cut a hole in your aquarium glass! Now, it’s time to take care of the post-cutting process to ensure your fish have a safe and healthy home. First, use a fine-grit sandpaper to smooth the edges of the hole. This will prevent any injuries to your fish or snags on their fins.
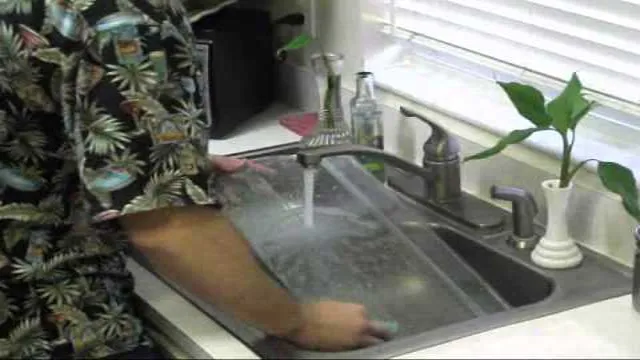
Next, clean the glass with a cloth and water to remove any debris or dust leftover from the cutting. If the hole is near the waterline, you can use silicone to seal the edges and prevent any leaks. Keep an eye on the hole for the next few days to make sure there are no leaks or changes in water levels.
With proper post-cutting care, your aquarium will be a beautiful and functional home for your aquatic pets!
Filing and Sanding the Edges
After cutting your material to the desired shape, it is important to give attention to the edges to ensure a clean and polished finish. This can be achieved by filing and sanding the edges. Using a file, start at one end of the edge and file in one direction until you reach the other end.
Be sure to apply even pressure and check the edge periodically to ensure that it is straight and flat. Once all the rough edges have been filed away, switch to sanding using a fine-grit sandpaper. Sand the edge in the same direction as the filing until it is smooth to the touch.
Remember to wear protective gear when filing and sanding to avoid injury and always dispose of the metal shavings and leftover debris safely. Taking the time to file and sand the edges after cutting will not only enhance the appearance of your project, but it will also ensure that it is safe to handle.
Cleaning Glass Shards and Debris
Cleaning up after breaking glass can be a tedious and dangerous task. It’s crucial to take caution and properly dispose of any broken pieces to prevent any injuries or damages. When cleaning up glass shards and debris, it’s best to wear gloves to avoid cuts or punctures.
Start by using a broom and dustpan to remove any larger pieces of glass. Then, use a damp paper towel or cloth to carefully pick up any smaller glass fragments. Be sure to dispose of the glass in a puncture-resistant container and place it in a garbage bin.
If there are any tiny glass particles left behind, try using a strong adhesive tape to pick up any pieces. It’s important not to use a vacuum cleaner as it can spread the glass and create further hazards. With these precautions in mind, cleaning up glass shards and debris can be done safely and efficiently.
Conclusion
Cutting holes in aquarium glass can seem like a daunting task, but with the right tools and techniques, it can be done with ease. Whether you’re adding a new filtration system or just creating a unique environment for your aquatic friends, having the ability to cut precise holes in glass is a valuable skill. So, grab your glass cutter, put on some soothing aquarium sounds, and dive into the process.
When it comes to aquarium glass, the only limit is your own creativity (and maybe a few physics laws). Just remember, safety first – no one wants to end up soaking wet or with a tank full of fish and shattered glass! Happy cutting!”
FAQs
1. How do you safely cut holes in aquarium glass? A: You can safely cut holes in aquarium glass using a diamond-tipped drill bit. It is important to wear protective gear and work slowly to avoid damaging the glass. 2. What tools do I need to cut holes in aquarium glass? A: You will need a diamond-tipped drill bit, a drill, masking tape, and water to cool and lubricate the drill bit during the process. 3. What size holes should I cut in aquarium glass for filters and heaters? A: The size of the hole will depend on the filter or heater you are using, but a general rule of thumb is to make the hole slightly larger than the diameter of the device. 4. Can I cut holes in tempered aquarium glass? A: No, you cannot cut holes in tempered aquarium glass as it will shatter. Only non-tempered glass can be cut for this purpose. 5. Can I cut holes in curved aquarium glass? A: It is possible to cut holes in curved aquarium glass, but it requires specialized equipment and expertise. It may be best to consult a professional for this task. 6. What is the best way to clean the hole after cutting it in aquarium glass? A: You can use a razor blade or sandpaper to remove any sharp edges or burrs from the hole. Make sure to rinse the glass thoroughly before adding it to your aquarium. 7. How do I prevent the drill bit from slipping while cutting holes in aquarium glass? A: Place a small piece of masking tape over the spot where you want to drill the hole. This will help the drill bit stay in place and prevent slipping.

