Drilling out an aquarium may seem like a daunting task, but with the right tools and a few easy steps, it can be done quickly and efficiently. Whether you need to add a new filter system or create a custom piece for your aquatic pets, drilling out your aquarium is essential. So, how do you drill out an aquarium? In this guide, we’ll walk you through the steps you need to take to successfully and safely drill out your aquarium.
Get ready to transform your tank into the perfect habitat for your fish and other aquatic pets.
Materials Needed
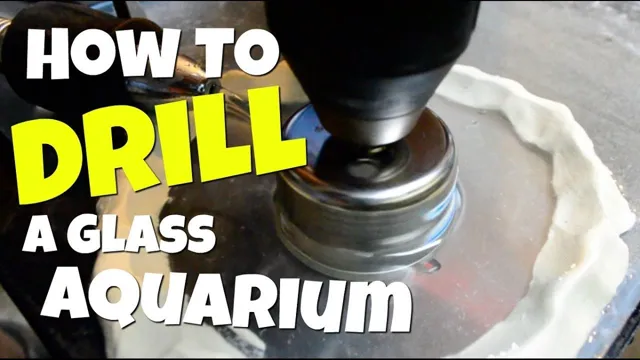
In order to drill out an aquarium, certain materials are necessary to ensure safety and accuracy. Firstly, a diamond-coated hole saw is ideal for drilling through the glass and avoiding shattering. This can be found at hardware stores or online.
Next, a power drill with variable speeds is crucial to avoid overheating the glass and causing cracks. It’s also important to have a spray bottle on hand to constantly cool the glass with water while drilling. Additionally, safety equipment such as gloves and eye protection must be worn during the process.
These materials will ensure that the drilling process goes smoothly and without any accidents. With the right tools and precautions in place, drilling out an aquarium can be a successful and rewarding DIY project.
Example: Glass aquarium, power drill, diamond drill bit, duct tape, goggles, water
If you’re looking to create a unique and impressive fish tank, you’ll need a few materials to get started. First and foremost, you’ll need a glass aquarium in the size and shape you prefer. Next, you’ll need a power drill equipped with a diamond drill bit to make holes in the glass.
Be sure to wear goggles to protect your eyes while drilling. Once you’ve drilled the necessary holes, you can use duct tape to secure any cords or tubing to the outside of the tank. Finally, fill the tank with water and add your aquatic plants and fish.
With these materials in hand, you’ll have a beautiful and functional fish tank that is sure to impress anyone who sees it. So, what are you waiting for? Let’s start building!
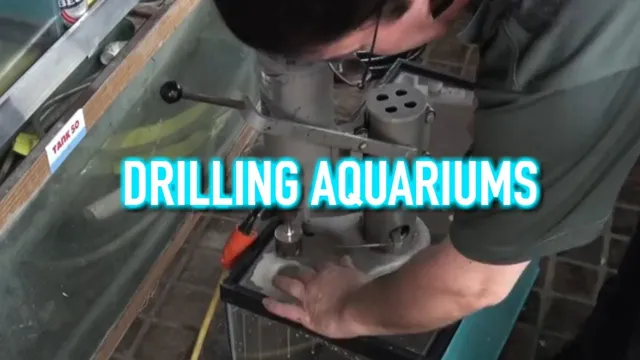
Step 1: Use Duct Tape to Create a Guide
If you’re looking to drill out an aquarium, there are a few steps you’ll need to follow to avoid any mishaps or potential disasters. First, start by using duct tape to create a guide for where you want to drill. This guide will ensure that your drill stays in place and doesn’t wobble or slip while you’re drilling.
Simply measure out the spot where you want to drill and create a square with the duct tape. Then, use a marker to mark the exact center of the square. This will be where you drill your hole.
By creating this guide, you can ensure that your hole is straight and centered, which can be crucial for certain types of aquariums or fish. Once you’ve created your guide, you’re ready to move on to the next step and start drilling. Remember, taking the time to create a guide can save you a lot of frustration and expense in the long run!
Example: Place the duct tape in the desired spot for the hole and mark the center with a non-permanent marker
When you’re trying to make a precise hole, using duct tape as a guide can be a real lifesaver. Here’s how you can use duct tape to make a guide for your hole. First, choose a spot where you want to make the hole, and place a strip of duct tape over it.
Make sure the tape is flush against the surface and that there are no wrinkles or bubbles. Next, take a non-permanent marker and mark the center of the hole on the tape. This will serve as your guide, and you can adjust it as needed to make sure you get the hole in precisely the right spot.
Once you’ve marked the center of the hole, you can remove the tape and get ready to make your cut. With this simple trick, you’ll be able to make precise holes with ease. Try it out the next time you need to make a hole and see what a difference it can make.
Your DIY projects will thank you for it! (See Also: How to Clean Artificial Plants in Aquarium: Essential Tips for Spotless Aquatic Decor)
Step 2: Put on Safety Gear
When it comes to drilling out an aquarium, it’s crucial to always put on the necessary safety gear. This includes wearing gloves and eye protection to shield yourself from any potential debris that may fly out while drilling. Safety should always be the top priority, and you don’t want to risk any injuries that could have been prevented by simply taking a few minutes to put on protective gear.
Although aquarium glass is relatively strong, it can be prone to breaking or cracking if you apply too much pressure or drill at the wrong angle. So, take the necessary precautions and gear up before beginning the drilling process to ensure a safe and successful project. By keeping yourself protected, you reduce the risk of injury and can focus all your attention on the task at hand.
Remember to stay focused, and don’t rush the process, as safety is key to ensuring the longevity of your aquarium.
Example: Goggles should be worn to protect eyes from glass fragments and water may be needed for cooling the drill bit
When it comes to drilling into surfaces, safety should be a top concern. That’s why step 2 of any drilling process involves putting on the necessary safety gear. Goggles are a must when drilling into any material that can produce tiny flying glass fragments, such as tiles or mirrors.
The last thing anyone wants is a piece of glass in their eye! So, to protect your vision, make sure to wear a good pair of goggles before starting the drilling process. Additionally, water may be needed to cool the drill bit when drilling through certain surfaces, like concrete or metal. Cooling the drill bit is crucial to preventing it from overheating and causing damage to the tool or creating a safety hazard.
It’s important to keep in mind that safety gear is not an optional extra when it comes to drilling; it’s a vital component that should never be ignored. By prioritizing the use of goggles and appropriate cooling techniques, you can greatly reduce the risk of accidents and ensure a safe and successful drilling experience.
Step 3: Begin Drilling
Now that you have all the necessary tools and safety equipment ready, it’s time to start drilling your aquarium. We recommend using a diamond drill bit, as it’s known for its durability and hardness, ensuring that it won’t chip or crack your glass aquarium. Begin by slowly and gently drilling a small hole where you marked the spot with your marker.
Then, gradually increase the pressure on the drill until you start to feel the bit making contact with the glass. Be patient and take your time as you carefully drill through the glass. Remember to add water or a lubricant to the hole to keep the bit cool and prevent it from overheating.
When drilling any aquarium, safety should always be your top priority. Ensure that you’re wearing eye protection, gloves, and work in a well-ventilated area. You don’t want to harm yourself or any of your aquatic pets during the process.
With the right equipment and caution, however, drilling your aquarium can be a simple and successful DIY project.
Example: Start by gently drilling in the center of the guide and gradually increase pressure until the hole is complete
When it comes to drilling, it’s important to start off on the right foot. As you begin drilling, it’s crucial to go slow and easy before picking up speed. Starting in the middle of the guide, apply light and gradual pressure, making sure to keep the drill perpendicular to the surface.
As the bit starts to bore into the material, you can slowly increase the pressure and pick up the pace. Remember to keep the drill bit lubricated with oil or a cooling agent to prevent overheating and damage to the bit. Don’t rush the drilling process, as it can lead to mistakes and accidents.
It’s much better to take your time and finish the job correctly. With a bit of patience and careful attention to detail, you’ll have a perfectly drilled hole in no time. (See Also: How to Get Rid of Aquarium Leeches: A Comprehensive Guide for a Clean and Healthy Tank)
Step 4: Clean and Check Hole
When drilling out an aquarium, the next step is to clean and check the hole you’ve made. Using a damp cloth or sponge, wipe away any debris or dust left from drilling. Make sure the edges of the hole are smooth and even, without any sharp or jagged edges that could harm your fish or plants.
If you notice any defects or weaknesses in the glass, it’s essential to address them before adding water to your aquarium. You don’t want to risk a burst or leak, as this could cause significant damage to your home and put your aquatic pets in danger. So, take the time to thoroughly examine the drilled hole and the surrounding glass to ensure it’s safe and ready for water.
With a little care and attention to detail, you’ll be on your way to creating a beautiful and functional aquarium that you and your fish can enjoy for years to come.
Example: Use water to rinse the area and carefully check that there are no cracks or damage around the hole
After successfully drilling a hole, it’s time to clean and check the area around the hole. Cleaning the area is necessary to remove debris that may have been created in the drilling process. Using water to rinse the area is the simplest and easiest way to do this.
Once the area is clean, it’s time to check for any cracks or damage that may have occurred. This is important because it can affect the integrity of the hole and lead to bigger problems down the road. It’s recommended to carefully inspect the area by running your hands over it and using a flashlight to check for any cracks or damage.
Take your time during this step, as it’s essential to ensure that the area is safe and secure. By following these steps, you can ensure that your hole is clean and safe, ready for whatever purpose you intended. Remember, safety should always be a top priority when drilling holes.
Step 5: Add Necessary Accessories
After drilling out your aquarium, it’s important to add the necessary accessories to make sure your fish thrive in their new home. One essential accessory is a filter, which helps to keep the water clean and free from harmful bacteria. There are several types of filters to choose from, so it’s essential to pick the right one for your tank size and water flow.
Additionally, you’ll need a heater to maintain the temperature of the water, as most fish require specific temperatures to thrive. Thermometers are another accessory that can help you monitor the temperature and ensure that your fish are comfortable. Finally, live plants, rocks, and ornaments can provide hiding places for fish and create a natural environment for them to thrive.
Don’t forget to add lighting to your tank, as it can help your plants grow and highlight the beauty of your fish. By adding these accessories, you’ll have a well-equipped aquarium that will provide a beautiful and healthy home for your fish!
Example: Install necessary accessories such as bulkheads or tubing using silicone or other adhesive specifically designed for aquarium use
When setting up your aquarium, it’s essential to add necessary accessories like bulkheads or tubing to help maintain proper water flow and filtration. Silicone or other adhesives specifically designed for aquarium use should be utilized to ensure a secure and safe installation. These materials are made to withstand the harsh water conditions and won’t harm the aquatic animals or plants in your tank.
Think of it like building a house; you wouldn’t use regular glue to hold the walls together, would you? The same principle applies when setting up your aquarium. Using the appropriate adhesive will help prevent leaks and potential disasters, creating a stable and healthy environment for your aquatic inhabitants. Remember, small details like this can make a big difference in the overall success of your aquarium.
So, take your time and make sure everything is properly installed before adding any animals or plants to your tank.
Conclusion
In conclusion, drilling out an aquarium may seem like a daunting task, but with the right tools and techniques, it can be accomplished easily. Just remember to take your time, use steady pressure, and always wear protective gear. With a little patience and some elbow grease, you can transform your aquarium into a custom masterpiece.
Happy drilling!” (See Also: How to Clean Aquarium Filter Media: Tips and Tricks for a Healthy Fish Tank)
Example: Drilling an aquarium is a delicate process that requires precision and careful attention. By following these steps and using the correct materials, you can successfully drill an aquarium for your desired accessories.
Once you’ve successfully drilled your aquarium, it’s time to add the necessary accessories to make it functional and aesthetically pleasing! The first thing to consider is the type of filter you’ll use. There are a variety of filters available on the market, including hang-on-back, canister, and sponge filters. Choose the one that best suits your needs, and make sure it is properly installed and in working order.
Next, you’ll want to add a heater to regulate the temperature of the water. Depending on your aquarium’s size and desired temperature range, you may need to use more than one heater. Finally, you can add decor and plants to add visual interest to your aquarium.
Plants not only look great, but they also provide oxygen and a place for fish to hide. Be sure to choose plants that are suitable for your aquarium size, lighting conditions, and water parameters. With these accessories in place, your aquarium will be a thriving, beautiful aquatic ecosystem!
FAQs
What tools do I need to drill a hole in my aquarium?
To drill a hole in your aquarium, you will need a drill, a glass hole saw, a hose, and a water source.
Can I drill any type of glass aquarium?
No, not all glass aquariums can be drilled. Only aquariums made of tempered or annealed glass can be drilled.
How do I prevent the glass from cracking while drilling?
To prevent the glass from cracking while drilling, use a slow, steady drilling motion and keep the glass lubricated with water.
How big of a hole can I drill in my aquarium?
The size of the hole you can drill in your aquarium depends on the thickness of the glass. Generally, a hole up to 1 inch in diameter can be drilled in a standard aquarium.
Do I need to empty my aquarium before drilling?
It is recommended to empty the aquarium before drilling to avoid any water damage or accidents during the drilling process.
Can I drill multiple holes in my aquarium?
Yes, multiple holes can be drilled in an aquarium, but it is important to plan and measure carefully to ensure the holes are in the correct position and do not weaken the glass.
How do I install a bulkhead in the hole I drilled?
To install a bulkhead in the hole you drilled, insert the bulkhead gasket and nut onto the threaded end, and tighten the nut until it forms a tight seal on the aquarium glass.

