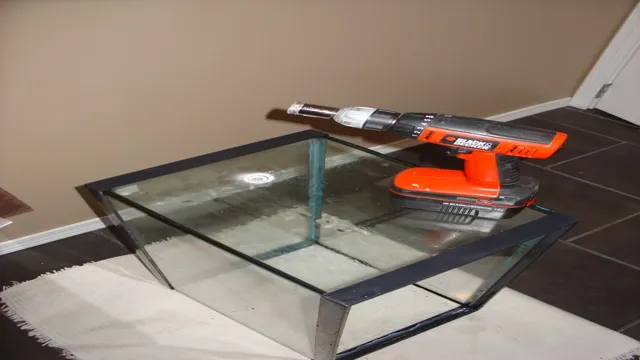
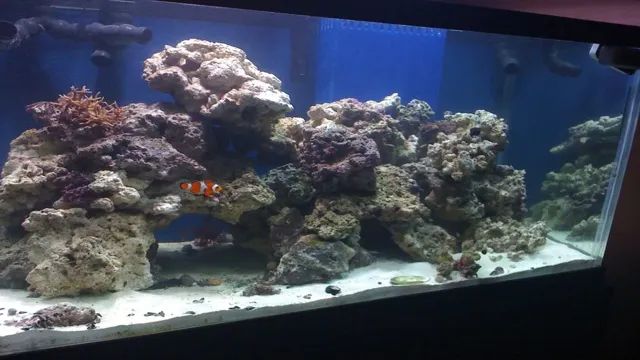
Do you love aquariums but feel limited by the sizes and shapes available at pet stores? Have you ever considered drilling your own aquarium? It may seem intimidating at first, but with a little guidance, drilling your own aquarium can be a fulfilling project that results in a custom-made tank. In this step-by-step guide, we’ll show you the tools and techniques needed to create a personalized aquarium that fits your unique vision. Whether you’re dreaming of a wall-mounted tank or a freestanding centerpiece, drilling your own aquarium can open up a whole new world of possibilities.
So, grab your drill and let’s dive in!
Why Drill Your Own Aquarium?
Drilling your own aquarium may seem like a daunting task, but it can actually be a rewarding and practical solution for many fish owners. By drilling your own tank, you can customize the placement and number of filtration systems, improve flow, and create a more natural environment for your aquatic pets. This can also save you money in the long run, as pre-drilled tanks often come with a higher price tag.
However, drilling your own aquarium does require some preparation and knowledge. You’ll need the right tools, such as diamond hole saws, and you’ll need to carefully plan and mark out the holes. It’s also important to work slowly and carefully to avoid cracking or damaging the glass.
Overall, with some research and caution, drilling your own aquarium can be a fulfilling and beneficial project for both you and your fish.
Benefits of Drilling Your Own Aquarium
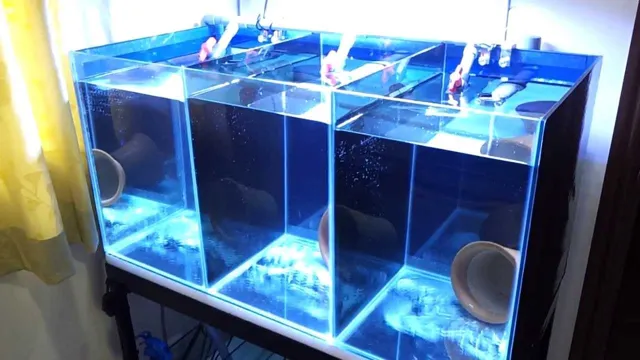
Drilling your own aquarium can provide several benefits, making it a popular choice among aquarium enthusiasts. First and foremost, it allows for a more efficient and effective filtration system. By drilling the aquarium, you can install an overflow box that sends water to a sump, where the water is filtered, aerated, and free of debris.
This ensures a cleaner and healthier environment for your aquatic pets. Additionally, drilling your own aquarium provides flexibility in designing your setup. You can customize the placement of equipment and accessories based on your specific needs.
This also allows for a more aesthetically pleasing setup as wires and tubing can be hidden from view. Moreover, drilling an aquarium can increase the overall water volume, improving the stability of the tank’s environment. Overall, drilling your own aquarium provides versatility and functionality, making it a worthwhile investment for aquarium enthusiasts.
What You Need to Drill Your Own Aquarium
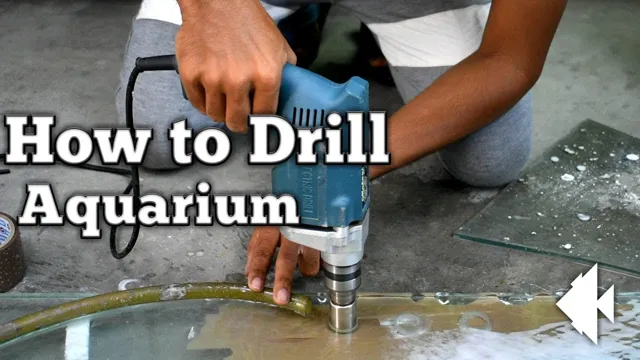
If you’re looking to add a custom overflow, sump, or other plumbing to your aquarium, you may need to drill your own holes in the glass. While this task may sound daunting, it can actually be done with a few simple tools and some elbow grease. First, you’ll need a specialized drill bit designed for drilling through glass or tile.
You’ll also need a source of water to keep the bit cool and lubricated during the drilling process. It’s important to take your time and apply consistent pressure to the drill as you work, ensuring that the bit doesn’t overheat and crack the glass. With a little practice and patience, you can create perfectly sized holes for your aquarium plumbing needs.
Just remember to measure twice and drill once, and always wear appropriate eye and hand protection. Happy drilling!
Tools and Materials
To drill your aquarium, you’ll need a few essential tools and materials. First and foremost, you’ll require a drill. For drilling glass, diamond-tipped drills work best.
They come in various sizes, so make sure you pick the right one based on your aquarium’s glass thickness. A mask and safety goggles are also necessary to prevent any glass dust or debris from getting into your eyes or lungs. Additionally, you’ll need a lubricant to keep the drill bit from overheating and breaking.
Water is commonly used, but there are specialized lubricants available that may work better. Lastly, silicone sealant is critical for creating a watertight seal around the hole you’ve drilled. Without it, your aquarium could leak, potentially leading to disaster.
By acquiring and using these tools and materials, you’ll be well on your way to drilling your own aquarium with ease.
Safety Precautions
When it comes to drilling your own aquarium, there are a few safety precautions that you definitely need to keep in mind. First and foremost, it’s important to take all the necessary safety measures to protect yourself from any potential harm. This means wearing proper safety gear such as gloves, safety glasses, and ear protection.
You will also want to ensure that the area is well-ventilated as drilling can produce a lot of dust and debris. Next, it’s important to use the right type of drill and drill bits for the job. It’s recommended to use a diamond-coated drill bit as it is much stronger and durable than other types of bits. (See Also: How to Make Hard Water Soft in Aquarium: 5 Simple Steps)
Finally, make sure to take your time and go slowly while drilling so that you don’t crack or damage the glass. By following these safety precautions, you can safely and successfully drill your own aquarium without any incidents.
Preparing Your Aquarium for Drilling
Drilling your own aquarium can be a daunting task, but with the right tools and preparation, it is a great way to add custom features to your tank. The first step in preparing your aquarium for drilling is to ensure it is completely empty and clean. Any fish, plants, or rocks need to be removed to avoid damage during the drilling process.
Once your aquarium is empty, measure and mark where you want the hole(s) to be located. It’s important to use a high-quality glass or tile drill bit, as this will prevent the glass from cracking or shattering while drilling. Always wear eye protection and go slow to avoid excess heat and pressure on the glass.
Before drilling, create a dam around the drill site using plumber’s putty or duct tape to maintain a pool of water. This will help keep the glass cool and reduce the risk of damage. With careful preparation and attention to detail, drilling your own aquarium can be a rewarding and exciting project to take on!
Measuring and Marking the Hole
Preparing your aquarium for drilling requires some precise measurements and markings to ensure a successful outcome. Before drilling, it’s essential to decide where you want the hole to be located, and then measure carefully to mark the spot. This ensures that the hole is in the right place and that it lines up perfectly with any overflow boxes or bulkheads that you want to install.
You can use a marker or a small piece of tape to mark the exact location where the drill bit will penetrate the glass. Make sure to double-check all your measurements and markings before drilling to avoid any mistakes. This can save you a lot of time, money, and frustration in the long run.
Proper preparation is key to achieving a successful drilling outcome and creating a beautiful aquarium ecosystem in your home.
Cleaning the Glass
When preparing your aquarium for drilling, it’s important to start with cleaning the glass. This may seem like a simple task, but it’s critical to ensure that the drilling process goes smoothly. Begin by using a scraper or razor blade to remove any excess algae or debris from the glass.
Follow up with a good cleaning solution and a soft cloth to get rid of any remaining dirt or grime. It’s important to use a solution that is safe for aquariums and won’t harm your fish or plants. Once the glass is completely clean, you can move on to marking out where you want to drill your holes.
Taking the time to properly prepare your aquarium will make the drilling process much easier and help ensure a successful outcome.
Drilling Your Aquarium
If you’re looking to add some customization to your aquarium, drilling it can provide you with new possibilities for filtration, sump configuration, or even adding an overflow box. It may sound intimidating, but with the right tools, it’s a surprisingly simple process. Here’s how to drill your own aquarium: first, decide on the drilling location and mark it with tape.
Then, use a diamond hole saw to drill the hole, taking care to go slowly and steady to avoid cracking the glass. Don’t forget to add water to the drilling area to keep it cool! Once the hole is drilled, you can attach bulkheads or other necessary fittings. However, it’s important to remember that drilling your aquarium does come with risks, and it’s important to take careful precautions and use appropriate safety equipment.
But with a little bit of patience and a steady hand, drilling your aquarium can open up endless possibilities for customization and personalization.
Choosing the Right Bit
When drilling your aquarium, it’s important to choose the right bit to avoid any damage to the glass or injury to your aquatic inhabitants. The most common type of bit used for aquarium drilling is a diamond-coated hole saw bit. This type of bit is specifically designed to cut through glass and has a diamond coating that makes it tougher than traditional steel bits.
It’s important to get the right size bit for your project as well, as a bit that is too small or too large can cause problems in the drilling process. Additionally, it’s important to use plenty of lubrication during the drilling process to keep the bit cool and prevent any cracking or shattering of the glass. With the right bit and proper technique, drilling your aquarium can be a breeze and open up opportunities for custom filtration systems and unique aquascaping designs.
Drilling Techniques
Drilling techniques are used to create holes in the aquarium for various reasons, including installing filtration systems, heaters and pumps, or creating a custom overflow. Before drilling, it is important to ensure that the aquarium is made of tempered glass and is free from any cracks or chips that could cause it to shatter during the process. The drilling process involves using a diamond-encrusted drill bit and a water-cooled drill to prevent the glass from overheating and cracking. (See Also: How to Get to Sydney Aquarium by Ferry: A Hassle-Free Guide for Tourists.)
It is important to take measures to ensure the accuracy of the hole placement and to avoid drilling too close to the edges of the glass. Once the hole is drilled, it is important to properly clean and prepare the area before installing the equipment. With proper drilling techniques, aquarium owners can create a customized and efficient aquarium setup.
Finishing the Hole
Now that you’ve successfully drilled a hole into your aquarium, it’s time to finish it up and make it functional. The first step is to smooth out any rough edges around the hole using sandpaper or a file, as jagged edges can be harmful to your fish. Next, you’ll need to insert a bulkhead fitting into the hole, which will provide a secure connection for your plumbing.
It’s crucial to make sure the fitting is tight to avoid any leaks. Once the bulkhead fitting is in place, you’ll need to attach your plumbing, such as a PVC pipe, to the fitting using a sealant. Make sure to let the sealant dry completely before adding any water to the tank.
With these final steps, your DIY drilled aquarium is now ready for use! Congratulations on a job well done.
Smoothing the Edges
When it comes to drilling holes, finishing them off is just as important as starting them. The edges of a hole can be rough and jagged, which can make it difficult to insert screws or other hardware. This is where smoothing the edges comes in.
To finish off a hole, you’ll need sandpaper or a file to smooth the rough edges. Sandpaper is great for small holes, while a file can be used for larger holes. Start by sanding or filing the edges until they’re smooth and free of any roughness or burrs.
By doing this, you’ll create a clean and even surface, making it easier to insert screws or other hardware, and giving your project a polished and professional finish.
Cleaning Up the Glass Shards
After replacing a broken window, the next step is to clean up the glass shards left behind. Glass fragments can be harmful if not handled properly, so it’s important to use protective gloves and eyewear. Begin by picking up any visible pieces and vacuuming the area thoroughly.
Then, use a piece of bread to pick up any remaining grains of glass. Press the bread onto the floor, and it will grab any missed crystals. Once all glass fragments are removed, it’s time to finish the hole.
First, measure the size of the hole and cut a piece of glass to fit it. Spread a thin layer of clear silicone caulking around the edges of the hole, and gently press the new piece of glass into place. Smooth out any excess caulk and let it dry completely.
Once dry, use a scraper to remove any remaining caulking residue, and the window will be as good as new. Remember, safety comes first, and don’t hesitate to seek professional help if needed.
Installing Your Equipment
When it comes to setting up your aquarium, drilling the tank may be necessary for installing filtration devices or plumbing systems. Although it may seem daunting, drilling your own aquarium is actually a straightforward process if you have the right equipment and follow the proper steps. First, gather all the materials you will need, including a diamond drill bit, a drill, a template (either purchased or homemade), water to lubricate the drill bit, and masking tape to mark the drill site.
Once you have everything prepared, attach the template to the designated spot on the tank and secure it with masking tape. Next, slowly begin drilling into the glass, making sure to keep the bit lubricated with water and to regulate the pressure applied to the drill. Once the hole is formed, remove the template and check for any rough or jagged edges that will need to be smoothed out with sandpaper.
With a little bit of patience and attention to detail, drilling your own aquarium can be a successful endeavor that opens up a world of possibilities for your aquarium setup.
Fitting the Bulkhead
When it comes to fitting the bulkhead on your boat, there are a few key things to keep in mind. First and foremost, it’s important to make sure that all of your equipment is properly installed and secured before you begin. This includes things like wiring, plumbing, and any other components that will be attached to the bulkhead.
Once everything is in place, you can begin the process of actually fitting the bulkhead itself. This will typically involve measuring and cutting the bulkhead to the appropriate size, as well as ensuring that it fits securely into place. Depending on the type of boat you have, you may also need to seal or caulk the edges of the bulkhead to prevent water from getting in. (See Also: How to Grow Moss in Freshwater Aquarium: A Comprehensive Guide for Beginners)
With a bit of patience and attention to detail, however, you can quickly and easily install the bulkhead and get your boat ready for whatever adventures lie ahead.
Attaching the Plumbing
When it comes to installing your plumbing equipment, attaching the plumbing is a crucial step that should be done with precision and care. Start by selecting the right type of fitting or valve for the job, ensuring that it is compatible with the pipes and the equipment you are installing. Once you have the right fittings, the next step is to connect the pipes and the equipment using a wrench or pliers to tighten the connections.
Take care not to over-tighten the fittings, as this can cause leaks or damage to the equipment. It’s also a good idea to test the connections by turning on the water and checking for any leaks or drips. If everything looks good, you can proceed with the rest of the installation process.
With the right tools and the right approach, attaching the plumbing can be an easy and stress-free task that will provide you with reliable and efficient plumbing equipment that will last for years to come.
Conclusion: Enjoy Your Newly-Drilled Aquarium!
Drilling your own aquarium can be a daunting task, but with the right tools and a little patience, anyone can do it. Whether you’re looking to add a sump system, create an overflow, or just add a unique touch to your aquarium, drilling is a great option. Just remember to take your time, measure twice, cut once, and always wear eye protection.
And just in case things don’t go as planned, make sure you have a solid backup plan for your fishy friends. With these tips in mind, you’ll be drilling like a pro in no time. So go ahead, let your creativity flow and create an aquarium that’s truly one-of-a-kind!”
FAQs
Why would someone want to drill their own aquarium?
Drilling your own aquarium allows for better filtration, custom plumbing, and more efficient water flow.
What tools are needed to drill an aquarium?
You will need a drill with a diamond-coated drill bit, a template for drilling, a level, and safety equipment such as gloves and eye protection.
How do you determine where to drill the aquarium?
The placement of the hole depends on the desired plumbing setup, but most commonly it is drilled on the back or bottom of the tank.
What type of sealant should be used for drilling an aquarium?
A marine-grade sealant such as silicone is recommended for creating a watertight seal around the drilled hole.
Can any type of aquarium be drilled?
Not all aquariums can be safely drilled, so it is important to research and ensure that your specific tank is compatible with drilling before attempting.
How long does it take to drill an aquarium?
The time it takes to drill a tank can vary depending on the size and thickness of the glass, but it typically takes several hours to complete.
What precautions should be taken when drilling an aquarium?
Safety precautions should be taken, such as wearing gloves and eye protection, as well as thoroughly researching and understanding the drilling process to avoid damaging the aquarium.

