Have a leak in your acrylic aquarium? It can be a stressful and frustrating experience. Not to worry, though – with some patience and a bit of perseverance, you can fix the problem and have your aquarium looking and functioning like new. First, it’s important to locate the leak.
You can do this by filling the tank with water and keeping an eye out for any drips or seepage. Once you’ve located the source of the problem, it’s time to get to work. Fixing an acrylic aquarium leak is a delicate process that requires a steady hand and some specialized materials.
Thankfully, there are a few tried-and-true methods for repairing leaks in your aquarium. For smaller leaks, you can use a commercial adhesive specifically designed for acrylic aquariums. These are easy to find at your local pet store or aquarium supply shop.
Just apply the adhesive to the affected area and let it dry according to the manufacturer’s instructions. For larger leaks, you might need to get more creative. Some aquarists swear by DIY fixes involving silicone sealant or even duct tape.
While these methods are not foolproof and should be approached with caution, they can be effective in a pinch. Some hobbyists even go so far as to use acrylic weld-on, a type of solvent that chemically bonds the acrylic together. No matter which method you choose, it’s important to take your time and approach the repair process with care.
Rushing through can lead to further damage or even more leaks down the line. With the right materials and a little bit of elbow grease, you can save your acrylic aquarium and get back to enjoying your underwater world.
Identifying the Leak
If you’ve noticed water seeping out of your acrylic aquarium, it’s important to address the issue immediately to prevent any further damage or potential fish fatalities. First, you’ll need to identify where the leak is coming from. One common area for leaks is at the seams, which are the areas where the panels of acrylic join together.
Check for any visible cracks or gaps in these areas. Another possibility is a leak from a drilled hole, such as for a filter or a pump. Inspect these areas closely for any signs of damage.
Once you’ve identified the location of the leak, you can start taking steps to fix it and ensure the safety of your aquatic pets.
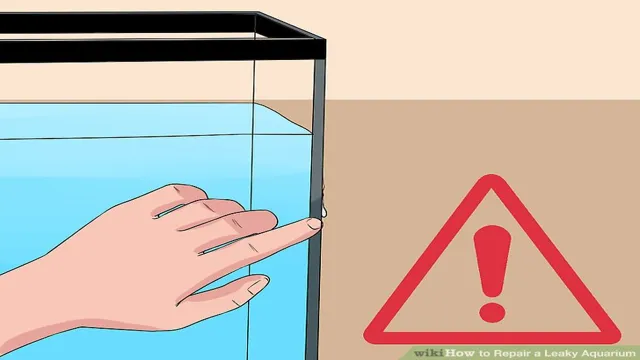
Check for water drops and bubbles on the surface of the tank
When it comes to identifying a leak in your aquarium, one of the most important things to look for is any water drops or bubbles on the surface of the tank. This is a tell-tale sign that there is a leak somewhere. The source of the leak could be anywhere from the tank itself to the filtration system or even the tubing and connections.
It’s important to locate the source of the leak as quickly as possible to avoid any damage to your aquarium and the surrounding area. One of the most common reasons for a leak in an aquarium is due to a crack or break in the tank’s glass or acrylic. This can happen for a variety of reasons, including improper handling, accidental impacts, or even just regular wear and tear.
Additionally, leaks can also occur due to faulty equipment or improper installation. It’s important to check all equipment and connections regularly to ensure that everything is working properly and any issues are addressed promptly. If you notice any water drops or bubbles on the surface of the tank, the first thing you should do is stop feeding your fish and turn off any equipment that is running.
This will help prevent any further damage while you locate and address the leak. Once you have isolated the source of the leak, you can take steps to repair or replace any damaged equipment, connections, or the tank itself. Ultimately, the key to preventing leaks in your aquarium is regular maintenance and inspections.
By checking your equipment and connections regularly, you can catch any potential issues before they turn into a major problem. With a little bit of diligence and care, you can keep your aquarium in top condition and provide a safe and healthy environment for your underwater pets.
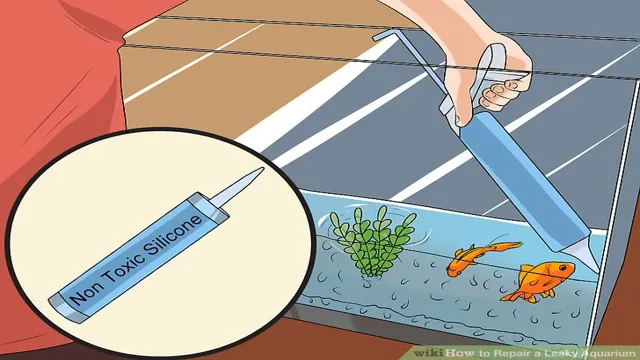
Look for cracks or scratches on the tank walls
If you suspect that your fuel tank is leaking, the first step in identifying the problem is to look for cracks or scratches on the tank walls. This can be done by carefully inspecting the exterior of the tank for any signs of damage. It’s important to note that even small cracks or scratches can lead to a leak, so be thorough in your inspection.
Once you have identified the location of the leak, you can determine the best course of action for repairing it. Depending on the severity of the damage, you may be able to patch the leak with a sealant or you may need to replace the entire tank. Regular inspection of your fuel tank can help prevent leaks and other potential issues, ensuring that your vehicle or equipment operates smoothly and safely. (See Also: How to Build a Labyrinth Aquarium – Easy DIY Guide for Aquatic Enthusiasts)
Remember, it’s always better to be proactive than reactive when it comes to maintaining the integrity of your fuel tank.
Removing the Water
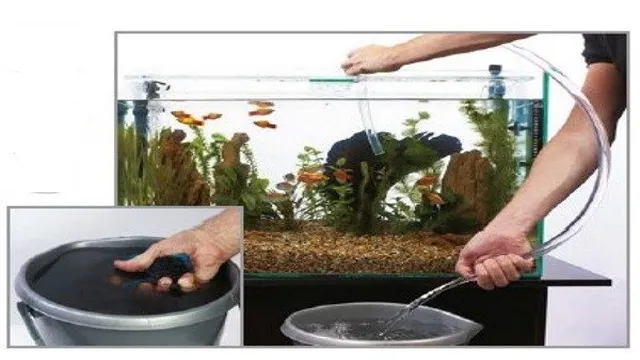
If you have encountered a leak in your acrylic aquarium, the first step is to remove all the water. This may seem like a daunting task, but it is crucial to prevent further damage to your aquarium. The easiest way to remove the water is to use a siphon or a pump.
Simply place one end of the siphon or pump into the aquarium and the other end into a bucket or drain. Once you have removed all the water, you can then begin to assess the damage and determine how to fix the leak. Remember to handle the acrylic with care, as it is prone to cracking and breaking.
With a careful and systematic approach, you can fix the leak and get your aquarium up and running again in no time.
Turn off all power and unplug any electrical components from the tank
When preparing to remove the water from your tank, the first step is to turn off all power and unplug any electrical components connected to the tank. This important safety measure protects you and your equipment from potential hazards during the water removal process. Once you’ve taken these steps, it’s time to begin draining the tank.
Depending on the size and shape of your tank, you may need to use a sump pump to suction out the water, or you may be able to simply open a drain valve. Whatever method you choose, make sure you have a place to direct the water. You don’t want to create a mess or cause damage to your property.
If you’re unsure about the best way to remove the water from your tank, consult with a professional or seek advice from a trusted source. By following these guidelines, you can safely and efficiently remove water from your tank and get back to using it for its intended purpose.
Drain the water completely from the tank
If you want to clean your water tank effectively, you need to start by removing all the water from it. This is a critical step to ensure that your tank is free from debris, sediment, and bacteria. To do this, you should turn off the water supply that runs from the tank, and then open the valve at the bottom of the tank.
As gravity takes effect, the water will flow out of the tank through the valve and into a nearby drain or bucket. It’s important to make sure that all of the water has been drained from the tank, as leaving even a little bit of water behind can create breeding grounds for bacteria. You can check if there’s any remaining water in the tank by shining a flashlight inside.
Once you’ve confirmed that all the water is removed, you can move on to the next step in cleaning your tank. Remember, removing the water is crucial to maintaining the quality of your tank’s water supply, so take the time to do it properly.
Patch the Leak
So, you’ve come across a leak in your acrylic aquarium. Don’t worry, it’s not the end of the world. Acrylic aquariums are prone to leakage, and it’s not uncommon to find a small crack or hole here and there.
However, it’s essential to patch the leak as soon as possible to prevent any further damage to your aquarium and the fish inside. Begin by identifying the source of the leak. You can do this by completely draining the tank and allowing it to dry.
Once it’s dry, you can look for any visible cracks or holes. Clean the area around the leak, ensuring that there is no dirt or debris in the way. Apply an acrylic adhesive with a syringe or a caulking gun, ensuring that the adhesive covers the entire area around the leak.
Allow the adhesive to dry for a couple of days before refilling the tank. Voila! Your aquarium’s leak has been fixed, and your fish will remain happy and safe.
Use an acrylic cement to fill in the crack or hole
One of the best ways to patch a leak is to use an acrylic cement. This material is perfect for filling in any cracks or holes that might be causing the leak. Acrylic cement is a type of sealant that is great for withstanding water, so it works perfectly for repairing any leaks in your pipes or basement. (See Also: How to Make a Toad Habitat in an Aquarium: A Step-by-Step Guide for Beginners)
It is easy to use and can be applied with a simple putty knife. One of the best features of acrylic cement is that it dries quickly and can be painted over. You can also sand it down if needed to achieve a smooth surface.
When using acrylic cement, make sure to wear protective clothing and gloves as it can be irritant to the skin. In summary, using acrylic cement to patch a leak is a cost-effective and simple solution that can save you from a lot of headaches in the future.
Apply the cement using a syringe or small brush
Applying cement using a syringe or small brush can be an effective way to patch a leak in your household items. A syringe can be used to apply the cement precisely and without making a mess, while a small brush can help you spread the cement evenly across the whole surface. If you’re dealing with a small hole in your wall, using a syringe can make the process a lot easier.
You can fill the syringe with the cement and apply it with as much force as necessary to ensure that the cement is filling the hole. A brush is also a more precise tool and can be great for applying cement to larger areas. Whether you’re dealing with a leaky pipe or a small crack in your wall, using a syringe or small brush can be a quick and effective way to patch the leak.
So next time you’re fixing a household item, give it a try and see how much easier it can be!
Let it dry for at least 48 hours before refilling the tank with water
If you’ve discovered a leak in your water tank, you’ll want to patch it as soon as possible to prevent further damage and potential flooding. The first step is to locate the leak, which can often be found by visually inspecting the tank for any cracks, holes, or gaps. Once you’ve determined the exact location, you’ll need to clean and dry the area around the leak using a cloth or sponge.
Depending on the size and severity of the leak, you may be able to fix it by simply applying a patch with a sealant or epoxy. However, for larger or more complex leaks, you may need to seek professional help. After patching the leak, it’s crucial to let the sealant dry for at least 48 hours before refilling the tank with water.
This will ensure that the patch properly sets and prevents the leak from reoccurring. By taking these steps, you can effectively and efficiently repair a leak in your water tank and avoid any further complications or damages.
Preventing Future Leaks
Acrylic aquariums may be prone to leaks during their lifespan, but there are a few things you can do to prevent them from happening in the future. Firstly, always ensure that your aquarium is placed on a flat and stable surface, and never on uneven ground or near a source of heat or cold. Secondly, regularly inspect your aquarium for signs of damage or wear, such as scratches or cracks, and replace any damaged components as soon as possible.
Additionally, avoid overstocking your aquarium with too many fish and overfeeding them, as excess waste can create a strain on the tank’s filtration system and increase the risk of leaks. By following these simple steps and being mindful of your aquarium’s condition and environment, you can help to prolong its life and prevent leaks from occurring. And if you do notice any signs of a leak, such as water stains or pooling, be sure to take immediate action to fix the issue, using a suitable sealant or contacting a professional to assist with repairs.
Regularly inspect the aquarium for any cracks or damage
Regular inspections are a crucial part of preventing future leaks in your aquarium. A crack or damage can quickly turn into a big problem if left unaddressed. It is essential to inspect your aquarium regularly to ensure that it is in good condition.
Check for any cracks or other damage that may have occurred since the last inspection. Even small cracks can lead to big problems over time if left unchecked. If you do find any damage, it is important to take care of it as soon as possible.
Once you have inspected your aquarium, make sure to clean it regularly to ensure that it stays in excellent condition. By regularly inspecting and cleaning your aquarium, you can avoid potential leaks and ensure that your fish have a healthy environment in which to thrive. So, make it a habit to check your aquarium regularly for any cracks or damage to prevent future leaks.
Avoid placing heavy objects on the tank or moving it frequently
When it comes to extending the life of your tank and preventing future leaks, it’s essential to avoid placing heavy objects on it or moving it frequently. Tanks are often made of durable materials, but they can still be susceptible to cracks and leaks if placed under too much pressure or moved around too often. By keeping heavy items off the tank and minimizing how much you move it, you can prevent any unnecessary wear and tear on the tank, which can lead to costly repairs and replacement down the line.
Think of your tank like a bottle of wine – it requires care and stability to maintain its integrity and quality over time. By taking simple precautions like not storing heavy items on it or keeping it in one stable location, you can ensure your tank lasts for years to come without any issues. (See Also: How to Feed Zooplankton Aquarium and Keep Your Tank Clean)
Use soft sponges or cloths to clean the tank instead of abrasive materials
If you want to prevent future leaks in your aquarium tank, one of the best things you can do is use soft sponges or cloths to clean it instead of abrasive materials. While it may be tempting to scrub away at algae or grime with a rough brush or scouring pad, doing so can actually damage the seals and create tiny fissures that can become larger over time. Soft cloths or sponges, on the other hand, are gentle enough to remove most buildup without causing any harm to the tank itself.
Plus, they won’t leave behind any scratches or marks that could weaken the glass or acrylic. So next time you’re cleaning your aquarium, reach for a soft sponge or cloth instead of a harsh scrubbing tool – your tank (and your wallet) will thank you in the long run!
Consider purchasing a silicone or rubber mat to place under the aquarium
When setting up an aquarium, it’s important to take preventative measures against potential leaks. One effective way to do this is by purchasing a silicone or rubber mat to place underneath the aquarium. Not only can this help to prevent water damage to your floors or furniture, but it can also provide a stable surface for the aquarium.
These mats are designed to be durable and long-lasting, with the ability to absorb shock and reduce noise. By investing in a quality mat, you can help ensure the safety and longevity of your aquarium and prevent any future leaks. So, why take chances when a simple solution such as a rubber mat can offer peace of mind?
Conclusion
So, there you have it – a witty and clever explanation on how to fix an acrylic aquarium leak! While a leak in your aquarium may seem like a daunting task to tackle, it can be easily fixed with a little bit of patience, a few tools, and the right technique. With these steps in mind, you can get your aquarium back up and running in no time, while impressing your fish with your handy DIY skills. So don’t let an acrylic aquarium leak get you down- instead, grab your sealant and get to work! “
FAQs
What are the common causes of acrylic aquarium leaks?
The common causes of leaks in acrylic aquariums may include, but not limited to, improper installation of plumbing equipment, scratches on the acrylic surface, and over-tightened fittings.
Can acrylic aquarium leaks be fixed?
Yes, acrylic aquarium leaks can be fixed. The leaking area can be patched with acrylic cement or silicone sealant, or it can be replaced entirely if the damage is severe.
How do I locate the source of the leak in my acrylic aquarium?
To locate the source of the leak, you can fill the aquarium with water and observe where the water is coming out. Alternatively, you can use a sheet of paper to run along the seams to detect any wet spots.
How long does it take to fix a leak in an acrylic aquarium?
The time it takes to fix a leak in an acrylic aquarium depends on the severity of the leak. A minor leak that requires only patching or resealing can be fixed within a few hours, while a major leak that requires replacing the panel may take a few days.
Can I prevent acrylic aquarium leaks?
Yes, you can prevent acrylic aquarium leaks by ensuring proper installation of plumbing equipment, avoiding abrasive cleaning materials, and inspecting the acrylic surface for scratches regularly.
What safety precautions should I take when fixing an acrylic aquarium leak?
When fixing an acrylic aquarium leak, you should always wear protective gloves and eye gear. Ensure the room is well-ventilated and avoid using any flammable materials near the aquarium.
Should I hire a professional to fix my acrylic aquarium leak?
If you are unsure of how to fix an acrylic aquarium leak or if the damage is significant, it is advisable to hire a professional. This will ensure that the job is done correctly and avoid any further damage to your aquarium.

