Aquariums are an excellent way to add an aquatic vibe to your home decor, and nothing can elevate the look of an aquarium quite like a beautiful background. A stunning backdrop in your fish tank can transform the look of your aquatic setup and add more depth and vibrancy to your underwater world. However, one issue that many aquarium owners often face is that the backgrounds tend to peel off or come loose over time.
It can be quite frustrating to watch your carefully crafted aquarium background fall to the bottom of the tank! But don’t worry, in this blog post, we’ll show you how to make your aquarium backgrounds stick for years to come. Whether you’re a beginner or an experienced aquarium hobbyist, we’ve got you covered. So let’s dive into the nitty-gritty details of how to make your aquarium background stick and give your aquatic pets the stunning home they deserve!
Preparation Steps
Are you tired of your aquarium background peeling off? There are a few preparation steps to ensure that your aquarium background will stick and stay in place. Firstly, ensure that your aquarium’s glass is clean and dry. Any dirt or moisture can reduce the adhesive’s effectiveness, resulting in peeling.
Secondly, measure the aquarium background to fit the aquarium correctly. Cutting it too large or small can make it challenging to apply and may cause unwanted wrinkles or bubbles. Thirdly, use a credit card or squeegee to apply the adhesive evenly, smoothing out any bubbles.
Lastly, be sure to press down firmly on the edges and corners to secure the background firmly in place. With these preparation steps, your aquarium background should stay in place and contribute to a beautiful, aesthetic aquarium.
1. Clean the Tank Walls
When preparing to clean your fish tank, the first step is to make sure you have all the necessary tools. One of the most important tools that you will need is a scraper or algae pad to clean the walls of the tank. Before you start cleaning, you should turn off all the electrical equipment in the tank and remove any decorations and plants.
This will make it easier for you to clean the walls without damaging any of the items in the tank. Once the tank is empty, you can start cleaning the walls. Use a scraper or algae pad to remove any algae or other debris that may have accumulated on the walls.
Be careful not to scratch the glass, as this can cause irreparable damage to the tank. Once you have finished cleaning the walls, you can rinse them with water to remove any remaining debris. By taking the time to prepare properly and clean the tank walls thoroughly, you can ensure that your fish will have a clean, healthy environment to live in.
2. Dry the Tank Walls
To properly prepare a fish tank for new occupants, it’s important to dry the tank walls. This helps remove any excess moisture that may have collected during cleaning and provides a clean surface for the new water and gravel. To dry the tank walls, you can use a clean towel or cloth to wipe down the interior of the tank, paying special attention to the corners and edges where water tends to accumulate.
It’s also a good idea to leave the tank in a warm, dry area for a few hours to air out and ensure all moisture has evaporated. Properly drying the tank will prevent bacteria and mold growth, which can be harmful to your fish, and provide a clean, healthy environment for your aquatic pets to thrive. So, take the time to properly dry your tank before adding new fish to ensure their health and longevity. (See Also: How to Adjust CO2 Rate in Your Aquarium to Ensure Optimal Plant Growth)
Application
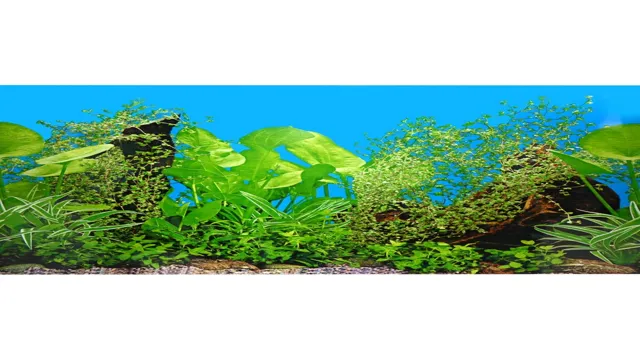
If you’re a fish tank enthusiast, it’s important to create a scenic environment for your beloved aquatic pets. However, after buying an aquarium background, you may have experienced some difficulty in getting it to stick. Luckily, there are a few easy steps you can take to remedy this issue.
Firstly, make sure that the tank is thoroughly cleaned of any dust or grime on the back panel. Next, apply a fine mist of water to the tank’s backside, creating a damp surface for the background to adhere to. Additionally, consider using double-sided tape or aquarium-safe adhesive to help secure the background in place.
Finally, let the background sit for a few moments to ensure that it is fully stuck before filling the tank with water. Following these steps should ensure that your aquarium background stays in place and creates a beautiful aquatic atmosphere.
1. Measure and Cut the Background
When applying a background to your project, the first step is to measure and cut it to the appropriate size. This ensures that it will fit perfectly and look professional. Start by measuring the area where the background will be applied.
Use a ruler or measuring tape to get exact measurements of length and width. Then, use these measurements to cut the background material to size. It’s important to use sharp scissors or a rotary cutter to get clean, precise cuts.
If you’re using a large piece of material, you may want to enlist the help of a friend to hold it steady while you cut. Once the background is cut to size, apply it to your project surface using your preferred adhesive method. With a little patience and attention to detail, your background will be the perfect addition to your project.
2. Apply the Adhesive
When applying the adhesive, it’s important to follow the instructions carefully to ensure the best hold possible. First, make sure the area is clean and dry so that the adhesive can bond properly. Then, apply the adhesive according to the manufacturer’s instructions.
This may involve spreading the adhesive evenly over the entire area or applying it in small dots. It’s important not to use too much adhesive, as this can cause it to ooze out and create a mess. Once the adhesive is applied, make sure to press the surfaces together firmly to ensure a good bond.
If you’re working with a particularly heavy or difficult material, you may need to use clamps or other tools to hold the surfaces in place while the adhesive sets. Overall, taking the time to properly apply the adhesive will help ensure a strong and long-lasting bond that can withstand even the toughest conditions.
3. Install the Background
When it comes to customizing your computer, changing the background is one of the easiest and most popular ways of personalizing your device. It’s a simple process and can instantly make your computer feel more like you. To change your background, you’ll need to open the Settings app or Control Panel and find the Personalization section. (See Also: How to Clean Fallen Food at Bottom of Aquarium: Tips and Tricks for a Sparkling Tank)
Once you’re there, you’ll be able to browse through a selection of pre-installed backgrounds or upload your own. If you want to make your own background, you can use a photo editing application to create a picture that is the right size for your screen. This will ensure that your background looks sharp and is properly aligned.
With a few clicks, you’ll have a custom background that reflects your style and personality.
Tips for Success
If you’re an aquarium enthusiast, you know how important it is for your aquarium background to stick. No one wants to see a backdrop slipping and falling in their aquarium. Thankfully, there are some tips you can follow to ensure a secure and long-term hold for your aquarium background.
Firstly, make sure the back of your tank is clean and free of any dust or debris. This will ensure good adhesion for the background. Secondly, use a quality adhesive like double-sided tape or silicone.
Be sure to apply it to the entire back of the background, including the corners and edges. Lastly, allow the adhesive to set for at least 24 hours before filling the tank with water. This will ensure that the background is firmly attached and won’t budge.
By following these simple tips, you can enjoy a beautiful and secure backdrop for your aquarium.
1. Use a Wallpaper Brush
When it comes to wallpapering a room, using a wallpaper brush can make all the difference in achieving a flawless finish. Here are some tips for success. First, start by selecting a high-quality brush with soft bristles.
This will ensure that the brush doesn’t leave any marks or streaks on the wallpaper. Additionally, make sure to use gentle, sweeping strokes when applying the wallpaper paste or smoothing out the wallpaper. Avoid pressing too hard or using a back-and-forth motion, which can cause the wallpaper to tear or wrinkle.
Finally, be patient and take your time. Wallpapering can be a time-consuming process, but rushing through it will only lead to mistakes and frustration. By using a wallpaper brush and following these tips, you can achieve professional-looking results that will enhance the beauty and style of your space. (See Also: How to Bake Soil for Aquarium: A Step-by-Step Guide to Create The Perfect Substrate)
2. Ensure Proper Alignment
Proper alignment is crucial when it comes to the success of any project. Whether you are working with a team of people or tackling a task on your own, it is important to ensure that everyone is on the same page. Alignment means identifying goals and ensuring that everyone is working towards achieving them.
This is where communication plays a key role. It is essential to communicate with your team or clients, set goals, and divide the tasks based on their strengths and weaknesses. Proper alignment helps avoid confusion and ensures that everyone is working towards a common goal.
In the end, the success of your project will greatly depend on how well you align with your stakeholders. So, be sure to take the time to discuss and clarify your goals to ensure everyone is in sync.
Conclusion
In conclusion, getting your aquarium background to stick can be a sticky situation indeed. But fear not, with a little creativity and resourcefulness, your aquarium can have the backdrop of its dreams. Whether you opt for the DIY approach with double-sided tape and sheer determination, or the more high-tech solution of using a specialized aquarium adhesive, there’s no need to let a slipping background spoil your aquatic fun.
So get sticking, get creative, and let your fishy friends swim in style!”
FAQs
1. How can I make my aquarium background stick without it falling off? – One way to ensure your aquarium background sticks is by cleaning the glass with rubbing alcohol before attaching the background. You can also use double-sided tape or a silicone adhesive to secure it in place. 2. Can you use regular tape to attach an aquarium background? – It is not recommended to use regular tape as it may not hold up against the moisture and humidity in the tank. Instead, opt for aquarium-specific adhesive products like double-sided tape or silicone. 3. My aquarium background keeps peeling off, what should I do? – You can try re-applying the adhesive or using a stronger adhesive product. You should also make sure the glass is clean and free of any residue that may prevent the adhesive from sticking properly. 4. Can I use wallpaper as an aquarium background? – It is not recommended to use wallpaper as it may contain harmful chemicals that can be harmful to aquatic life. It may also deteriorate quickly in an aquatic environment and require frequent replacement. 5. How do I remove an aquarium background without damaging the glass? – You can use a heat gun or hair dryer to heat the adhesive, making it easier to remove the background. Be careful not to apply too much heat as it can damage the glass. Gently peel off the background and use rubbing alcohol to remove any remaining adhesive residue. 6. What is the best type of background to use for a saltwater aquarium? – A natural-looking background that mimics the look of a coral reef or rock formation is best for a saltwater aquarium. This can include 3D backgrounds or custom-painted backgrounds that match the tank’s decor. 7. How can I create a DIY aquarium background? – You can use materials like Styrofoam, aquarium-safe silicone, and acrylic paint to create a custom background. There are many tutorials available online to guide you through the process.

