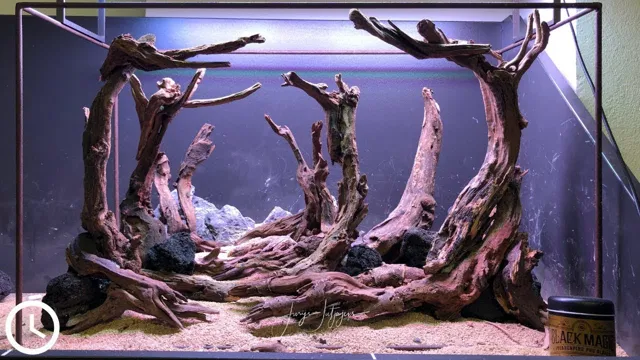
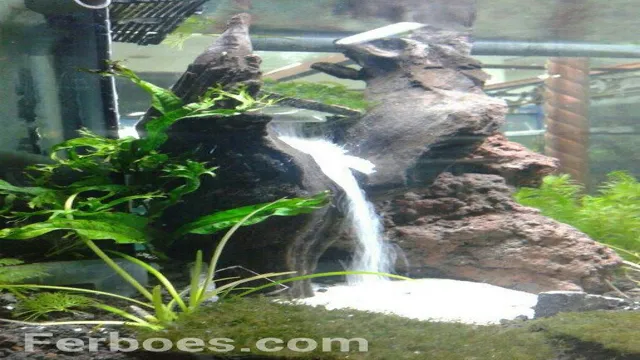
Are you looking for a unique way to enhance the visual appeal of your aquarium? Driftwood is a popular choice among aquarists as it adds a natural touch and provides hiding spots for fish. However, securing driftwood together can be a challenging task. You don’t want your driftwood to fall apart and ruin the aesthetics of your aquarium.
Don’t fret! In this blog post, we will guide you on how to glue driftwood together for your aquarium and ensure it stays put. With a little patience and effort, you can create a beautiful and stable driftwood structure for your aquatic pets to enjoy. So, let’s dive in and learn how to secure your driftwood in place!
Materials You Will Need
If you’re looking for a natural and unique addition to your aquarium, consider using driftwood. But how do you glue driftwood together for a sturdy and secure structure? Here are the materials you will need: aquarium-safe silicone sealant, a caulking gun, gloves, a putty knife, and of course, the driftwood pieces themselves. It’s important to choose aquarium-safe materials to ensure the health and safety of your aquatic pets.
Before beginning, thoroughly clean and dry the driftwood pieces to remove any debris or algae that may hinder the adhesive. Next, apply the silicone sealant to the areas where the driftwood pieces will join and press them firmly together. Be sure to use enough sealant to create a solid bond, but not so much that it oozes out and creates unsightly clumps.
Use a putty knife to even out any excess sealant. Allow the glue to dry for at least 24 hours before introducing it to your aquarium. By using these simple materials and steps, your driftwood structure will be secure and beautifully integrated into your aquatic environment.
Driftwood
When it comes to creating beautiful home decor using driftwood, there are a few materials you will need to get started. Firstly, you will need to find some good quality driftwood pieces. This can often be found along the shorelines of beaches or in riverbanks.
Once you have collected your driftwood, you will need a good saw to cut it into the shapes and sizes you desire. Sandpaper is also a useful material to help smooth out any rough edges or splinters. Depending on what you are making, you may also need some strong glue or nails.
Finally, if you want to add a glossy finish to your driftwood creation, you can use a clear varnish. By having these materials at hand, you can create stunning home decor items that will impress your guests and add a touch of natural beauty to your living space. So, grab your materials and let’s get started on your next DIY driftwood project!
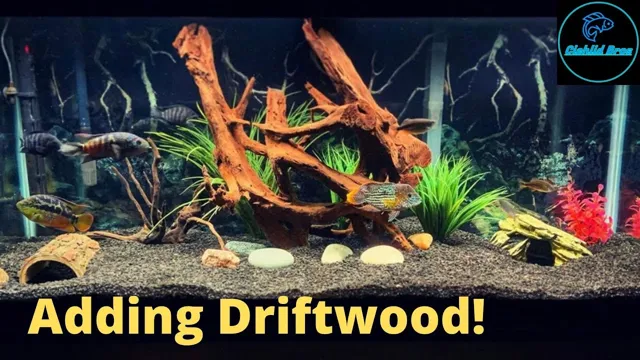
Aquarium-Safe Adhesive
When looking for an aquarium-safe adhesive, it is important to choose a product that is specifically designed for this purpose. A standard adhesive may contain chemicals or toxins that can harm your fish and other aquatic life. To ensure the safety of your aquarium, you will need to have silicone sealant, which is a type of adhesive that is specifically formulated for use in an aquarium.
Additionally, you will need a caulking gun to apply the adhesive evenly and smoothly. The sealant should also be waterproof and able to withstand high pressures, as it will be used to create a strong and reliable bond between glass and plastic materials of your aquarium. With the right materials and precautions, you can easily and safely keep your aquarium in top condition without the risk of harming your aquatic pets.
Sandpaper
Sandpaper is a versatile material that is used to smoothen surfaces, remove paint and other finishes, and prepare surfaces for painting or gluing. To use sandpaper effectively, you will need different grades of sandpaper, a sanding block or tool, and a dust mask. The grades of sandpaper you need depend on the type of surface you are smoothing and the level of roughness you want to remove.
Coarse grits such as 60 or 80 are suitable for removing paint, while finer grits such as 150 or 200 are good for preparing surfaces for painting or gluing. A sanding block or tool helps to prevent the sandpaper from creasing or folding, which can create uneven surfaces. Finally, it is essential to wear a dust mask because sanding creates a lot of dust, which can be harmful to your lungs.
By following these basic guidelines, you will have the right materials you need to use sandpaper successfully.
Waterproof Sealant
Waterproof Sealant When it comes to waterproofing your home or workspace, using a reliable and long-lasting waterproof sealant is essential. To get started on applying your sealant, you will need a few key materials first. These include a clean and dry surface to work on, a set of gloves to protect your hands, a caulking gun, and the sealant itself.
Additionally, you may want to consider using a putty knife to smooth out the sealant after application and ensure complete coverage. When choosing your waterproof sealant, it’s important to select a product that specifically meets the needs of your project and surface type. This will help ensure the effectiveness and longevity of the seal.
With the right materials and attention to detail during application, you can rest assured that your home or workspace will be properly protected from water damage for years to come.
Step-by-Step Guide
If you want to create a beautiful aquarium with driftwood, gluing all the pieces together is the perfect way to achieve that desired look. The first step is to gather all your materials which include a waterproof glue, your driftwood pieces, and clamps. Begin by cleaning all your driftwood pieces thoroughly and let them dry completely. (See Also: How to Keep Aquarium Water Crystal Clear: Top Tips for Maintaining Pristine Tank Water)
Then, arrange them in the way you want to glue them together before applying the glue. Once you’ve decided on the desired arrangement, apply a small amount of glue to one side of each piece and press them firmly together. Use clamps to hold the driftwood in place until the glue dries, and don’t forget to wipe off any excess glue.
Once all the pieces have been glued together and the glue is dry, you can rinse the driftwood with water to remove any leftover adhesive. With these easy steps, anyone can create a stunning driftwood centerpiece in their aquarium, bringing a natural and unique touch to their aquatic habitat.
Step 1: Prepare the Driftwood
To create a beautiful piece of driftwood decor, the first step is to prepare the driftwood. Start by gathering pieces of driftwood that are clean and free of any rot or decay. If you picked up fresh wood, it’s advisable to sun-dry them before using them to avoid mold.
Use a brush or a cloth to remove any debris or dirt that may have accumulated on the wood. If there are tough spots that you cannot remove even with a brush, use sandpaper for a smooth, clean surface. Once the wood is clean, you can opt to bleach them to achieve that whitewashed effect.
Bleaching can be done using hydrogen peroxide, and it’s essential to wear gloves and a mask to avoid skin and respiratory irritation. Allow the wood to dry for a day or two after bleaching before moving on to the next step. By following this simple and easy guide, you can prepare the driftwood to make beautiful DIY decor that is sure to catch everyone’s attention.
Step 2: Sand the Driftwood
After collecting your driftwood, the next step is to sand it down to make it smooth and ready for any project. Sanding driftwood can be a fun and satisfying task that allows you to uncover its unique textures and patterns. First, gather some sandpaper with varying grits, starting from coarse to fine.
Next, put on some safety goggles and gloves to protect yourself from any debris. Then, begin sanding the driftwood in a circular motion, making sure to get into any grooves or knots. Remember to start with the coarsest grit and gradually move to the finer ones.
The more you sand, the more the driftwood’s natural beauty will be revealed. You may also want to use a damp cloth to wipe the wood down to remove any dust as you sand. With patience and care, your driftwood will soon be smooth enough for any project you have in mind.
Step 3: Apply Aquarium-Safe Adhesive
When it comes to adding decorations to your aquarium, it’s crucial to use a reliable, aquarium-safe adhesive. Step three of decorating your aquarium involves applying this adhesive to secure your décor in place. Begin by choosing an aquarium-safe adhesive that won’t release harmful chemicals into the water.
Once you’re confident in your chosen adhesive, apply a small amount to the back of your décor, ensuring that it’s evenly spread without any clumps. Gently press your décor in place and hold it for a few moments to allow the adhesive to set. It’s crucial to avoid touching the adhesive with your bare hands as oils from your skin may hinder its effectiveness.
While there are many different types of adhesives available, it’s essential to select the right one for your particular décor material. By following these easy steps, you’ll have an attractive, secure aquarium setup in no time!
Step 4: Press and Hold
After the first three steps of setting up your device, it’s time to move to the next one. Press and hold the power button down for a few seconds until you see the device’s logo appear. Keep holding the button down until you see the loading screen followed by the home screen.
This step might take a little longer than the previous ones, so be patient. Remember that each device has its own particular way of doing things, so make sure you read the instructions carefully before starting the setup process. Pressing and holding the power button is a crucial step that ensures your device is starting up correctly.
If you encounter any difficulties during this step, don’t hesitate to check the user manual or contact customer support for assistance.
Step 5: Let it Dry
After completing all the previous steps, the final step is to let your project dry. Depending on the type of work you have done, drying time could range from a few hours to several days. It’s important to keep in mind that rushing this step could ruin all the hard work you’ve put in so far. (See Also: How to Grow Moss on Stone in Aquarium: Tips and Tricks for a Vibrant Aquascape)
It’s crucial to avoid any contact with the wet paint or finish during this process to avoid smudging or damaging your project. Make sure you have a clean and dry area to let your project dry without any disturbances. Some projects may require a second coat of paint after drying, so refer to the instructions to see if this applies to your project.
Once it’s completely dry, your project will be ready for use or display.
Step 6: Seal the Driftwood
After you’ve cleaned and dried your driftwood, the next step is to seal it. Sealing your driftwood will not only help preserve it, but it will also enhance its natural color and texture. There are several options for sealants, but one of the most popular is polyurethane.
To apply this sealant, use a foam brush or a clean cloth and apply a thin, even layer across the entire surface of the driftwood. Be sure to let each coat dry completely before applying the next one and remember to lightly sand between each coat for a smooth finish. Depending on the size and shape of your driftwood, you may need to repeat this step several times until you have achieved the desired level of protection and shine.
Once your driftwood is sealed, it will be ready to use for your next project or as a unique piece of decor in your home.
Tips for Success
If you’re looking to create a natural and stunning aquarium with driftwood, gluing the pieces together may seem like a daunting task. However, with the right techniques, you can easily glue driftwood together in a way that looks seamless and natural in your underwater landscape. First, choose a glue that is safe for aquarium environments, such as super glue gel or aquarium silicone.
Next, clean and dry the driftwood pieces thoroughly to ensure a strong bond. Apply the glue sparingly, focusing on the areas where the pieces meet and gently press them together. It’s essential to be patient and wait for the glue to dry completely before adding it to the aquarium.
And voila, you have an eye-catching and durable piece of decor for your underwater oasis. Making sure to use the appropriate glue and allowing enough drying time will ensure a secure and long-lasting bond for your driftwood creation.
Clean the Driftwood Thoroughly
Cleaning driftwood is an essential step in preparing it for use in any DIY project or home decor. You might think that it’s a simple process, but there are some tips to keep in mind to ensure success. One of the first things to do is to thoroughly clean the driftwood.
Start by brushing off any loose debris or dirt with a soft-bristled brush. If the driftwood is really dirty, then consider soaking it in a bucket of warm water mixed with mild dish soap. You can scrub it gently with a soft-bristled brush to remove any remaining dirt or grime.
Rinse it several times to ensure all the soap is removed, and then let it dry completely before moving on to the next step. By taking the time to properly clean your driftwood, you’ll ensure that the final product looks beautiful and is free from any unwanted debris.
Use Adequate Amounts of Adhesive
When it comes to using adhesive, it’s crucial to apply an adequate amount to ensure a successful bond. Using too little adhesive can result in a weak connection or even complete failure. On the other hand, using too much adhesive can create a mess and potentially damage surfaces.
To avoid these issues, it’s important to follow the manufacturer’s instructions for the specified adhesive and surface type. Additionally, consider applying the adhesive in a zig-zag pattern or using a notched spreader to ensure even coverage. Remember, using the right amount of adhesive is crucial for ensuring a strong and long-lasting bond.
So always take your time and be careful to apply the right amount for the best results.
Be Patient and Let it Dry Completely
When it comes to painting, one of the most crucial factors that can often be overlooked is patience. You’ve finally chosen the colors, cleared out a space, and readied your tools, but the most crucial step still remains – waiting for the paint to dry completely. Rushing this step can leave you with a subpar finish that smudges, streaks, and requires touch-ups.
That’s why it’s important to take your time and allow each layer to dry completely before adding another or moving objects around. Depending on the type of paint, this can take anywhere from a couple of hours to a full day. It might be tempting to speed things up by using a fan or a heater, but this can lead to uneven drying and accidents. (See Also: How to Add Coral to a Salt Aquarium: A Step-by-Step Guide to Enhance Your Marine Tank Environment)
Remember, patience is a virtue when it comes to painting, and letting each layer dry completely will yield the best results.
Check for Safety and Stability
When it comes to check for safety and stability, there are a few things to keep in mind if you want to be successful. First and foremost, always make sure to do a thorough inspection of the area or equipment you’ll be using. Look for any signs of damage or wear and tear that could potentially compromise safety.
It’s also important to check the stability of any equipment you’ll be using. This includes making sure that it’s properly secured and that the surface it’s placed on is level and sturdy. Additionally, be sure to follow any safety guidelines or protocols provided by the manufacturer or employer.
By taking these precautions and being vigilant when it comes to safety and stability, you can help ensure a safe and successful outcome.
Conclusion
In the world of aquarium décor, driftwood reigns supreme. But what do you do when you want to create a larger piece from multiple smaller ones? The answer is simple: glue them together! With a few easy steps and some aquarium-safe glue, you’ll have your driftwood masterpiece in no time. Just remember to use caution when gluing, and don’t get too carried away – after all, you don’t want your fish friends feeling like they’re living in a driftwood skyscraper!”
FAQs
What type of glue is best for attaching driftwood in an aquarium?
It is recommended to use aquarium-safe silicone adhesive or epoxy glue for bonding driftwood in an aquarium.
Can I use regular glue for attaching driftwood in my aquarium?
No, regular glue can be toxic to fish and may harm their health. It is crucial to use aquarium-safe adhesive products only.
How do I prepare the driftwood before gluing it in the aquarium?
Wash the driftwood thoroughly with warm water and scrub it with a stiff brush to remove any dirt and loose debris. Soak it in a bucket of water for a few days until it is completely waterlogged and sinks to the bottom before attaching it with glue.
Is it better to glue the driftwood vertically or horizontally in the aquarium?
The orientation of attaching the driftwood depends on the user’s choice and the design of the aquarium. Both horizontally and vertically fixed driftwood can create a beautiful aquascape.
Can I reuse the glued driftwood in another aquarium?
Yes, if the driftwood is in good shape and does not contain any toxic substances, it can be reused in another aquarium.
How long does it take for the glue to dry and hold the driftwood in place?
The drying time of the glue depends on the type and brand of adhesive used. The average drying time ranges between 24 to 48 hours.
Will gluing driftwood in the aquarium affect water quality?
If you use an aquarium-safe adhesive, it will not impact water quality. It is important to allow the glue to dry and cure properly before adding the water and fish to the aquarium.

