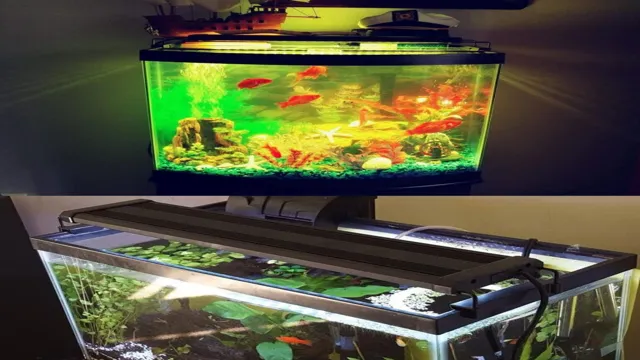
If you’re a proud owner of an aquarium, you know how important it is to maintain a healthy environment for your underwater creatures. One crucial aspect of this is ensuring your aquarium has adequate lighting. A UV light is an excellent option for keeping your tank clean and free from algae and harmful bacteria.
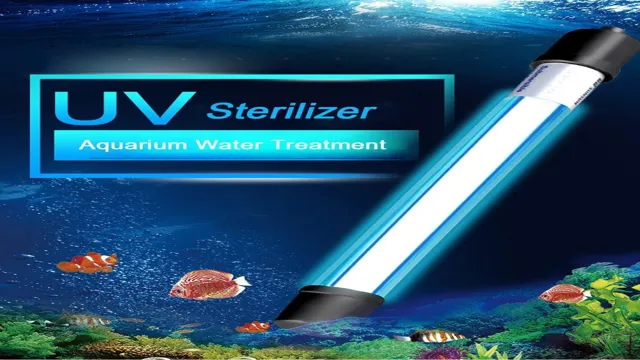
But what exactly is a UV light, and how do you install one in your aquarium? A UV light, also known as a UV sterilizer, emits ultraviolet radiation that helps control harmful microorganisms in your aquarium. Installing one can be easy with the right steps and equipment, so don’t fret! You’ll need to choose the right size and wattage for your aquarium, as well as the type of UV light that’s appropriate for your setup. Once you’ve selected the right UV light, it’s time to install it.
The process typically involves attaching the sterilizer to your aquarium’s filter system and directing the water flow through it. Some UV lights may require additional plumbing, but this is usually a straightforward process. Overall, installing a UV light in your aquarium may seem like an intimidating task at first, but it’s a relatively simple process with a massive payoff.
With your UV sterilizer, you can rest easy knowing your aquatic friends are living in a healthy and safe environment. So why not give it a try?
Benefits of UV Light in Aquariums
Installing a UV light in your aquarium can provide numerous benefits for your fish and overall tank health. UV light helps to reduce harmful bacteria, viruses, and parasites that can cause disease and stress in fish. It also aids in preventing algae growth, which can cloud the water and harm plants by blocking light.
To install a UV light, first choose a unit appropriate for your aquarium size and ensure it is compatible with your filtration system. Position the unit after the filter and before the water returns to the tank, allowing the water to pass over the UV bulb. Ensure that the bulb is changed regularly, as it may lose its effectiveness over time.
Overall, installing a UV light can be a simple and effective way to improve the health and clarity of your aquarium water.
Kills Harmful Bacteria and Algae
UV Light in Aquariums One of the great benefits of using UV light in aquariums is that it kills harmful bacteria and algae. We all want our fish to be healthy and thrive, but the truth is that many aquariums suffer from poor water quality, which can lead to various illnesses and even death. This is where UV sterilization comes in.
By using a good UV sterilizer, you can create a clean and clear environment for your fish to live in. The UV light shines through the water and kills off all the unwanted bacteria and algae, keeping your tank clean and healthy. It’s like having your own little pool filter for your fish tank! Not only does UV sterilization help keep your fish healthy, but it also helps keep your aquarium looking its best.
No one wants a tank full of green water! By incorporating UV light into your aquarium setup, you can enjoy crystal-clear water all year long. So, if you’re looking for an easy and effective way to keep your fish tank clean and healthy, consider adding UV light to your setup. Your fish will thank you for it!
Improves Water Clarity
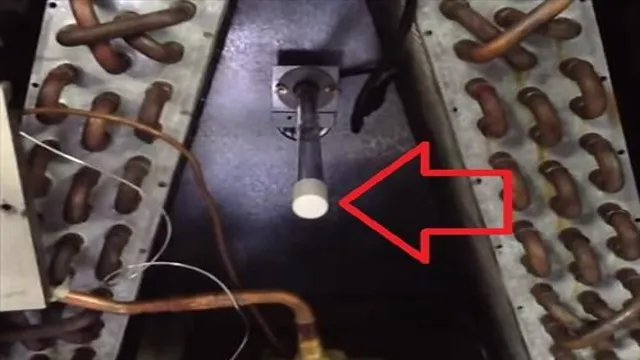
UV light is an essential tool for maintaining the clarity of water in an aquarium. When the water in an aquarium is exposed to ultraviolet light, it can eliminate or reduce the presence of harmful bacteria, viruses, and other microorganisms. These organisms can cause the water to become cloudy or discolored, impacting the overall health of the fish and aquatic plants.
UV light can also help to reduce the growth of algae in the tank, ensuring that it remains a safe and healthy environment for your aquatic pets to thrive. Using a UV light clarifier can help to prevent the need for frequent water changes or the use of harsh chemical treatments. With the use of UV light, aquarists can enjoy crystal clear water and healthy aquatic life.
Choosing the Right UV Sterilizer for Your Aquarium
If you’re wondering how to install a UV light in your aquarium, the first thing to consider is the size of your tank. UV sterilizers need to be correctly sized to be effective. A unit too small won’t achieve the desired results, while an overly large unit will be unnecessarily expensive and consume too much power.
Once you’ve determined the correct size for your tank, the next step is selecting the appropriate unit. There are several types of UV sterilizers on the market, ranging from hang-on-back units to in-line models that require plumbing. Hang-on-back units are typically the easiest to install and require no additional plumbing, while in-line systems require more advanced installation.
Factors like maintenance requirements and bulb replacement should also be considered when selecting a UV sterilizer for your aquarium. Overall, investing in a well-sized and appropriately installed UV sterilizer can greatly benefit the health of your aquatic animals and plants. (See Also: How Often to Dose Iron in Aquarium: A Comprehensive Guide for Fishkeepers)
Consider Tank Size and Flow Rate
When it comes to choosing the right UV sterilizer for your aquarium, there are several factors to consider. One important aspect is the size of your tank and the flow rate of your water system. You need to ensure that your UV sterilizer can effectively treat the entire volume of water in your aquarium, so choosing the right size is crucial.
On the other hand, if the flow rate is too high, the water may not spend enough time in the UV sterilizer to effectively sterilize it. So, it’s important to find a balance between the size of the UV sterilizer and the flow rate of your water system. Remember, a UV sterilizer is a valuable tool in maintaining a healthy aquarium by effectively killing harmful bacteria and parasites in the water.
By selecting the right size UV sterilizer for your tank, you can help ensure your fish and other aquatic life stay healthy and thriving.
Choose the Correct Wattage for Your Aquarium
When it comes to aquarium maintenance, ensuring that the water stays clean and healthy is a top priority. Choosing the right UV sterilizer can make a huge difference in achieving this goal. It’s important to select one with the correct wattage for your aquarium size, as this will determine how effectively it will eradicate harmful bacteria and parasites.
Generally, a wattage of 1-2 watts per gallon is recommended. However, it’s important to note that if your aquarium is heavily stocked or has a lot of plants, you may need a higher wattage. It’s always best to consult with a professional or do your own research to determine the appropriate size for your specific aquarium.
By selecting the right UV sterilizer, you’ll be on your way to creating a healthy and thriving aquatic environment for your fish and plants.
Steps to Install UV Light in Your Aquarium
If you’re looking to keep your aquarium clean and healthy for your fish, installing a UV light can be a great addition to your set up. Follow these steps to get it up and running. First, choose a UV sterilizer that’s appropriate for the size of your tank and the flow rate of your filter.
Next, mount the sterilizer in a location that will allow the water from your filter to flow through it. Make sure to follow the manufacturer’s instructions for wiring and plumbing, as this can vary depending on the model. Once your sterilizer is in place, turn on your filter and ensure that the water is flowing through the sterilizer.
UV lights require periodic maintenance to remain effective, so be sure to clean the quartz sleeve that encases the bulb periodically to keep it free of debris. With these steps completed, your UV light should be working effectively to keep your aquarium clean and your fish healthy.
Step 1: Turn Off the Electrical Supply
If you’re looking to install a UV light in your aquarium, there are some important steps that you should follow to ensure a successful installation. The first and most crucial step is to turn off the electrical supply to the aquarium before beginning any work. This ensures that there is no risk of electrocution or damage to your equipment.
Once the power is off, you can begin installing the UV light according to the instructions provided by the manufacturer. It’s important to make sure that the light is securely attached to the aquarium and that all wiring is properly insulated. You should also check that the light is working properly before turning the power back on.
Once the installation is complete, you can enjoy the benefits of a UV light in your aquarium, including clearer water and reduced levels of harmful bacteria and parasites. So, don’t forget to turn off the power before you begin installing your UV light and follow the manufacturer’s instructions carefully for a successful installation.
Step 2: Choose a Suitable Location
Once you’ve decided to install a UV light in your aquarium, the next step is to choose a suitable location. The ideal spot for your UV light is after your filtration system, as this ensures that the water passing through the light is already partially clean. Additionally, placing the light after the filtration system allows for maximum exposure to the water as it circulates through the tank.
Avoid placing the light too close to any live plants or corals, as the UV rays can harm them. It’s also important to ensure the light is easy to access for cleaning and maintenance. By carefully selecting the location for your UV light, you can effectively eliminate harmful bacteria and parasites from your aquarium, ensuring a healthy and thriving aquatic environment for your fish.
Step 3: Attach the UV Sterilizer to the Water Pump
Installing a UV sterilizer in your aquarium can help maintain a clean and healthy environment for your fish and other aquatic creatures. Once you have your water pump installed, the next step is to attach the UV sterilizer. Begin by checking the manufacturer’s instructions to ensure you have all the necessary components, including mounting brackets, sleeves, and bulbs. (See Also: How to Kill Nematodes in Aquarium with Effective Methods)
Once you have everything you need, attach the sterilizer to the water pump using the mounting brackets provided. It’s important to ensure the sterilizer is secured tightly in place to prevent any leaks or malfunctions. Carefully insert the bulb into the sleeve, making sure not to touch the bulb with your bare hands as this can damage it and reduce its effectiveness.
Once the bulb is inserted, connect the sterilizer to the power source and turn it on to ensure it’s working properly. With the UV sterilizer attached to the water pump correctly, you can enjoy crystal clear water in your aquarium and healthier aquatic life.
Step 4: Install the UV Light Bulb
Installing a UV light bulb in your aquarium is crucial to maintaining a healthy environment for your fish. Once you’ve found the ideal spot for your UV sterilizer, it’s time to install the UV light bulb. Firstly, make sure to turn off all power to the aquarium and unplug any electrical equipment for safety purposes.
Secondly, remove the quartz sleeve from the UV sterilizer to have access to the bulb. Gently remove the old bulb and replace it with the new UV light bulb. Ensure that the new bulb is firmly in place before replacing the quartz sleeve.
Lastly, plug in the electrical equipment, turn it all on, and monitor the aquarium for a few days to ensure that the UV light is operating correctly. By following these simple steps, you’ll maintain an optimal quality of water and a healthy atmosphere for your aquatic friends.
Step 5: Turn the Electrical Supply Back On
Congratulations! You have successfully installed a UV light in your aquarium, and now it’s time to turn the electrical supply back on. However, before you do so, double-check that you have followed all the previous steps correctly, and everything is securely in place. The last thing you want is water damage or electrical short-circuits due to incorrect installation.
Once you’re confident, turn the electrical supply back on and observe the UV light’s functioning. You should see a blue glow indicating that the light is working. Also, observe any changes in the water color; it should start to clear up as the UV light kills off the bacteria.
However, don’t forget to turn off the UV light when doing maintenance as it could harm your fish and other aquatic life. With the UV light now installed, you can sit back and relax as it does its job, keeping your aquarium water crystal clear and your fish safe and healthy.
Maintaining Your UV Light in Your Aquarium
If you’re looking to install a UV light in your aquarium, there are a few important things to consider. First and foremost, make sure you select the right size and strength of UV light for your tank. This will ensure that it effectively eliminates harmful bacteria, algae, and other unwanted organisms.
Once you have your UV light, installation is relatively simple. Most UV lights are designed to be easily mounted inside your aquarium, either directly on the tank or on a nearby wall. Be sure to follow the manufacturer’s instructions carefully and make sure your light is securely in place.
It’s also important to regularly clean your UV light, as buildup of sediment and other debris can reduce its effectiveness. By properly installing and maintaining your UV light, you can help ensure a healthy and vibrant aquarium environment for your fish and other aquatic creatures.
Clean the Quartz Sleeve Regularly
Maintaining a UV light for your aquarium is vital to ensure that your aquatic pets are living in a clean and healthy environment. One critical aspect of maintaining your UV light is cleaning the quartz sleeve regularly. The quartz sleeve is a protective sleeve that encases the UV bulb.
Over time, algae and other debris can build up on the quartz sleeve, blocking the UV light from reaching the aquarium water. Cleaning the quartz sleeve is a simple process that involves removing the sleeve from the UV unit and rinsing it in water. However, caution must be taken to avoid cracking or damaging the delicate material of the quartz sleeve.
By cleaning the quartz sleeve regularly, you can ensure that the UV light is functioning at its optimum level, helping to keep your aquarium water clear and free from harmful microorganisms. (See Also: How to Grow Lysimachia Nummularia in Your Aquarium: A Complete Guide)
Replace the UV Light Bulb Every 6-12 Months
Maintaining your UV light in your aquarium is crucial for keeping the water clean and healthy for your aquatic pets. One key aspect of UV light maintenance is replacing the UV light bulb every 6-12 months. Over time, the UV rays emitted by the bulb become less effective at killing harmful bacteria and algae, which can lead to cloudy water and unhealthy living conditions for your fish and other aquatic life.
Replacing the bulb ensures that the UV light is working properly and effectively, keeping your aquarium water clear and your pets thriving. Think of it like changing the oil in your car – it may not seem like a big deal, but regular maintenance is essential for optimal performance. So, don’t forget to replace your UV light bulb on schedule to keep your aquarium in top shape!
Conclusion
There you have it folks, now your aquarium can have the perfect ambiance for any time of day or night with the installation of a UV light. Thanks to this simple but effective addition, your fish friends will be living their best lives and you can revel in the glow of a job well done. Just remember, proper installation and maintenance of the UV light is key to creating a healthy and happy environment for your aquatic buddies.
So go ahead and let your aquarium shine like a beacon of underwater beauty!”
FAQs
What is UV light and why is it important in an aquarium?
UV light is a type of light that kills harmful bacteria and parasites in an aquarium. It is important because it helps keep the water clean and healthy for fish and other aquatic animals.
What are the benefits of using a UV light in an aquarium?
Using a UV light in an aquarium can help eliminate harmful bacteria and parasites, reduce algae growth, and improve overall water quality. It can also help prevent diseases and infections in fish and other aquatic animals.
How do you choose a UV light for your aquarium?
When choosing a UV light for your aquarium, consider the size of your tank, the type of aquatic animals you have, and the flow rate of your filtration system. You will also need to choose the appropriate wattage and bulb type for your specific needs.
How do you install a UV light in an aquarium?
To install a UV light in an aquarium, follow the manufacturer’s instructions and connect the light to your filtration system. Make sure all tubes and connections are tight and secure, and test the light before adding fish to the tank.
How often should you replace the bulb in a UV light?
The bulb in a UV light should be replaced every 6-12 months, depending on the manufacturer’s recommendations. This will ensure that the light continues to effectively kill harmful bacteria and parasites in your aquarium.
Can UV light harm fish or other aquatic animals?
UV light can be harmful to fish and other aquatic animals if it is too strong or is used for too long. However, when used properly and at the appropriate strength, UV light is safe and beneficial for most aquatic animals.
Do you need a UV light in a freshwater aquarium?
A UV light is not always necessary in a freshwater aquarium, but it can be helpful in reducing harmful bacteria and parasites and improving water quality. If you have a heavily stocked or planted freshwater tank, a UV light may be a worthwhile investment.

