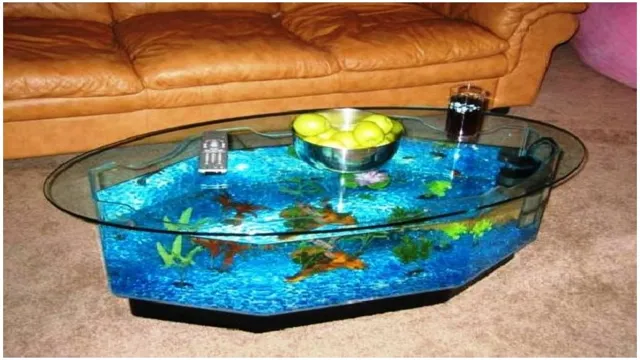
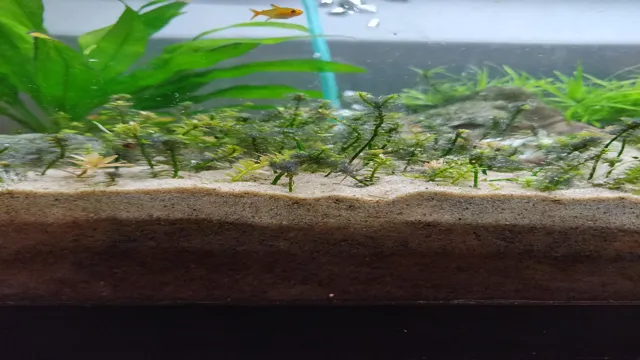
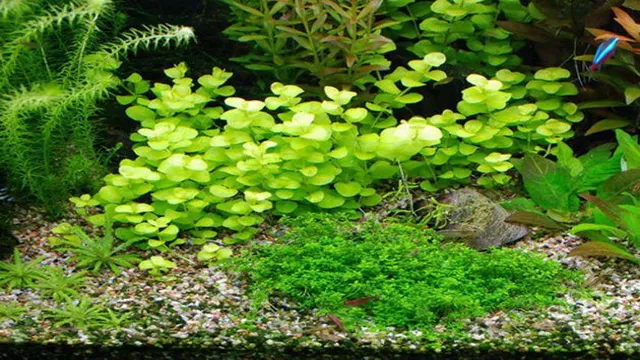
Have you ever considered adding an aquarium to your home decor? Aquariums can be not only visually stunning but also soothing and relaxing to watch. But have you ever considered taking it a step further and turning your aquarium into a functional piece of furniture? That’s where the aquarium table comes in. Imagine having a beautiful aquarium as the centerpiece of your living room, while also using it as a functional table.
In this blog, we will guide you through the process of making an aquarium table, from selecting the appropriate materials to assembling it all together. Get ready to add a unique and eye-catching element to your home decor!
Materials Needed
One exciting way to make your home more aesthetically pleasing is by creating an aquarium table. The materials that you will need for the aquarium table include a glass aquarium, a frame or base, aquarium rocks, an aquarium filter, and fish. The frame or base can be made from wood, metal, or acrylic and should have a hole in the center to accommodate the aquarium.
It is essential to choose an appropriately sized aquarium for the table, keeping in mind the type of fish you plan to keep. You may also add aquatic plants to enhance both the beauty and the health of your aquarium. Once you have gathered all the materials, it’s time to build and set up your aquarium table.
With proper care and maintenance, your aquarium table will provide years of enjoyment and relaxation for you and your family.
Glass Tank
Glass Tank If you are planning on setting up an aquarium, one of the key components you will need is a glass tank. This will provide a safe and secure environment for your aquatic pets to thrive. Before purchasing a glass tank, it is important to consider the materials that will be needed to set it up properly.
Aside from the tank itself, you will need a filtration system, lighting, and heating equipment to regulate the temperature and keep the water clean and clear. Additionally, you will need substrate, decor, and plants to create a natural and comfortable setting for your fish. It’s important to choose high-quality materials that are appropriate for the size and nature of your aquarium, as poor quality or mismatched materials can create an unhealthy environment for your aquatic pets.
By carefully considering your options and investing in the right materials, you can create a beautiful and thriving aquarium for your pets to enjoy.
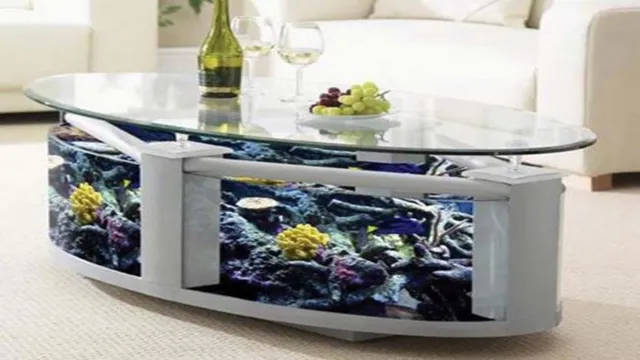
Table Base
When it comes to building a table base, there are a few essential materials you’ll need. First, you’ll need wood for the frame and legs of the table base. Ash, oak, and maple are all popular choices for their durability and strength.
You’ll also need screws, wood glue, and a drill to assemble the base. If you’re looking to create a decorative element, you might want to add metal brackets or fittings for added support and style. Additionally, you’ll need sandpaper to smooth out any rough edges and a finish to protect the wood from scratches and stains.
Incorporating these materials will ensure that your table base will not only look great but also last for many years to come. So, whether you’re building a table base for your dining room or home office, make sure to gather all the necessary materials beforehand to ensure a successful project.
Silicone Sealant
When it comes to sealing gaps and cracks, silicone sealant has become a popular choice for its flexibility, durability, and resistance to water and chemicals. But before you start using silicone sealant, make sure you have all the necessary materials on hand. First and foremost, you will need the silicone sealant itself, which comes in a variety of colors and types.
Silicone sealant can be purchased as a one-part or two-part formula, and each type has its own set of pros and cons. Additionally, you will need a caulking gun, which is used to apply the sealant and ensures a smooth and even application. Other important materials include a clean rag for wiping away excess sealant, a utility knife for cutting the nozzle of the sealant tube, and a surface cleaner to ensure the area you are sealing is free of debris and grime.
By having these materials on hand and following proper application techniques, you can effectively and efficiently seal gaps and cracks with silicone sealant.
Fish and Decorations
When it comes to creating the perfect underwater oasis for your fish, there are a few materials that you will need to complete the look. Of course, the most obvious materials are fish and aquarium decorations. As far as the fish go, you’ll want to make sure that you choose species that are compatible with each other and that you have the appropriate size aquarium for them.
As for decorations, you can choose from a wide variety of materials including rocks, plants, and even driftwood. These additions not only add visual interest to your aquarium, but they also provide hiding places and areas for fish to explore. Just be sure to choose decorations that are made specifically for aquarium use and that won’t harm your fish.
By using these materials, you can create a beautiful and functional underwater world for your fish to thrive in. (See Also: How to Care for Water Plant Aquarium: Tips and Tricks for Healthy Aquatic Plants)
Step-by-Step Instructions
If you’re looking for a unique way to incorporate a fish tank into your home decor, making an aquarium table might be just what you need! Here’s a step-by-step guide on how to make a sturdy and stylish aquarium table that will impress all your guests. First, gather all the necessary tools and materials, such as a sturdy table frame, a large fish tank, aquarium silicone sealant, a glass cutter, measuring tape, and sandpaper. Next, measure the dimensions of your table frame and purchase a fish tank that fits snugly on top.
Once you have the right sized tank, use a glass cutter to cut a hole in the center of the table top that matches the dimensions of the fish tank’s base. Sand the edges of the hole to prevent any sharp edges that may harm your tank. Then, apply a thick bead of aquarium silicone sealant along the edges of the fish tank’s base and carefully place it into the hole in the table top.
Allow the sealant to dry completely before adding any water. After the sealant has dried, fill the tank with water, decor, and your desired fish species. Make sure to maintain the water quality and temperature regularly to keep your fish healthy and happy.
Overall, making an aquarium table may seem daunting, but with the proper materials and a bit of time, it can be a unique addition to your home decor. Happy crafting!
Step 1: Choose a Table Base
When it comes to designing your own table, choosing the right base is crucial. The table base is not only responsible for supporting the weight of the table, but it also sets the tone for the overall aesthetic. Start by considering the style and purpose of your table.
What materials and finishes would fit well with the surrounding decor? Do you want a sleek, modern look or a more traditional style? Once you’ve determined the style, consider the shape and size of the table top. Ensure that the base is the appropriate height and can comfortably accommodate the top. It’s important to also keep in mind the table’s function.
Will it be used for dining, work, or as a decorative piece? Some table base options include pedestal, trestle, and leg styles. Ultimately, the table base you choose will be the foundation for your entire table and will greatly impact the final product.
Step 2: Measure and Cut the Hole for the Tank
Measuring and cutting a hole for a toilet tank can seem daunting at first, but with the right tools and some patience, it can be a straightforward process. First, take measurements of the tank and mark where the hole needs to be cut on the wall or floor. Then, use a reciprocating saw or jigsaw to carefully cut out the hole.
It’s essential to ensure the cut is precise and a snug fit for the tank to prevent any leaks or wobbling. To make the process easier, use a hole saw attachment for the saw to create a perfect, circular cut. Remember to take safety precautions and wear protective gear, including goggles and gloves, when handling power tools.
Once the hole is cut, test fit the tank to ensure everything aligns correctly. With a little attention to detail, measuring and cutting the hole can be a quick and simple task, leaving you with a sturdy and secure toilet installation.
Step 3: Install the Tank into the Table
To install the tank into the table, you’ll need to get started with the right tools. First, make sure your tank is properly cleaned and ready to go. Then, carefully lower the tank into the opening in the center of your table.
Ensure that the tank is level and centered so that it sits firmly in place. Once you’ve verified its placement, it’s time to secure the tank. Using screws, securely attach the tank to the table.
Make sure the screws are tightly fastened so that the tank will not move. If you’re unsure about the placement or security of the tank, don’t hesitate to ask for help from a professional. With the tank firmly in place, you’re now ready to begin adding your fish, plants, and other decorations.
Remember to follow the care instructions for your specific tank and keep an eye on the water quality to ensure a healthy environment for your aquatic friends. By following these simple steps, you’ll soon be enjoying the unique beauty and tranquility of your aquarium table.
Step 4: Seal around the Edges of the Glass
Sealing around the edges of your glass is an essential step to prevent any leaks or drafts. Firstly, make sure the area around the edge of the glass is clean and dry. Then, apply a thin line of caulk along the edge of the glass, ensuring full coverage.
You can use a caulk gun or your finger to do this. Be sure to work in small sections to avoid the caulk drying out too quickly. Once the caulk has been applied, use a damp cloth to smooth out any bumps or ridges. (See Also: How to Get Rid of Calcium Buildup in Aquarium: Tips and Tricks)
This will give you a clean, even finish, and ensure that no air or water can penetrate through the seal. Let the caulk dry completely before moving on to the next step. By taking the time to correctly seal your glass edges, you can increase the longevity of your window, and save yourself time and money in the long run.
Step 5: Fill the Tank with Water and Add Fish and Decorations
Now that your aquarium is ready, it’s time to fill it up with water. It’s important to make sure the temperature of the water is appropriate for the type of fish you plan to keep. Once the water is in, it’s time to add fish and decorations.
Start by adding live plants or decorations to your aquarium to create a natural environment. Then, introduce your fish slowly. Do not add too many fish at once.
It’s important to give them time to adjust to their new surroundings. Remember to feed them appropriately and maintain the cleanliness of their tank regularly. Keeping an eye on the water quality is also crucial to keep your fish healthy.
With these steps, you’ll have a beautiful and thriving aquarium to enjoy.
Tips and Tricks
Creating an aquarium table can be a fun and rewarding experience. To start, first choose a table that is sturdy enough to hold the weight of the aquarium and any decorations you plan to add. Next, measure the length and width of the table and purchase a custom-made aquarium that fits those dimensions.
Make sure to leave enough space for a filter, heater, and any other equipment you plan to use. When setting up the aquarium, be sure to follow all the necessary steps to ensure your fish are happy and healthy. This includes adding substrate, plants, and decorations that are safe for your fish.
To maintain the health of your aquatic pets, perform regular water changes and keep the tank clean. With some patience and dedication, you can create a beautiful and functional aquarium table that will impress your guests and provide a peaceful environment for your fish.
Choose a Generous-Sized Glass Tank
When it comes to setting up an aquarium, choosing a glass tank is one of the first things you’ll need to do. And, when you’re selecting your tank, it’s important to choose one that’s generously sized. Why? For one thing, your fish will be happier and healthier in a larger tank.
By giving them plenty of space to swim and explore, you’ll help promote their overall well-being. Additionally, a larger tank allows for more flexibility when it comes to decorating and maintaining the aquarium. You’ll have plenty of room for plants, rocks, and gravel, as well as space to add a filter and other equipment.
So, when you’re selecting your glass tank, don’t skimp–go for a size that will give your aquatic friends plenty of room to thrive.
Use a Table Base that is Sturdy and Strong
When it comes to selecting a table base for your furniture, it’s important to choose one that’s sturdy and strong. A durable table base will provide the necessary support for your tabletop and help prevent it from wobbling, shaking, or collapsing. One thing to consider is the material of the base itself – cast iron, steel, and solid wood are all good options as they are heavy-duty and can withstand a lot of weight and pressure.
Additionally, make sure the base is properly sized for your table and any accompanying chairs or stools; an undersized base can result in instability and potential accidents. So when shopping for table bases, be sure to prioritize strength and durability to ensure your furniture will last for years to come.
Make Sure the Tank Fits Snugly into the Table
When setting up a fish tank, it’s important to ensure that the tank fits snugly into the table. A wobbly tank could not only be unsightly, but it could also potentially harm your fish. To make sure your tank fits perfectly, measure both the table and the tank before purchasing.
Choose a table that is sturdy and stable to provide optimal support for your fish tank. Additionally, when placing the tank on the table, use padding or foam to prevent any scratches or damage to the tank or table surface. Your fish will thank you for providing them with a safe and comfortable home that doesn’t wobble or shift. (See Also: What Eats Fish Poop in Aquarium? Discover The Best Clean-Up Crews!)
Watch for Leaks and Repair Immediately
When it comes to maintaining your home, it’s important to stay proactive in preventing water damage. One of the easiest ways to do this is by watching for leaks and repairing them immediately. Even small leaks can lead to bigger problems down the road if left unaddressed.
So, make it a habit to regularly inspect your plumbing system, including faucets, pipes, and appliances that require water, such as washing machines and refrigerators. If you notice any signs of a leak, such as water stains on your walls or ceilings, musty odors, or a sudden increase in your water bill, don’t wait to take action. Fix the issue right away or call a professional if you’re unsure how to proceed.
Remember, water damage can cause serious structural issues and health hazards if left unchecked. By staying vigilant and repairing leaks promptly, you can save yourself time, money, and stress in the long run. So, make leak detection and repair a regular part of your home maintenance routine.
Your home – and your wallet – will thank you for it.
Conclusion
In conclusion, creating an aquarium table is more than just combining a fish tank and a piece of furniture. It requires patience, creativity, and a love for both the underwater world and interior design. But with the right materials, a steady hand, and a bit of imagination, you can bring a slice of the ocean into your home and impress all your guests with your DIY skills.
Just remember, a good aquarium table is a work of art as well as a functional piece, so don’t be afraid to let your personality and style shine through. And who knows, maybe your fish will even thank you for giving them the coolest habitat in the block. So, get your tools ready, dive into this project, and let your fish companions be the envy of the tank!”
FAQs
What materials do I need to make an aquarium table?
You will need a glass tank, a wooden table base, silicone adhesive, and a filtration system.
How big should the glass tank be for an aquarium table?
The size of the glass tank will depend on the size of the table and the types of fish you plan to keep. Generally, a tank that is 20-30 gallons is a good place to start.
Can I use any type of wood for the table base?
Hardwood like oak, maple, and cherry are good choices for the table base as they can bear the weight of the tank and last long.
Do I need special tools to make an aquarium table?
Yes, you may need power tools like a saw, drill, and router to construct the table base and cut the hole for the tank.
How do I ensure that the aquarium table is level?
Use a spirit level to make sure the table base is level before placing the tank on it. Adjust the legs or sand the base as necessary.
Can I put any type of fish in the aquarium table?
No, some fish may not be suitable for a small aquarium and may require larger tanks or more specific conditions. Research the types of fish that can be kept in the size tank you have.
How often do I need to clean the aquarium table?
Clean the tank and change the water regularly, at least once a week, to ensure the health and longevity of the fish and the clarity of the water.

