Looking for a new way to showcase your aquatic pets in your home or office? Why not try building a double aquarium stand? Not only will you be able to display two tanks side by side, but you’ll also have the satisfaction of having made it yourself. With a few basic carpentry skills and some materials, you can have a sturdy and stylish stand that will elevate your fish-keeping game to the next level. In this blog post, we’ll go over the steps and materials needed to create your own double aquarium stand, so you can have a beautiful and functional addition to your home or office décor.
So, grab your tools and let’s dive in!
Introduction
Are you looking for a way to display your double aquariums in a stylish and sturdy way? Look no further than a DIY double aquarium stand! Making your own double aquarium stand may seem like a daunting task, but with the right materials and a little bit of patience, it can be done easily and affordably. One of the most important things to consider when making a double aquarium stand is the weight of the water, fish, and tanks themselves. It’s important to use solid and sturdy materials such as thick plywood and heavy-duty screws to ensure the safety of your aquatic pets.
By following a few simple steps and utilizing some basic woodworking skills, you’ll have a beautiful and functional double aquarium stand in no time!
Reasons for Building a Double Aquarium Stand
If you have multiple aquariums in your home, you may want to consider building a double aquarium stand. Not only does it save space, it also adds a sleek, modern look to your home décor. There are many reasons why a double aquarium stand might be the perfect addition to your home.
Firstly, if you have limited space in your home, a double aquarium stand can be a great solution. With two aquariums stacked on top of each other, you will have double the space to keep your fish and other aquatic creatures. Additionally, building a double stand can save you a lot of money in the long run.
By building the stand yourself, you can avoid having to purchase two separate stands, which can be costly. With a double aquarium stand, you will also be able to easily maintain both tanks without having to bend down to access the lower one. Not to mention, the double stand can also be an aesthetically pleasing addition to your home, elevating the look of your aquariums and adding a modern touch to your living space.

Materials
If you’re looking to create a double aquarium stand, you’ll need a few key materials to get started. First and foremost, you’ll need sturdy wooden planks that are capable of supporting the weight of two aquariums. You’ll also need screws, a drill, measuring tape, and a saw to size the wood to the appropriate dimensions.
Additionally, you may want to invest in a level to ensure that your stand is perfectly balanced. Depending on your preferences, you could also choose to style your stand with paint, stain, or other decorative touches. With the right materials and a little bit of patience, you can build a double aquarium stand that’s both functional and stylish.
List of Required Materials
When it comes to starting a new project, it’s important to have all the required materials on hand to avoid any unexpected roadblocks. Depending on the project, the list of materials can vary greatly. For example, if you are starting a woodworking project, you may need tools such as a hand saw, drill, sandpaper, and a measuring tape, as well as materials like wood, screws, and nails.
On the other hand, if you are starting a painting project, you may need brushes, paint, canvases, and an easel. It’s important to carefully review the project plans and ensure you have all the necessary materials before beginning to avoid any setbacks or unnecessary trips to the store. By taking the time to gather all the required materials, you can dive in confidently and enjoy the creative process.
Tips for Choosing Materials
When it comes to choosing materials for a project, there are a few things to consider. First, you need to think about the purpose and function of the item you’re creating. Are you making something that needs to withstand the elements, or something purely decorative? Once you know what you’re looking for in terms of durability and strength, you can start considering the different materials available.
Wood, metal, plastic, and glass are all popular options depending on the project and design. Another factor to consider is the cost and availability of the material. While some materials may be perfect for what you need, they may also be too expensive or difficult to find.
It’s important to strike a balance between quality and budget. By taking the time to carefully consider your options and do your research, you can choose the right materials for your project and ensure its success.
Tools
If you’re looking to create a double aquarium stand, there are a few tools you’ll need to get started. Firstly, you’ll need a saw to cut the pieces of wood to size. A table saw or circular saw would work well for this.
You’ll also need a drill to make holes for screws and ensure everything is securely fastened. A level will come in handy to ensure the stand is straight and balanced. Additionally, you might want to have a measuring tape on hand to ensure everything is cut to the correct size. (See Also: How to Clean Saltwater Aquarium Sand: A Step-by-Step Guide for Sparkling Tanks)
Once you have these tools ready, you can start on your double aquarium stand. Remember to take your time and double-check your measurements to ensure everything fits together properly. With the right tools and some patience, you’ll have a double aquarium stand in no time!
List of Required Tools
When it comes to tackling any DIY project, having the right tools on hand can make all the difference. Whether you are taking on a small repair or completing a major renovation, a list of required tools is essential to ensure your project is successful. Some of the most common tools you will need for most projects include a tape measure, hammer, saw (hand or power), screwdrivers (flat and Phillips), pliers, and a level.
Additionally, depending on the job you are tackling, you may also need specialty tools such as a drill, circular saw, or socket set. Don’t forget the importance of safety equipment, including gloves, goggles, and a dust mask. Ensuring you have the necessary tools upfront will save time and frustration in the long run, so take stock of what you need before getting started.
Tips for Choosing Tools
When it comes to choosing the right tools for any project, it can be overwhelming with all the options available. However, there are a few tips to keep in mind that can help make the process a little easier. First, consider the specific needs of the project and what tools will be necessary to complete it efficiently.
Next, do some research on different brands and models to find ones that have good reviews and are known for their quality. It’s also important to keep budget in mind and find tools that fit within that range. Lastly, don’t be afraid to ask for recommendations or advice from professionals in the industry, as they likely have experience with different tools and can offer valuable insight.
By taking the time to carefully consider and choose the right tools, a project can be completed with greater accuracy and efficiency.
Assembly Steps
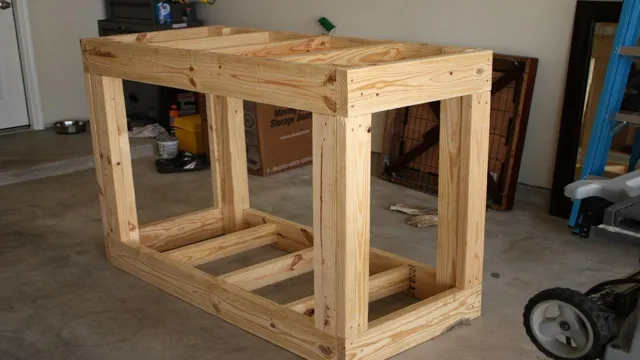
If you’re looking to create a double aquarium stand, it’s important to take it step-by-step to ensure a sturdy and safe finished product. First, gather all necessary materials such as wood boards, screws, and a saw. Next, cut the pieces of wood to the desired length and width for the stand’s base and upright supports.
Make sure the corners are mitered for a clean look and use wood glue and screws to secure them together. Then, add cross braces to connect the upright supports for added stability. After the base and supports are assembled, add the top shelf in the same manner.
Finally, sand the stand and finish it with a stain or paint of your choosing to protect and enhance the wood. Remember to measure twice and cut once to ensure accuracy and precision. With these assembly steps, you’ll have a double aquarium stand that’s not only functional but also a beautiful addition to your home.
Step 1: Frame Assembly
When it comes to assembling the frame of your project, it’s important to follow the steps carefully to ensure a sturdy and successful final result. Step 1 is all about getting the frame assembly started. First, gather all the necessary materials and tools needed for the job.
This likely includes wood pieces, screws, a drill, and a saw. Next, begin by cutting the wood pieces to the desired lengths as specified in your project plans. Once your pieces are cut, use the drill and screws to start connecting the pieces together to create the frame.
Take your time to make sure everything is level and aligned properly before tightening all the screws. This will help ensure that your frame is stable and sturdy, making it easier to add on to later in the project. Remember, a solid frame is the foundation to any successful project, so take your time and do it right.
Step 2: Shelves and Supports
Now that you have the frame of your bookshelf assembled, it’s time to focus on the shelves and supports. First, let’s talk about the shelves. Measure the height of your frame and cut your shelves to size accordingly.
Then, attach shelf brackets to the sides of the frame where you want your shelves to be placed. Make sure to use a level to ensure that each shelf is properly positioned. Once the brackets are in place, slide your shelves onto the brackets and make any necessary adjustments.
Next, let’s discuss the supports. Depending on the size and weight of your books, you may want to add additional support to your shelf to prevent sagging. One way to do this is to add diagonal supports to the back of the shelf. (See Also: How to Cool Down Aquarium Temperature: 7 Effective Ways to Keep Your Fish Healthy and Happy)
Measure the distance between the back of the shelf and the frame and cut two pieces of wood to that length, angled at 45 degrees at each end. Attach these supports to the back of your frame using screws. Another option for additional support is to add vertical supports underneath each shelf.
Cut pieces of wood to the length from the bottom of the frame to just below the underside of each shelf. Make sure to use a level to ensure that each support is placed correctly. Attach the supports to the frame using screws or wood glue.
Remember, it’s important to add the proper support to your shelf to prevent any damage or collapse. By following these steps, you’ll have a sturdy and reliable bookshelf to hold all of your favorite books.
Step 3: Attaching the Top Shelf
Now that the bottom shelf and legs are attached, it’s time to move on to the top shelf. This step will involve lining up the pre-drilled holes in the legs with the corresponding holes in the top shelf. It’s essential to make sure everything is level and squared off before tightening the screws.
One tip is to use a spirit level to ensure everything is straight. Once everything is lined up correctly, start to secure the screws, but don’t tighten them all the way just yet. It’s important to double-check everything once more before tightening the screws firmly.
After this step, the DIY table will start to take shape, making it easier to visualize the finished product. With the top shelf attached, it will be easier to work on the final details and personalize the table to fit your needs.
Step 4: Finishing Touches
After completing the previous steps of preparing the materials, cutting the pieces, and assembling the main structure, it’s time to add the finishing touches to your project. This step includes adding paint, stain, or any type of coating to protect and enhance the appearance of the wood. Before you begin, make sure to sand any rough edges and wipe off any debris that may have accumulated during the previous steps.
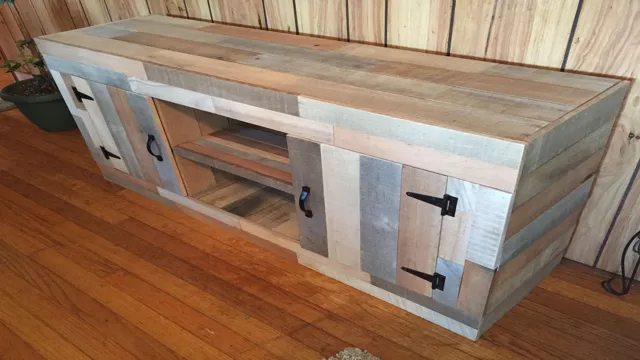
Next, choose your desired finish and apply it evenly with a brush or roller, taking care not to leave any unsightly bubbles or streaks. Allow the finish to dry completely before handling the project. Finally, you can add any decorative elements such as handles, hinges, or knobs to complement the finished look of your creation.
By following these steps, you can ensure that your woodworking project not only functions well but also catches the eye with its beautiful design.
Conclusion
In conclusion, making a double aquarium stand may seem like a daunting task, but with a few simple steps and a bit of creativity, you can have a sleek and functional home for your aquatic pet pals. Remember to measure twice and cut once, use sturdy materials, and add a personal touch to make it uniquely yours. With this DIY project, your fish will be swimming in style and you’ll be the envy of all your fish-loving friends.
After all, why settle for one aquarium when you can have two and show off your DIY skills at the same time?”
Safety Precautions and Tips
When it comes to assembling a product, safety should be your top priority. Ensure that you read and follow all safety precautions provided by the manufacturer before starting the assembly process. Always wear protective gear such as safety goggles and gloves to prevent injury.
Before you start assembling, clear the workspace of any potential hazards or obstacles that may cause harm. While carrying out assembly, keep all tools out of reach of children to prevent accidents. When tightening screws or bolts, use the appropriate tools and tighten them sufficiently but not excessively.
Over-tightening can lead to damage to the product or even injury. Always keep the manual close by and refer to it frequently to avoid confusion or incorrect assembly. Following these safety tips will ensure that you complete your assembly task without any harm to yourself or others.
Keywords: Safety Precautions, Assembly Steps, Manufacturer, Workspace, Hazards, Tightening, Damage, Injury, Manual. (See Also: How to Get Rid of Bloodworms in Aquarium: Effective Methods & Tips)
Maintenance and Care for Your Double Aquarium Stand
Assembling a double aquarium stand may seem like a daunting task, but with the right tools and a little patience, it can be quite simple. The first step is to gather all the necessary pieces and make sure you have the instructions on hand. Begin by assembling the base of the stand and securing it with screws.
It’s important to make sure the base is level before moving on to the next step. Next, assemble the vertical supports and attach them to the base. Once the supports are in place, attach the horizontal beams that will support the aquariums.
It’s important to make sure the beams are securely attached and level to prevent any accidents. Lastly, attach the cross braces and any additional embellishments or features. To ensure your double aquarium stand lasts for years to come, it’s important to take proper care and maintenance.
Regularly check for any signs of wear and tear or damage from water exposure. Keep the stand clean and free from debris by wiping it down with a damp cloth. Consider using a protective coating or sealant to prevent any water damage.
With proper assembly and maintenance, your double aquarium stand will be a beautiful and functional addition to your home or office.
FAQs
What tools do I need to make a double aquarium stand?
You will need a saw, drill, measuring tape, wood screws, and wood glue.
How much wood do I need to make a double aquarium stand?
This will depend on the size of your aquariums, but typically you will need two sheets of plywood and some 2×4 lumber.
Can I make a double aquarium stand without any prior woodworking experience?
It is possible, but it may be helpful to have some basic woodworking knowledge or enlist the help of someone who does.
How do I ensure that my double aquarium stand is sturdy and stable?
Make sure to use the proper measurements and securely attach all pieces with screws and wood glue.
How long does it take to make a double aquarium stand?
This will depend on your level of experience and the complexity of the design, but it can typically take a few hours to a few days.
Can I customize the design of my double aquarium stand?
Yes, as long as the design is structurally sound and able to support the weight of two aquariums.
What precautions should I take when placing my aquariums on the stand?
Make sure the stand is level and the weight of the aquariums is evenly distributed. It may also be helpful to add a layer of foam or felt between the stand and the aquariums to prevent any scratching or damage.


