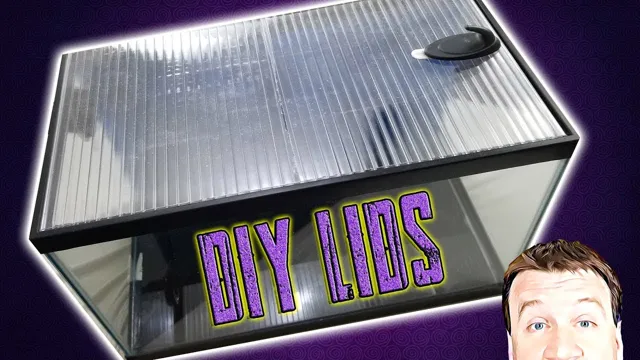
Are you tired of constantly losing fish or having them jump out of your aquarium? Have you been searching for an effective way to keep your aquatic pets safe and secure? Look no further than a mesh aquarium lid! This easy-to-make DIY project can keep your fish and other aquatic inhabitants inside the tank while also allowing for proper air flow and ventilation. With just a few simple materials and some basic tools, you can create a custom-fit lid that perfectly suits the dimensions of your aquarium. Keep reading to learn how to make a mesh aquarium lid and enjoy peace of mind knowing your beloved fish are safe and sound.
Materials and Tools Needed
If you’re looking to create a mesh aquarium lid, you’ll need a few key materials and tools to get started. First and foremost, you’ll need a mesh material that is suitable for use in an aquarium. Stainless steel mesh is a popular choice because it is durable and resistant to rust, but there are also other options such as plastic mesh that can be easier to work with.
You’ll also need a pair of wire cutters to cut the mesh to the right size and shape for your aquarium. A ruler or tape measure will also come in handy to ensure your cuts are accurate. Additionally, you’ll need some kind of hardware to attach the mesh to your lid, such as screws or clips.
Finally, if you want to add a frame to your lid, you’ll need either a saw and some wood to create your own or a pre-made frame that can be modified to fit your mesh. Overall, creating a mesh aquarium lid requires a bit of effort and attention to detail, but with the right materials and tools, it is a manageable DIY project that can improve the safety and functionality of your aquarium.
Mesh Screen
When it comes to creating a mesh screen, there are a few materials and tools that you’ll need to get started. First and foremost, you’ll need a mesh material that is durable and resistant to wear and tear. Look for mesh materials that are made from metal or a durable synthetic substance that won’t easily break down or deteriorate over time.
You’ll also need a frame to hold the mesh in place. This can be made from a variety of materials, including wood, metal, or PVC. Additionally, you’ll need a staple gun or other fastening device to connect the mesh to the frame securely.
It’s important to choose the right tools for the job, as this will ensure that your mesh screen is durable and long-lasting. Remember, taking the time to select quality materials and tools will pay off in the end, as your screen will be able to withstand years of use without needing to be repaired or replaced.
Measuring Tape
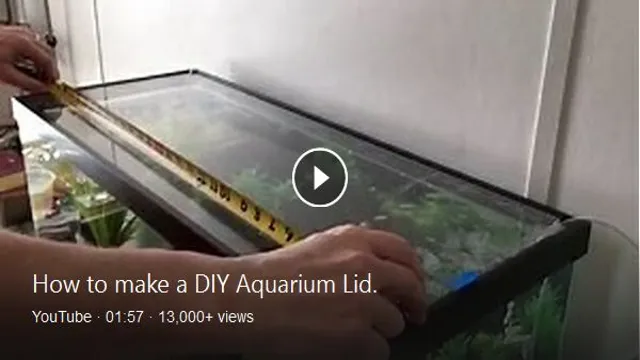
When it comes to measuring tape, there are a few essential materials and tools that you’ll need to ensure accurate results every time. First and foremost, of course, is the measuring tape itself. Look for a tape that’s at least 25 feet long, with clear markings and a locking mechanism to keep it in place.
You’ll also want a level to ensure that your measurements are straight and even, as well as a pencil or marker to make notes as you work. Finally, consider investing in a good pair of safety glasses to protect your eyes from flying debris or accidental cuts. With these materials and tools on hand, you’ll be well-equipped to take on any measuring project with confidence and precision.
Pliers or Wire Cutters
If you’re starting a DIY project that requires some cutting or bending of wire, you might find yourself wondering whether to use pliers or wire cutters. The truth is, both tools have their own strengths and weaknesses, and understanding the differences between them is key to choosing the right one for your project. Pliers are great for tasks that require twisting, bending, or holding wire in place, but they can be cumbersome when it comes to cutting.
Wire cutters, on the other hand, are designed specifically for cutting wire, making them much more efficient than pliers in this regard. When it comes to choosing between the two, it all depends on the task at hand. If you need to cut a lot of wire, wire cutters are the better choice, while pliers are ideal for more intricate tasks that require bending or twisting wire.
Ultimately, having both tools on hand can make your DIY projects run much more smoothly, as you’ll be able to switch between them depending on what’s needed.
Zip Ties or Screws and Nuts
When it comes to securing materials together, two commonly used methods are zip ties and screws and nuts. Depending on the project, one method may be more suitable than the other. Zip ties are great for quick and temporary fixes, such as securing cables or tying bags together.
They are inexpensive and easy to use, requiring no additional tools. However, they are not as secure as screws and nuts, which provide a more permanent fix for heavy-duty applications. For screws and nuts, you’ll need a screwdriver and a wrench to fasten them tightly.
They are ideal for projects that require a strong and long-lasting hold. Ultimately, the decision between zip ties or screws and nuts comes down to the specific needs of your project.
Drill or Screwdriver
When it comes to DIY projects, choosing the right tools can make a huge difference in the outcome of your project. Two of the most common tools that people use are drills and screwdrivers. At first glance, they might seem interchangeable, but they have different functions and may be suited for different materials. (See Also: How to Boost Good Bacteria in Aquarium: Tips and Tricks for a Healthy Ecosystem)
To start with, you need to consider the materials you’re working with. If you’re working with wood or other soft materials, a screwdriver may be all you need. But for harder materials like metal or concrete, using a drill may be more efficient.
When it comes to tools, quality matters. Cheap tools can be tempting, but it’s usually better to invest in a high-quality tool that will last longer and perform better. When you choose a drill or screwdriver, make sure it’s the right size and has the power needed to get the job done.
Overall, choosing the right tool for your project is key to a successful outcome. Keep in mind the materials you’re working with and invest in high-quality tools. A little bit of planning can go a long way in making your DIY project a success.
Steps to Make a Mesh Aquarium Lid
Are you tired of your fish jumping out of the aquarium? One effective solution is to make a mesh aquarium lid. Here are several simple steps to create your own mesh lid. First, measure the dimensions of your aquarium and cut a mesh sheet to fit the top.
Next, attach the mesh to a PVC frame using zip ties or adhesive, making sure the frame fits snugly on your tank. You can add additional support by attaching small wood blocks to the frame’s corners. Finally, place the lid on top of the aquarium and enjoy a secure and safe environment for your fish.
By following these easy steps, you can create a practical and inexpensive solution to keep your fish safe. With a mesh aquarium lid, you can enjoy the peace of mind knowing that your aquatic pets are protected from harm.
Step 1: Measure the Size of the Lid
Making a mesh aquarium lid is a great idea to help keep your fish safe, and it’s not as complicated as you might think! The first step is to measure the size of your lid. You want to be sure that your mesh lid fits perfectly to prevent any gaps for your fish to jump through. Use a measuring tape to measure the length and width of your lid, making sure to include any overhangs or edges that might be present.
Once you have your measurements, you can start cutting your mesh to fit your lid. It’s important to use a durable and sturdy mesh to ensure that it can withstand all the wear and tear that comes with aquarium life. By taking the time to measure your lid accurately, you’re already on your way to creating a safe and enjoyable environment for your fish to thrive in.
Step 2: Cut the Mesh Screen to Size
To make a mesh aquarium lid, the second step is to cut the mesh screen to the appropriate size. It’s important to measure the top of the aquarium accurately to ensure a proper fit for the mesh lid. Once the measurements are taken, the mesh should be cut slightly larger than the measured size to allow for a secure fit.
A sharp pair of scissors or wire cutters may be used to cut the mesh. It’s essential to be cautious and make sure the cut is straight and even. The cut mesh should then be placed on top of the aquarium to check the fit.
The edges can be trimmed as needed until the mesh fits securely on top of the aquarium. Ensuring a proper fit is crucial to prevent fish from jumping out of the tank and to maintain the right humidity and temperature levels inside. With these steps done, the next step is to attach the mesh to the aquarium.
Step 3: Attach the Mesh to the Frame
Now that you have your frame and mesh prepared, it’s time to attach the mesh to the frame. One easy way to do this is using a staple gun. Begin by placing the mesh on top of the frame and aligning it evenly.
Hold the mesh in place with one hand while using the staple gun with the other to secure the mesh to the frame. Make sure to staple along the entire perimeter of the frame to ensure that the mesh is secure. If you have any excess mesh material, simply trim it off with a pair of scissors.
Once you have secured the mesh to the frame, give it a quick test to make sure that it fits snugly on top of your aquarium. Congratulations, you have now successfully made a mesh aquarium lid! Your fish will now be safe from any potential jumping accidents while still allowing for air flow and easy access to your tank for maintenance.
Step 4: Secure the Corners with Zip Ties or Screws and Nuts
When it comes to making a mesh aquarium lid, securing the corners is an important step to prevent any unwanted escapes or accidents. Now, there are two options for securing those corners: zip ties or screws and nuts. Zip ties are a quick and easy solution that can be easily adjusted as needed, but they may not be the most durable option. (See Also: How to Make a Tortoise Aquarium: A Step-by-Step Guide to Building Your Own Turtle Tank.)
On the other hand, screws and nuts may take a bit more time and effort to install, but they provide a sturdier and long-lasting solution. Whichever option you choose, make sure to secure each corner tightly and evenly to ensure the mesh remains intact. Once you’ve secured all corners, give your lid a good shake and tug to test its strength.
If it holds up, congratulations! You’ve successfully made a mesh aquarium lid that is both secure and safe for your fish.
Step 5: Drill Holes for Feeding and Filtration
In order to make a mesh aquarium lid, there are several important steps to follow, one of which is drilling holes for feeding and filtration purposes. These holes are crucial for allowing proper airflow and water circulation within the tank, ensuring that your fish have a healthy and thriving environment. When drilling the holes, it’s important to carefully measure and mark the placement, taking care not to create too many or too large of holes that could compromise the structural integrity of the lid.
Additionally, it’s important to use the right tools and techniques to avoid cracking or damaging the mesh material. With these key steps in mind, you can create a functional and effective mesh lid for your aquarium, providing your fish with the best possible living conditions. So, are you ready to get started on creating your own mesh aquarium lid?
Benefits of a Mesh Aquarium Lid
If you’re a responsible aquarium owner, you probably already know the importance of using a lid to keep your fish safe and your tank clean. However, not all aquarium lids are created equal, and a mesh lid can offer numerous advantages over a solid one. First and foremost, a mesh lid allows for much better ventilation, which can be crucial for certain species of fish or invertebrates that require a specific amount of oxygen exchange.
Additionally, a mesh lid is typically more lightweight and easier to handle than a solid one, making maintenance tasks like feeding and cleaning a breeze. Finally, a mesh lid can also help to prevent unwanted visitors like insects or small animals from getting into your aquarium, while still letting in plenty of natural light. So if you’re looking to upgrade your current lid setup, consider making your own mesh lid using a simple DIY tutorial!
Provides Good Ventilation
If you’re in the market for a new aquarium lid, it’s worth considering a mesh option. Mesh aquarium lids provide good ventilation for your fish while keeping them safe and contained. The benefits of a mesh aquarium lid go beyond just ventilation, though.
With a mesh lid, you can also easily monitor your fish and feed them without having to remove the lid. Plus, the mesh material is durable and easy to clean. You won’t have to worry about algae or other unwanted buildup on a mesh lid like you might with a solid top.
Overall, a mesh aquarium lid is a great investment for any fish owner looking to improve the health and happiness of their aquatic pets.
Prevents Fish from Jumping Out
If you’re an aquarium owner, you understand the importance of keeping your underwater ecosystem protected from external factors. One of the most significant risks to your fish’s health is them jumping out of your aquarium. This is where a mesh aquarium lid comes in.
Mesh lids offer many benefits that can help protect your aquatic friends from harm. One of the most significant benefits is preventing fish from jumping out and landing on the floor, which can be a traumatic experience for them. The mesh lid acts as a barrier, keeping your fish safe and secure in their underwater environment.
It also prevents debris and other unwanted materials from getting into the tank, which can harm your fish’s health. So, if you want to keep your aquarium safe and secure, consider investing in a mesh lid today!
Allows for Better Lighting
Mesh aquarium lids are becoming increasingly popular nowadays due to their numerous benefits. One of the significant benefits of using a mesh aquarium lid is that it allows for better lighting. Unlike traditional aquarium lids, mesh lids permit more light to pass through, making it easier for plants and corals to thrive.
More light in your aquarium means that photosynthetic organisms will receive enough light and have a better chance of fulfilling their growth potential. Additionally, a well-lit aquarium is more aesthetically pleasing, making it even more enjoyable to look at. By using a mesh aquarium lid, you can eliminate the shadows caused by traditional lids that obstruct light and reduce its intensity. (See Also: How to Make Driftwood Safe for Aquariums: Simple yet Effective Methods)
In summary, having a mesh aquarium lid allows for better lighting, which enables the plants and corals in your aquarium to grow more efficiently, providing a beautiful and healthy environment for your aquatic creatures.
Easy to Clean and Maintain
When it comes to taking care of a fish tank, keeping it clean and maintaining it can be a challenge. One easy solution to this problem is using a mesh aquarium lid. Not only does it provide great ventilation for your fish, but it also allows for easy cleaning.
Water changes and removing debris becomes a breeze with a mesh lid. Plus, the lid itself is easy to maintain and can be wiped down with a damp cloth whenever needed. It’s the perfect solution for those who want to keep their fish happy and healthy while also making their own lives a bit easier.
So, if you want a hassle-free way to care for your fish tank, consider getting a mesh aquarium lid.
Conclusion
In conclusion, making a mesh aquarium lid is a fin-tastic way to bring both form and function to your underwater world. Not only will your fish thank you for the improved security and ventilation, but you’ll also have the satisfaction of creating something with your own two hands. So whether you’re a seasoned aquarist or just starting out, dive in and give this DIY project a try – you won’t be disappointed!”
FAQs
What materials do I need to make a mesh aquarium lid?
You will need mesh material, a tape measure, scissors, zip ties, and a ruler.
How do I measure the dimensions for my mesh aquarium lid?
Use a tape measure to measure the width and length of your aquarium. Subtract 1/4 inch from both measurements to ensure a snug fit.
What type of mesh material should I use for my aquarium lid?
You can use nylon or stainless steel mesh. Nylon is easier to work with and won’t rust, but stainless steel is more durable and resistant to chewing by fish.
How do I secure the mesh to the aquarium frame?
Use zip ties to attach the mesh to the frame. Make sure to space the zip ties evenly and trim off any excess for a neat appearance.
Can I customize the size and shape of my mesh aquarium lid?
Yes, you can easily modify the dimensions and shape of the mesh to fit your aquarium. Use a ruler and scissors to trim the mesh to size and shape as desired.
Will a mesh aquarium lid affect the lighting in my aquarium?
No, a mesh lid should not significantly impact lighting. However, it may slightly reduce evaporation and prevent fish from jumping out of the tank.
How do I clean my mesh aquarium lid?
Simply remove the lid from the tank and rinse it off with running water. For tougher stains, gently scrub with a soft brush and mild soap, then rinse thoroughly.

