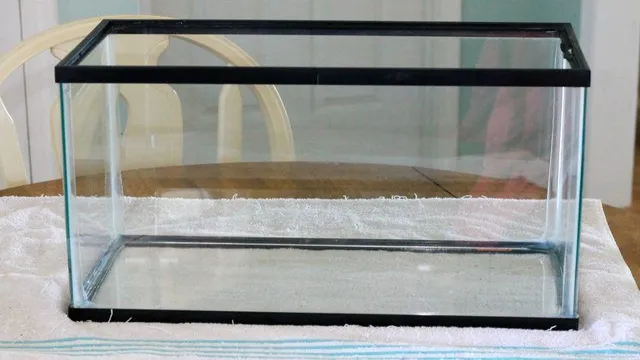
Have you ever wondered how to create a unique and eye-catching aquarium for your home or office? Making angled aquariums may be just the solution for you. With a little bit of creativity and some technical know-how, you can turn your fish tank into a stunning piece of art that is both functional and aesthetically pleasing. In this step-by-step guide, we will walk you through the process of creating your own angled aquarium, from selecting the right materials to designing and building the structure.
Whether you’re a hobbyist or a professional, this guide is sure to inspire and enlighten, so let’s dive in!
Planning and Materials
If you’re considering building an angled aquarium, there are a few things you need to think about before you get started. Firstly, you’ll need to select the right materials. Toughened, anti-reflective glass is the best option, as it is strong, durable, and resistant to scratches.
If you’re going to use acrylic, make sure that it is at least 1cm thick to prevent it from warping or flexing over time. You’ll also need to plan your design carefully, thinking about the angle and shape of the tank, as well as the placement of any additional features, such as filtration systems or lighting. It’s a good idea to sketch out your design or use a digital design tool to help you visualize how everything will fit together.
Remember to measure carefully to ensure that your tank fits perfectly into its chosen location. With the right planning and materials, you’ll be well on your way to creating the perfect angled aquarium for your fishy friends to call home.
Choose Glass Thickness and Angles
When it comes to creating a glass structure, the thickness and angles you choose can make a big difference in the final look and durability of the piece. The thickness of the glass determines how strong it will be, with thicker glass being more sturdy, but also heavier. The angles of the glass also play a role in the final look, with angled cuts providing a unique prism effect.
It’s important to consider both factors when selecting materials for your glass project. Think about the purpose of the piece and where it will be located. For a freestanding structure, such as a glass sculpture, thicker glass may be preferable to ensure that it can withstand the elements and general wear and tear.
However, if the glass is part of a window or door, a thinner material may be more appropriate to allow for easy opening and closing. When it comes to angles, consider the effect you’re going for. A 45-degree angle will create a classic look, while a more acute angle can create a more modern and edgy feel.
And don’t be afraid to combine angles for a more dynamic effect. Overall, choosing the right glass thickness and angles is essential for creating a piece that is not only aesthetically pleasing but also functional and durable. Keep in mind the purpose and location of the piece and experiment with different angles to find the best fit.
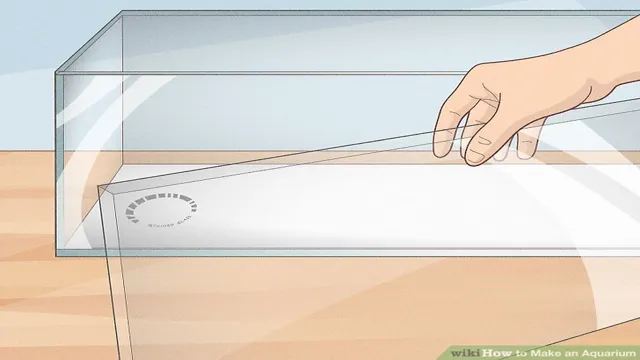
Gather Materials and Tools
When it comes to any DIY project, planning and gathering the necessary materials and tools is crucial. Before starting your project, it’s essential to assess what items you already have and what you’ll need to purchase or acquire. Make a list of everything you need, from the larger items like wood or paint to the smaller tools like sandpaper and brushes.
Once your list is complete, take the time to research prices and where you can purchase the items needed. Don’t forget to compare prices at different stores to find the best deals and quality materials. When you’ve secured everything on your list, double-check that you have all the necessary tools on hand, including saws, hammers, and measuring tapes.
Finally, arrange all your supplies in a designated area, so everything is easily accessible when you start your project. Planning and gathering your materials beforehand can save you time, money, and frustration down the road. Get started on your DIY project knowing you have everything at hand to make it a success.
Plan Wiring and Filtration
When planning the wiring and filtration for your aquarium, it’s important to consider the materials you’ll need and the specific requirements of your fish. For wiring, you’ll need a reliable power source and appropriate cables, as well as any necessary adapters or connectors. Make sure to arrange the wiring in a way that’s safe and easy to access for maintenance. (See Also: How to Plumb an Overflow Aquarium: A Step-by-Step Guide)
As for filtration, you’ll need to choose a system that’s suitable for the size and type of your aquarium, as well as the number and species of fish. Some common filtration options include hang-on-back filters, canister filters, and sponge filters. You’ll also need filter media, such as bio balls or filter floss, to keep your water clean and healthy for your fish.
When choosing your wiring and filtration materials, it’s important to purchase from a reputable supplier and to keep in mind the specific needs of your fish. For example, certain fish may require a stronger or less intense flow from your filtration system, so it’s important to research and choose accordingly. Additionally, you’ll want to consider the overall aesthetic of your aquarium when planning your wiring and filtration setup, as it can have a significant impact on the overall look and feel of your tank.
With thoughtful planning and careful consideration, you can create a safe, healthy, and visually appealing environment for your aquatic pets.
Cutting and Assembly
If you’re looking to add a unique touch to your aquarium, then creating an angled aquarium may be just what you need. To start, you’ll need to cut the glass at the appropriate angle, usually 45 degrees or 60 degrees, depending on the design you’re going for. This can be done with a specialized glass cutter or saw, but it’s important to note that it requires precision and care.
Once the glass is cut, it’s time for assembly. Using a specialized aquarium-safe silicone, carefully join the panels together to create a seamless, watertight bond. It’s important to wait for the silicone to fully cure before filling the aquarium with water, as any leaks or weak spots can lead to disaster.
With a bit of patience and skill, however, you’ll have a stunning addition to your home aquarium collection that’s sure to impress.
Cut Glass Panels to Size and Angle
When it comes to installing cut glass panes, it’s important to get the sizing and angles just right. It’s not as simple as just measuring and cutting, as the type of glass and the angle of installation can affect the accuracy of the cut. One method to accurately cut glass panels is to use a glass cutter and a straight edge to score the glass along the desired cutting line, then applying slight pressure to snap the glass along the scored line.
However, this method may not work for more intricate cuts that require a specific angle. In those cases, a diamond blade saw may be used to achieve the perfect cut. Once the panel is cut to size, it’s important to assemble it using a strong adhesive that is specifically designed for glass.
This will ensure a secure and durable installation. So, whether you’re installing a glass shower door or a custom glass table top, accuracy and precision are key in achieving a flawless finished product.
Assemble Panels Using Aquarium Safe Silicone
Cutting and assembling aquarium panels can seem daunting, but with the right tools and techniques, it can be a breeze. To start, gather the pieces of glass or acrylic that you will be using and measure out the dimensions you need. A glass cutter or plastic saw can be used to create the proper shapes and sizes.
Once you have all of your pieces, it’s time to assemble them using aquarium safe silicone. Be sure to use enough silicone to create a strong bond between the individual panels. You’ll want to make sure the seams are well-sealed but also allow for some flexibility in case of any movements or changes in temperature.
As you assemble the panels, take breaks to check for any leaks or weakness in the structure. With proper cutting and assembly, you’ll have a beautiful and secure aquarium ready for your aquatic friends to call home.
Install Wiring and Filtration Systems
When it comes to setting up your aquarium, one of the most important steps is installing the wiring and filtration systems. This is where things can get a bit tricky, but by following a few simple steps, you can get everything up and running in no time. The first step in cutting and assembling the necessary components is to determine the best location for your aquarium and its accompanying equipment. (See Also: How to Lessen the Flow of an Aquarium Filter: 5 Easy DIY Hacks)
You’ll want to make sure there is enough space for both the tank and the filtration system, as well as any other equipment you may be using. Once you have your location picked out, it’s time to start cutting and assembling the various parts. This will typically involve cutting hoses and tubing to the correct length, installing connectors and valves, and attaching them securely to your tank and filtration system.
It’s important to pay close attention to the instructions provided with your equipment and to ensure that everything is properly secured and connected before moving on to the next step. This will help prevent any potential leaks or other problems down the line. Overall, installing the wiring and filtration systems for your aquarium can be a bit of a daunting task, but by taking it step by step and paying close attention to the details, you can ensure that everything is set up correctly from the start.
Just remember to take your time and double-check everything along the way to avoid any issues later on.
Maintenance and Care
If you’re interested in creating an angled aquarium, there are a few things to keep in mind. First and foremost, you’ll need to choose a tank that is designed for this type of setup. Typically, angled aquariums have one or more sides that are slanted at an angle rather than being straight up and down.
This can create a unique and eye-catching look, but it also means that you’ll need to pay careful attention to the size and placement of your aquarium. In order to make sure that your fish have plenty of space to swim and thrive, it’s important to choose a tank that is large enough and positioned in the right place. You may also want to consider the type of fish that you plan to keep, as some species may be better suited for an angled aquarium than others.
With a little bit of planning and careful consideration, however, you can create a beautiful angled aquarium that both you and your fish will enjoy.
Regular Cleaning and Water Changes
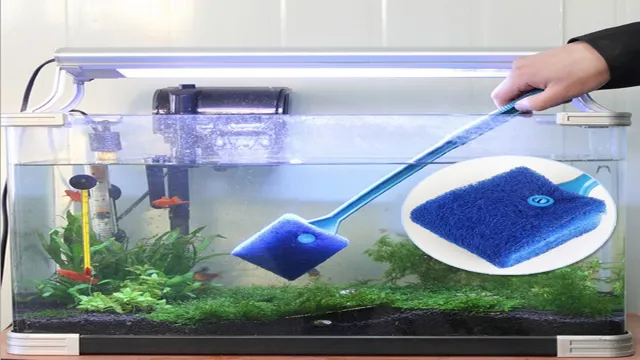
Maintaining a clean and healthy environment for your aquatic pets is essential to ensure their well-being. Regular cleaning and water changes are crucial tasks that must be performed on a specific schedule to prevent any health issues or bacteria growth in your aquarium. It’s recommended to clean the tank and its accessories at least once a week or every two weeks, depending on your tank’s size and fish quantity.
This process includes cleaning the tank walls, gravel, decorations, and filter media, depending on the type of filtration system you have. Besides cleaning the tank, routine water changes are essential to maintain the tank’s water quality. You should remove and replace about 10-20% of the aquarium water every week to keep the water fresh, free of toxins, and appropriate for your aquatic pets.
Following these regular cleaning and water changes routines will help maintain your aquarium’s overall health and keep your fishes happy and thriving.
Monitor Water Chemistry and Temperature
Maintaining proper water chemistry and temperature in your fish tank is crucial for the health of your aquatic pets. The balance of pH, ammonia, nitrite, and nitrate levels is essential and should be regularly monitored using a test kit. Keeping the water temperature consistent is also important and can be achieved with a reliable aquarium heater.
Fluctuations in temperature can cause stress to your fish and can even lead to illnesses. It’s essential to remember that different types of fish have specific temperature and water parameter requirements, so research and adjust accordingly. Neglecting to monitor and maintain water chemistry and temperature can result in the death of your fish, so make it a habit to check it regularly.
With the proper care and attention, your fish can thrive in a healthy and stable environment. (See Also: How to Clean an Aquarium the Right Way: A Step-by-Step Guide)
Conclusion
In conclusion, creating angled aquariums can be a fun and rewarding project for fish enthusiasts. With careful measurements, planning and cutting, you can achieve a unique and visually stunning tank that adds interest to any space. Just be sure to remember that the angles should enhance the fish’s home, not hinder their health or comfort.
So go ahead, dive in and get creative with your aquarium design – and remember to keep your fishy friends in mind every step of the way!”
FAQs
What are angled aquariums?
Angled aquariums are aquariums that have one or more angled sides, which can create an interesting and unique appearance.
What are some benefits of having an angled aquarium?
Angled aquariums can provide a larger viewing area, create the illusion of more space, and allow for easier cleaning.
How do you make an angled aquarium?
To make an angled aquarium, you will need to purchase aquarium glass and silicone sealant. Cut the glass to the desired shape, then use the silicone sealant to glue the pieces together.
What tools do you need to make an angled aquarium?
To make an angled aquarium, you will need glass cutting tools, a ruler, a marker, and a silicone sealant gun.
What types of fish are suitable for an angled aquarium?
Any type of fish can be kept in an angled aquarium, as long as the tank is large enough and the water is properly maintained.
How often do you need to clean an angled aquarium?
You should clean your angled aquarium once a week by removing any debris and performing a partial water change.
Can an angled aquarium be used for breeding fish?
Yes, an angled aquarium can be used for breeding fish, as long as it meets the specific needs of the species being bred.

