A well-lit aquarium can bring a serene and calming atmosphere to any room. However, buying a pre-made aquarium light can be expensive. Do you want to learn how to save money and make your own aquarium light? Luckily, making your own aquarium light is a simple and budget-friendly DIY project.
All you need is a few materials and some basic knowledge of electronics. In this blog, we will guide you through the step-by-step process of making an aquarium light that not only illuminates but also enhances the colors of your aquatic plants and fish. Get ready to dive into the world of DIY aquarium lighting!
Introduction
If you’re wondering how to make an aquarium light from scratch, don’t worry, it’s easier than you might think. You’ll need a few essential tools such as LED strips, a power supply, and clear acrylic sheets to diffuse the light. It’s important to choose the right type of LED strip, one that emits enough light for your aquarium and can be cut to the right length.
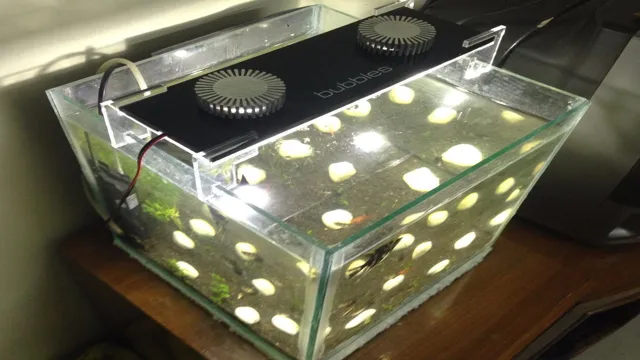
Once you have your supplies, start by mounting the LED strips onto a piece of clear acrylic sheeting, using a silicone adhesive. Make sure the strips are evenly spaced and face downwards into the aquarium. Then, cut the acrylic sheets to the size of the aquarium and attach them to the top of the LED strips.
Finally, wire the power supply to the LED lights and plug it in. Voila! You now have your homemade aquarium light. By using LED strips, you’re not only saving money on your electricity bill but you’re also providing a natural-looking light source which benefits your aquatic life.
Why You Need Aquarium Lights
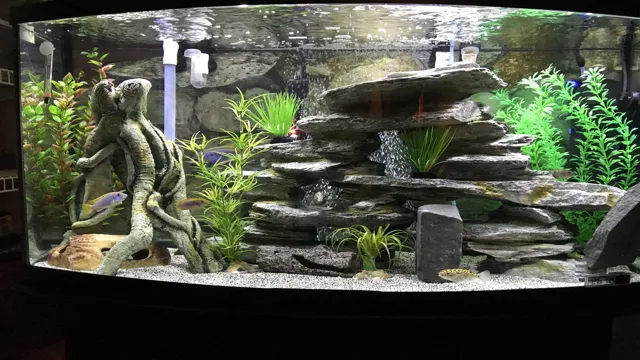
Aquarium Lights Have you ever wondered why aquariums need lights? Sure, they look pretty and add ambiance to your aquarium, but their purpose goes beyond aesthetics. Aquarium lights play a crucial role in the health and well-being of your underwater pets and plants. In fact, without proper lighting, your aquarium may eventually become a hostile environment for your marine life.
Lighting helps promote healthy plant growth, which is vital for providing oxygen and hiding places for your fish. It also helps regulate their natural circadian rhythms and assists in maintaining water temperature. Plus, let’s be honest, having a well-lit aquarium is just more enjoyable to watch! So, when it comes to your aquarium, don’t overlook the importance of proper lighting.
Types of Aquarium Lights
Aquarium lights play a significant role in the proper growth and development of your aquatic plants and animals. There are different types of aquarium lights available, and choosing the right one can be a bit perplexing. Essentially, the type of aquarium light you will need depends on the kind of plants or animals you have and the size of your aquarium.
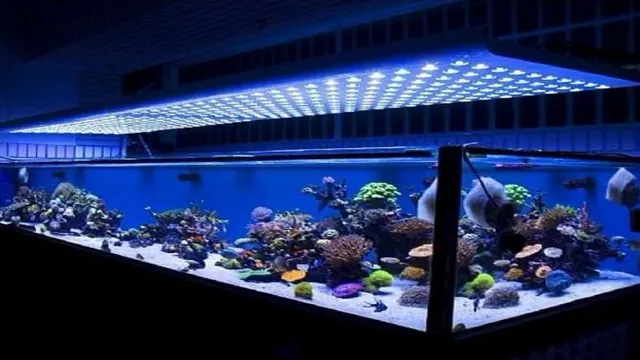
Some of the common types of aquarium lights include LED lights, fluorescent lights, metal halide lights, and incandescent lights. LED lights are known for their energy efficiency and long lifespan, while fluorescent lights are budget-friendly and provide a wide spectrum of light. Metal halide lights are best for large aquariums with deep water, while incandescent lights are ideal for smaller aquariums.
Overall, it’s essential to research thoroughly and choose the best type of aquarium light that will meet your aquatic needs.
Materials Needed
If you’re looking to make your own aquarium light, the good news is that it’s not as tough as it might sound. The first thing you’ll need to do is gather up all the materials you’ll need. The most important item is the LED light strip.
You’ll also need a power supply, a dimmer switch, a waterproof cover for your LED strip, and some type of mounting hardware to attach the light to your aquarium. If needed, you can also purchase a timer so that your aquarium light turns on and off automatically. It’s important to make sure that all your materials are waterproof to prevent any harm to your fish or damage to your equipment.
With these materials in hand, you can easily create your own custom aquarium light without breaking the bank.
LED Strips
If you’re planning to add LED strips to your home decor, you’ll need a few materials to get started. The basic supplies you need include LED strips, a power supply, a controller, and connectors. LED strips come in a variety of colors and lengths, so choose one that suits your preferences and requirements.
You also need a power supply that can handle the voltage and wattage of the LED strip you purchase. Additionally, a controller allows you to adjust the brightness, color, and effects of the LED strip, while connectors help you attach and cut the strip as per your needs. Overall, investing in these materials can transform your home into a cozy and personalized space that you’ll enjoy for years to come.
Power Supply
When it comes to building a computer, one of the most important components you’ll need is a power supply unit (PSU). This device is responsible for supplying power to all of the components in your computer, so it is critical to choose a high-quality PSU that can handle the load. One of the first things you’ll need to consider when selecting a PSU is its wattage. (See Also: How to Get Rid of Snails in Tropical Aquarium: A Guide for a Snail-Free Environment)
Your PSU’s wattage should be appropriate for the components you plan to use, so make sure to check the power requirements for each individual part. In addition to wattage, you’ll also want to consider the PSU’s efficiency rating, the number and type of cables it comes with, and its overall reliability. Remember, a high-quality PSU is essential for keeping your computer running smoothly and avoiding potential problems down the line.
Connectors
When it comes to electrical wiring and connections, having the right materials is crucial. Connectors are an essential part of any electrical system, as they enable wires to connect and disconnect easily and safely. First and foremost, you’ll need a variety of connectors, ranging from wire nuts and crimp connectors to lug connectors and spade connectors.
These come in different sizes and shapes to fit wires of various gauges and shapes, so it’s important to have a good selection on hand. Additionally, you’ll need tools like wire strippers and crimpers to prepare your wires for connection and ensure a secure connection. It’s important to choose high-quality materials that meet industry standards to ensure your electrical connections are safe and long-lasting.
By having the right connectors and tools on hand, you can easily make electrical connections with confidence.
Heat Dissipation System
One of the most crucial components of any electronic device is the heat dissipation system. Without proper cooling, electronic components can overheat and cause damage to the device. The materials needed for an effective heat dissipation system vary depending on the type of device, but typically include thermal pads, heat sinks, thermal grease, and fans.
Thermal pads provide a cushion between the heat source and the heatsink, helping to transfer heat away from the device. Heat sinks are the most common way to dissipate heat and can be made of aluminum, copper, or other metals. Thermal grease is a type of thermal interface material that is placed between the heat sink and the device, improving thermal conductivity.
Fans are used to improve airflow and remove hot air from the device. It’s essential to choose high-quality materials for a heat dissipation system to ensure efficient cooling and prevent damage to your electronics.
Step-by-Step Guide
Making your own aquarium light can be a fun and rewarding project. Not only can it save you money in the long run, but you can also customize the light to fit your specific aquarium needs. The first step in making an aquarium light is to determine the type of lighting you need.
Will you be growing plants in your aquarium? Are you keeping fish that require specific lighting conditions? Once you have answered these questions, you can begin gathering the necessary materials such as LED light strips, a power source, and a waterproof casing. From there, you will need to measure and cut the light strips to fit your aquarium’s dimensions and secure them in place. Finally, attach the power source and waterproof casing, and your homemade aquarium light is ready to use! With a little bit of creativity and some basic knowledge, creating your own aquarium light can be both enjoyable and beneficial for your aquatic friends.
Step 1: Prepare your materials
Preparing your materials is the first step in any successful project, and it’s no different when it comes to crafting a blog post. To start, you’ll need to determine the topic of your post and gather any necessary research or information. This can involve conducting interviews, doing online research, or drawing from your own experience.
Once you have your ideas and information in order, it’s time to create an outline for your post. This will help you stay organized and ensure that your writing is structured in a logical way. With your outline in hand, you can start to write your post, keeping in mind the tone and style that will engage your readers.
Finally, it’s important to review and edit your work to remove any typos or errors and ensure that your writing flows smoothly. By taking the time to prepare your materials, you’ll be well on your way to creating a blog post that is informative, engaging, and successful.
Step 2: Measure your tank’s dimensions
To begin setting up your fish tank, it’s important to start with accurate measurements. After choosing a location for the tank, grab a measuring tape and jot down the dimensions of the space. You’ll need to measure the length, width, and height of the tank to determine its total volume and ensure that it will fit the intended space.
It’s important to consider the weight of the tank as well, as it will need to be placed on a sturdy, level surface. Understanding the measurements of your tank can also help you choose the right filter, heater, and other equipment for optimal efficiency. Make sure to double-check your measurements before making any major purchases or setting up the tank to avoid any complications or losses. (See Also: How to Develop Aquarium Business: Essential Tips and Tricks for Success)
By thoroughly measuring your tank, you’ll have a solid foundation for creating a healthy, thriving aquatic environment for your fish.
Step 3: Plan your light setup
If you want to take your photography to the next level, planning your light setup is crucial. The first step is to consider what you’re trying to achieve – whether that’s a specific mood, a particular focal point or something else entirely. Once you’ve devised a plan, it’s time to start selecting your light sources.
Ideally, you’ll want to use a mix of natural light and artificial lighting to achieve the best possible results. If you’re working indoors, make sure to experiment with different types of lights, such as lamps or candles, to create an interesting and unique atmosphere. Finally, be sure to experiment with different angles and positions to get the perfect lighting setup for your shot.
By following these simple steps and being willing to experiment, you can create a truly stunning photograph that will be sure to impress.
Step 4: Install the LED strips
Now that you have your power source and controller set up, it’s time to install the LED strips! Begin by measuring the length of your surface and cutting the strip to fit. Make sure to cut on the designated cut lines, indicated by scissors or a knife icon. Next, remove the adhesive backing from the strip and gently press it onto the surface.
Be sure to start at one end and work your way along, pressing firmly to ensure a secure hold. If you have a corner or turn to navigate, you may need to cut the strip and use connectors to turn the strip. And that’s it! Now you can turn on your LED strips and enjoy the new ambiance of your space.
Remember to handle the strips with care and avoid bending them unnecessarily to prevent damage. Happy decorating!
Step 5: Connect the power supply
Connecting the power supply is the final step to power up your device. Before you do anything, it’s essential to ensure the power supply matches the device’s requirements. Once you have the right power supply, connect one end to the device and the other end to the power outlet.
Make sure the power cord is correctly plugged in, and there are no loose connections. After that, turn on the power outlet, and your device should start up. Always keep in mind to double-check everything before turning on the power to avoid any damage or accidents.
By following these easy steps, you can successfully connect your power supply and start using your device efficiently.
Step 6: Add a heat dissipation system
A heat dissipation system is necessary to prevent your device from overheating. It’s an essential part of any electronic device as it helps cool down the components that produce heat, ensuring that they don’t get damaged. Without a cooling system, the heat buildup can cause significant damage to the circuitry, leading to data loss and hardware failure.
A common cooling system is a fan or a heat sink, depending on the device’s size and design. A heat sink is made of a material that absorbs and transfers heat away from the components, while a fan blows cool air over the heat sink to dissipate the heat. It’s important to choose a cooling system that is appropriate for your device’s needs.
Overloading the device’s cooling system can lead to additional problems. So next time you’re building a device, make sure to include an adequate heat dissipation system to ensure its longevity and health.
Conclusion
In conclusion, making aquarium light may seem like a daunting task, but with these simple steps, you’ll be swimming in success. Whether you’re a fish fanatic or just someone looking to brighten up your space, creating your own aquarium light can be a fun and rewarding project. From sourcing the perfect LEDs to assembling the final product, there’s a sense of satisfaction that comes with knowing you’ve made something with your own two hands.
And who knows, maybe your fish will appreciate the DIY effort too. So dive in and light up your aquatic world – the possibilities are endless!” (See Also: How to Add Silicone to Aquarium: A Step-by-Step Guide for a Safe and Leak-Free Seal)
DIY Aquarium Lights: Cost-effective and Customizable
Aquarium lights are crucial for the health and growth of aquarium plants and fishes. While there are many commercial options available, DIY aquarium lights are a cost-effective and customizable alternative. With a few simple tools and materials, you can create a lighting system that fulfills your aquarium’s specific requirements.
To begin, choose the type of LED lights that will best suit your aquarium’s needs. Next, measure and cut the lights to fit the size of your aquarium lid. Prepare a heat sink and attach the lights to it.
Once you have a solid lighting fixture, attach it to your aquarium lid and test it before using it. With just a few steps you’ll be able to create a fully customizable and cost-effective LED lighting system for your aquarium. Remember that natural light is still important to your aquarium’s health, so ensure that you balance this with the use of artificial light.
With a little bit of DIY effort, your aquarium can look and function beautifully.
FAQs
What are the benefits of using LED lights in an aquarium?
LED lights provide energy efficiency, long lifespan, and customizable lighting options.
Can I use regular household light bulbs in my aquarium?
No, regular household light bulbs don’t provide the right spectrum of light for aquarium plants or fish.
How do I calculate the wattage of light needed for my aquarium?
You can calculate the wattage needed by multiplying the tank’s volume by 1.5-2 watts per gallon.
Do different types of fish require different lighting conditions?
Yes, different fish species have varying lighting needs, which can impact their behavior and health.
How often should I change my aquarium light bulbs?
It’s recommended to replace your aquarium light bulbs every 12 months to ensure consistent and effective lighting.
Can I use blue light in my aquarium, and what are the benefits?
Yes, blue light in your aquarium can promote coral growth, enhance fish colors, and simulate a natural light cycle.
What are some popular types of aquarium light fixtures?
Some popular types of aquarium light fixtures include LED strip lights, T5 fluorescent lights, and metal halide lights.

