Are you an aquarium enthusiast looking to create your own tank but don’t know where to start? You’ve come to the right place! Making an aquarium tank may seem like a daunting task, but with a little guidance, it can be a fun and rewarding experience. Firstly, decide on the size and type of tank you want to make. Will it be a freshwater or saltwater tank? An aquarium that is large enough to hold many fish or small enough to fit on your desk? Once you have an idea in mind, the next step is to choose the appropriate equipment such as a filter, heater, and lighting.
Once you have gathered all your necessary supplies, it’s time to get creative with the decor. Choosing the right substrate, plants, and rocks can make all the difference in creating a visually appealing and healthy environment for your aquatic friends. At this stage, you can start building your tank from scratch or modifying an existing one.
Proper sealing with silicone and letting it cure for at least 24 hours is crucial to avoid leaks. The final step is to cycle your tank and introduce your fish gradually to avoid stressing them out. Remember to maintain proper water parameters and perform regular water changes to ensure a healthy environment for your aquatic creatures.
In conclusion, making an aquarium tank can be a fun and rewarding experience with a little knowledge and creativity. From choosing the size and type of tank, selecting equipment and decor, to the final step of introducing your fish, creating a successful aquarium tank can bring hours of enjoyment and beauty to any space.
Materials Needed
If you’re interested in creating your own aquarium tank, there are a few key materials you’ll need. Firstly, you’ll need a tank itself – choose the size and shape carefully based on the type of fish you want to keep. A heater to regulate the temperature of the water is also important, as well as a filter to keep the tank clean and healthy.
Don’t forget to include some substrate, such as gravel or sand, for your fish to swim around in. Decorations such as plants and rocks can also provide your fish with places to hide and make the tank look great. Finally, you’ll need a water testing kit and some fish food to keep your aquatic friends happy and healthy.
With these basic materials, you’ll be well on your way to creating your own beautiful aquarium tank.
Glass or Acrylic Sheets
When it comes to choosing between glass or acrylic sheets, there are a few materials needed to make the best decision for your project. Both materials have their advantages and disadvantages, so it’s important to consider what’s most important for your specific situation. First, you’ll need to determine the level of impact resistance required.
If you need a material that can withstand high impacts without breaking or shattering, acrylic sheets are a great choice. They’re lightweight, more durable than glass, and can be easily replaced if they become damaged. On the other hand, glass sheets are more scratch-resistant, heat-resistant, and offer better clarity.
If you’re using the material for something like a display case, where clarity is crucial, then glass may be the better choice. Additionally, the thickness of the sheet should be considered. Thicker glass sheets may be needed for certain projects, while acrylic sheets come in a variety of thicknesses to choose from.
Ultimately, the decision between glass or acrylic sheets comes down to your specific project’s needs and requirements.
Glass Cutter or Plastic Knife
When it comes to cutting materials, specifically glass and plastic, it’s important to choose the right tool for the job. A glass cutter is a specialized tool that is designed to score glass, allowing for a clean break. On the other hand, a plastic knife is a versatile tool that can be used to cut a variety of materials, including plastic.
If you’re working with glass, it’s recommended that you use a glass cutter. It’s important to remember that glass is a brittle material, and a tool that is too rigid can easily crack or shatter it. A glass cutter is designed to score the glass, rather than cut through it.
By scoring the glass, you create a line of weakness that allows you to break it cleanly. If you’re working with plastic, a plastic knife can be a great tool to have on hand. Not only is it versatile, but it’s also relatively safe and easy to use.
Unlike glass, plastic is a softer material that can be cut using a variety of tools. However, it’s important to choose a tool that won’t damage or melt the plastic. Ultimately, the tool you choose will depend on the material you’re working with and the task at hand.
If you’re unsure which tool to use, it’s always best to err on the side of caution and seek advice from an expert. By choosing the right tool for the job, you can ensure that your project is a success.
Waterproof Sealant
When it comes to waterproofing projects, using the right sealant is essential. Here’s a list of materials you’ll need: Waterproof sealant: This is the most important material you’ll need for your project.
There are several types of sealants available in the market, such as silicone, polyurethane, and acrylic. Choose the one that’s best suited for your project’s needs. Make sure you read the label for instructions and precautions.
Caulking gun: A caulking gun is essential for applying the sealant. It allows you to control the flow of the sealant, ensuring a smooth and even application.
Choose a caulking gun that’s comfortable to hold and easy to use. Utility knife: A utility knife is useful for cutting the tip of the sealant tube, making it easier to apply the sealant precisely.
Sandpaper: You’ll need sandpaper to prepare the surface before applying the sealant. Sandpaper helps to remove any rough patches or debris, ensuring a smooth and even surface.
Cleaning supplies: Make sure you have cleaning supplies like water, soap, and a rag, to clean the surface before applying the sealant and to clean up any spills or excess sealant. Using the right materials and tools is essential for a successful waterproofing project. (See Also: How to Fill Aquarium Without Disturbing Substrate: Avoid Messy Cleanups with These Simple Tips)
Measuring Tape
If you’re planning to measure anything, a measuring tape will come in handy. The materials needed for this DIY task include a measuring tape, a pencil, and a notepad to record your measurements. The measuring tape is a flexible, retractable plastic or metal strip that has markings on it indicating various units of measurement such as centimeters, inches, or feet.
It’s an essential tool for anyone who wants to get an accurate measurement of an object’s length, width, or height. To use a measuring tape, hold one end firmly in one hand, and extend the tape to the object you want to measure. Then line up the end of the tape with the starting point of the object, and read the measurement from the markings on the tape.
A measuring tape is a simple and versatile tool that you can easily carry in your toolbox. It’s perfect for measuring furniture, clothing, or even your waistline. With a measuring tape on hand, you’ll never have to guess the length of anything again.
Masking Tape
When it comes to crafting, masking tape is a versatile tool that can be used for a variety of purposes. All you need are a few basic materials, including masking tape, scissors, and a surface to work on. First and foremost, it’s important to make sure you’re using the right kind of tape for your project.
Masking tape comes in different widths and adhesive strengths, so consider your needs before making a purchase. Once you’ve got your tape, you can start cutting it into different shapes or designs, depending on what you’re trying to achieve. The best thing about masking tape is that it’s easy to remove, so you can experiment with different patterns and designs until you find the one you like best.
Whether you’re using it to create a custom wall design, personalize a notebook, or add some flair to a picture frame, masking tape is a simple yet effective way to add some creativity to your crafting projects.
Clamps or Heavy Objects
When it comes to woodworking, clamps and heavy objects are essential tools that can come in handy for a wide range of projects. To use clamps effectively, you’ll need to have a few different sizes on hand to accommodate different project needs. From small spring clamps to sturdy bar clamps, having a variety of clamps to choose from can mean the difference between a successful project and a frustrating mess.
Heavy objects, like bricks or even weighted bags, can also be used to hold materials in place while glue dries. It’s important to choose a heavy object that is appropriate for the weight and size of the project materials. Whether you choose to use clamps, heavy objects, or a combination of both, the key is to ensure that the project materials are held in place securely while the glue sets.
With the right tools and a bit of creativity, the possibilities for woodworking projects are endless.
Steps to Make an Aquarium Tank
If you’re looking to create a beautiful aquarium tank for your home, there are a few steps you’ll need to take. First, you need to decide on the size and shape of your tank. You can choose a standard rectangular shape or get creative with a curved or round design.
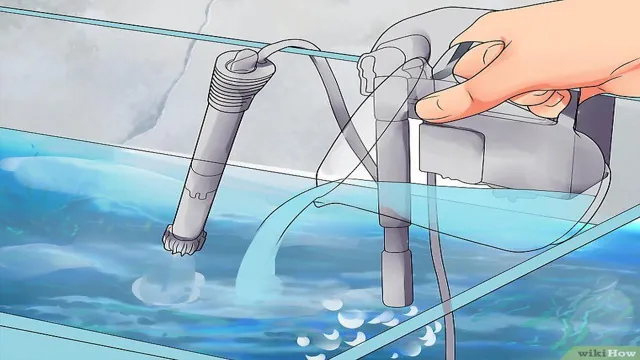
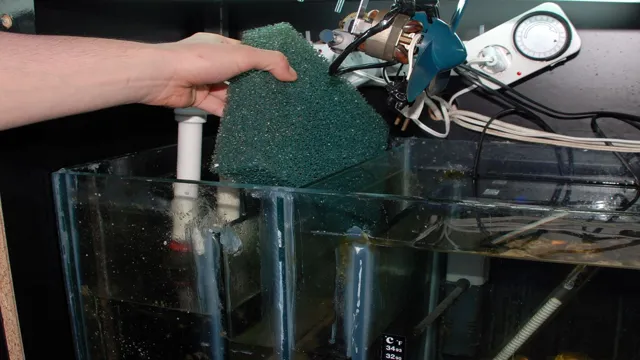
Next, you’ll need to select the perfect filter system for your tank to ensure that your fish stay healthy. You can choose from hang-on-back filters, canister filters, or even wet/dry filters. Then, you’ll need to select the right substrate for your tank, such as gravel or sand.
Once you’ve made these decisions, it’s time to add the water and decorations to your tank. This is where you can really get creative and add any plants, rocks, or ornaments that you desire. Finally, you’ll need to add your fish carefully and patiently.
With a little bit of time and effort, you can have a stunning aquarium tank that’s sure to impress. So, why not give it a try and see what kind of underwater world you can create?
Step 1: Measure and Cut the Glass or Acrylic Sheets
If you’re feeling confident in your DIY skills and are looking for a fun project to take on, making your own aquarium tank can be a rewarding challenge! The first step to creating your own tank is to measure and cut the glass or acrylic sheets. This may seem like a daunting task, but with the right tools and careful measurements, it can be done easily. First, measure the length, width, and height of the tank you want to create.
Then, use a glass cutter or saw to cut the sheets to the correct size. Be sure to wear gloves and take all necessary safety precautions when working with glass or acrylic. Once the pieces are cut, sand the edges to ensure they are smooth and won’t harm your fish.
With this step complete, you’ll be ready to move on to assembling the tank and creating a beautiful underwater landscape for your fish to call home!
Step 2: Attach Bottom and Sides with Waterproof Sealant
Now that the aquarium tank’s base has cured completely, it’s time to attach the bottom and sides with waterproof sealant. The sealant acts as a barrier between the glass and water, preventing any leakage. To begin, place the bottom glass piece over the cured base and apply a generous amount of silicone sealant around the edges.
Place the side glass pieces on top of the sealant carefully and press them gently to ensure a watertight seal. Repeat this process with all the side pieces, ensuring that the sealant covers all edges completely. While the sealant dries, use clamps or tape to hold the glass pieces in place, maintaining their position.
It’s essential to be patient and follow the manufacturer’s instructions to allow enough drying and curing time. After curing, remove any excess sealant and check for any leaks or cracks. By taking the time to properly seal your aquarium tank, you can ensure a long-lasting, durable, and leak-free home for your aquatic pets.
Step 3: Let the Sealant Dry
After applying the sealant to the edges and corners of the aquarium tank, it’s time to let it dry completely. This step is crucial as it helps the sealant to set and form a stronger bond with the glass. The drying time may vary depending on the type of sealant used, the thickness of the layer applied, and the temperature and humidity of the room.
In general, it can take anywhere from 24 to 48 hours for the sealant to dry and cure properly. During this time, it’s important to avoid any disturbance or movements to the tank, as these can cause the sealant to shift or crack. It’s also recommended to keep the room well ventilated and free of dust and debris to ensure a smooth and even finish. (See Also: How to Add Fish to a Newly Cycled Aquarium: A Step-by-Step Guide)
Once the sealant is completely dry, you can proceed with filling the tank with water and decorating it with plants, rocks, and other underwater accessories. With proper care and maintenance, your homemade aquarium can provide a beautiful and relaxing environment for your fish to thrive and flourish.
Step 4: Attach the Back Wall with Sealant
Today, we’re going to talk about the fourth step in making a DIY aquarium tank – attaching the back wall with sealant. This is a crucial step, as it will ensure that the aquarium is leak-proof and will be able to hold water. First, you’ll need to apply sealant along the bottom edge of the back wall before carefully positioning it against the side walls of the tank.
Use a scraper or putty knife to smooth out any excess sealant, then leave it to dry according to the instructions on the sealant packaging. It’s important to make sure that the back wall is aligned properly and held firmly in place, as any movement during the drying process can cause leaks. Once the sealant has dried completely, you can move onto the next step of making your DIY aquarium tank.
By following these steps carefully, you’ll be able to create a beautiful and functional aquarium that you can be proud of!
Step 5: Add the Front Wall with Sealant
To complete your aquarium tank, the next step is to add the front wall with sealant. This is an essential step since it will secure the front wall and make sure that the water will not leak out. You will need to apply a thin line of sealant along the top and bottom edges of the front wall before attaching it to the side walls.
You can use a caulking gun to make it easier for you to apply the sealant. Once you have applied the sealant, slowly and carefully press the front wall into place. Make sure it is securely attached to the side walls, and wipe away any excess sealant with a damp cloth.
Give the sealant ample time to dry, according to the manufacturer’s instructions before proceeding to the next step. With the front wall securely in place, you’re one step closer to having your very own aquarium tank where you can house your fish and other aquatic animals.
Step 6: Wait for Sealant to Cure Completely
As you near the end of your aquarium tank building project, it’s important to not rush the final steps. After applying the sealant, it’s vital to allow it to cure completely before filling the tank with water and introducing any fish or other aquatic life. The curing process can take anywhere from 24 to 48 hours, depending on the brand and type of sealant used.
It’s tempting to want to speed up the process, but doing so can result in the sealant not properly adhering to the glass and creating leaks later on. So, go ahead and take a break from the project, check it off your to-do list, and patiently wait for the sealant to completely cure before moving forward. Your future aquarium inhabitants will thank you for your diligence.
Step 7: Add Silicone Sealant for Extra Protection
If you’re looking to build an aquarium tank, then adding silicone sealant is a crucial step to ensure your tank is secure and leak-free. Silicone sealant creates an airtight and watertight seal that prevents water from leaking out of the tank. To apply the silicone sealant, first ensure the tank is clean and dry.
Then, using a caulking gun, apply a generous bead of silicone sealant around the edges where the glass panels meet. Smooth out the silicone sealant with a caulk smoothing tool to ensure it is evenly distributed and create a neat finish. Let the silicone sealant dry for at least 24 hours before adding water to the tank.
Remember, always use a high-quality silicone sealant made specifically for aquariums. By following this step, you can rest easy knowing your aquarium tank is well-protected and secure.
Step 8: Install Top or Cover
When it comes to setting up an aquarium tank, one of the final steps is to install a top or cover. This is an important step because it not only completes the look of the tank, but it also helps to keep your fish safe and secure. There are a variety of different tops and covers available on the market, from glass tops to mesh covers.
The type of cover you choose will depend on the type of fish you have and any other specific needs you may have for your tank. For example, if you have jumpers in your tank, a mesh cover will help to prevent them from hopping out. Regardless of the type of cover you choose, make sure that it fits securely on top of your tank and is easy to remove for maintenance and cleaning.
By following these steps and properly installing a top or cover, you can enjoy your new aquarium and your fish can thrive in their new home.
Tips for Making an Aquarium Tank
If you are thinking about creating your own aquarium tank, here are some tips to help you get started. Before you begin, decide what type of fish you want to keep and how many. This will determine the size of your tank and the equipment you’ll need.
Next, choose a suitable location for your tank where it won’t be exposed to direct sunlight or extreme temperatures. Once you have your location, you’ll need to purchase a tank, lighting, a filter, and substrate. When you set up your tank, start by placing the substrate at the bottom, then add any decorations or plants you want.
Fill the tank with clean, room temperature water and let it sit for a day or two to make sure the temperature stays stable. After that, add your fish slowly, allowing them to acclimate to their new environment. Remember to monitor the water quality regularly and clean your tank as needed.
With a little patience and care, you can create a beautiful and healthy aquarium for your fish to thrive in.
Tip 1: Use Adequate Amounts of Sealant
When it comes to making an aquarium tank, sealant is one of the most critical components to consider. A commonly overlooked aspect of the aquarium tank-building process is the amount of sealant used. It’s essential to use an adequate amount of sealant because this can affect the overall stability, durability, and effectiveness of the tank.
Not using enough sealant can result in leaks and failures, while using too much sealant can be messy and take longer to dry. It’s best to follow the instructions provided by the manufacturer and ensure that you’re using the recommended amount of sealant for your tank’s size and shape. By doing this, you can ensure that your aquarium tank is secure and long-lasting, protecting your fish and aquatic pets for years to come. (See Also: How to Propagate Bacopa Aquarium Plant: A Complete Guide for Beginners)
Tip 2: Keep Glass or Acrylic Clean
Aquarium tank, glass, acrylic, clean Keeping your aquarium tank clean is incredibly important in ensuring the health and happiness of your aquatic pets. One crucial tip for maintaining your tank is to make sure the glass or acrylic is kept clean. Dirt and algae can quickly accumulate on the surface, which not only obstructs your view but can also negatively affect the quality of water.
To clean the glass or acrylic, avoid using chemicals or abrasive materials that can scratch or damage the surface. Instead, use a microfiber cloth or a specialized aquarium cleaner that is safe for the glass or acrylic material. You don’t want to risk harming your fish or plants with harsh chemicals! By regularly cleaning your tank’s glass or acrylic surface, you can enjoy a crystal-clear view of your underwater world and keep your aquarium healthy and thriving.
Tip 3: Be Patient and Let Sealant Cure Completely
When it comes to making your own aquarium tank, patience is key. One of the most important tips to keep in mind is to allow the sealant to cure completely before adding water and fish. This may take several days, depending on the type of sealant used and the size of the tank.
It can be tempting to rush the process, but failing to wait for the sealant to fully cure can result in leaks and other issues down the line. So what should you do while waiting for the sealant to cure? Take this time to plan and prepare for the next steps of the process. You can research different types of fish and determine which ones will thrive in your tank.
You can also set up the filtration system and ensure that the lighting is set up correctly. By being patient and allowing the sealant to fully cure, you can ensure that your aquarium tank will be a success. Rushing the process can lead to costly mistakes and may potentially harm your fish.
So take your time, plan ahead, and enjoy the process of creating a beautiful and thriving underwater world.
Tip 4: Use Proper Safety Equipment when Cutting Glass or Acrylic
Making an aquarium tank can be a fun and rewarding experience, but it’s important to prioritize safety when working with glass or acrylic. Tip 4 is to use proper safety equipment when cutting these materials. This includes wearing gloves to protect your hands and goggles to prevent any small pieces from getting in your eyes.
It’s also important to ensure that you have a sharp cutting tool and a stable surface to work on. Take your time and use steady, even pressure when cutting to prevent breakages or accidents. Additionally, make sure to dispose of any leftover glass or acrylic properly, as it can be dangerous if not handled correctly.
By following these safety tips, you can create a beautiful aquarium tank without putting yourself or others at risk.
Conclusion
In conclusion, creating a beautiful and thriving aquarium tank is more than just finding some fish and filling up a glass box with water. It requires research, patience, and a bit of creativity to design a captivating underwater world. With the right equipment, knowledge of fish care, and a little bit of imagination, you can craft a stunning aquatic environment that will be the envy of all your fishy friends.
So go ahead, dive in and make your aquarium dreams a reality!”
FAQs
What is the ideal size for an aquarium tank?
The size of the aquarium tank depends on the type and number of fish you want to keep. Generally, a 20-gallon tank is considered ideal for beginners.
How do I choose the right location to set up my aquarium tank?
Choose a level surface near an electrical outlet and away from direct sunlight, drafts, and heat sources. Also, ensure that the surface can support the weight of the tank.
What equipment do I need to make an aquarium tank?
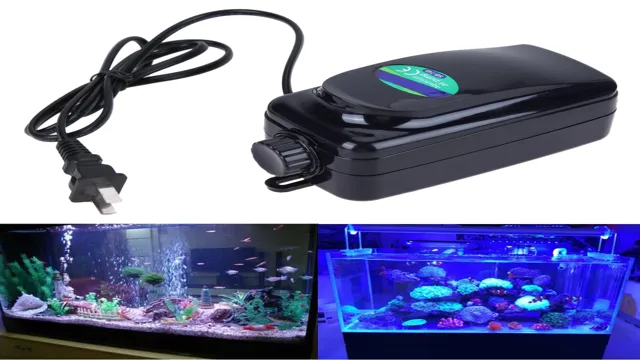
You will need a tank, filter, heater, lighting, substrate, plants, and decorations. You may also need an air pump, thermometer, and water test kit.
How do I set up a freshwater aquarium tank?
Rinse the tank and all equipment with water. Add the substrate, plug in the filter and heater, and fill the tank with water. Add water conditioner and let the tank cycle before adding fish.
Do I need a specific type of filter for my aquarium tank?
The type of filter you need will depend on the size of your tank and the type of fish you have. Generally, a hang-on-back or canister filter is recommended for most aquariums.
How often should I clean my aquarium tank?
You should clean your tank once a week by removing debris, scrubbing the glass, and changing a portion of the water. Clean the filter once a month.
How do I maintain a healthy environment for my fish in the aquarium tank?
Maintain the temperature, pH level, and water quality within the range suitable for your fish. Feed your fish a balanced and appropriate diet, and avoid overcrowding the tank.

