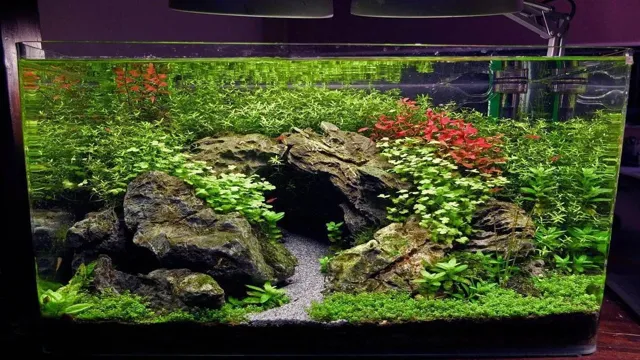
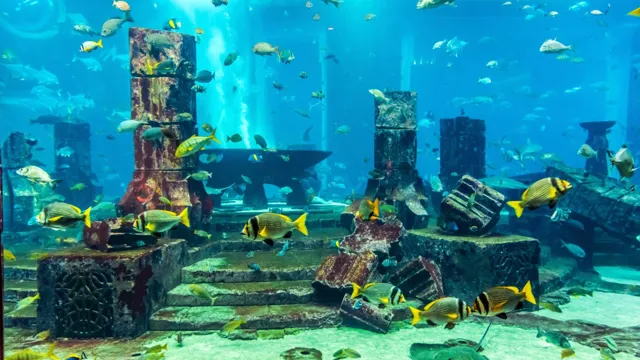
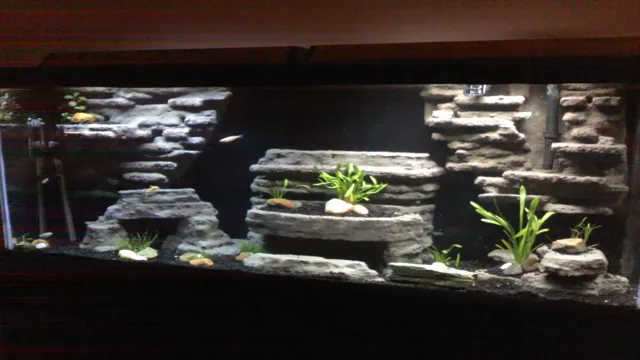
Have you ever wondered how to create a cozy hideaway for your aquatic pets? Building a DIY cave for your aquarium can be a fun and rewarding project that not only adds an extra layer of visual interest to your tank but also provides a safe haven for fish and invertebrates to retreat to when they feel stressed or scared. By integrating natural materials like rocks, driftwood, or even PVC pipes, you can create a stunning and functional underwater landscape that reflects your personal style and supports your pets’ needs. In this blog post, we’ll be sharing some tips and tricks on how to build a DIY cave for your aquarium, including the best materials to use, how to create a solid foundation, and how to design a cave that your fish will love.
So, put on your DIY hat, grab your tools, and let’s dive in!
Gather Materials and Tools
If you’re planning to make a cave for your aquarium, it’s essential to gather all the necessary materials and tools before starting your DIY project. The first step is to determine the size and design of the cave you want to create. Once you have an idea, gather some foam boards and a cutter tool to shape the foam into the desired structure.
You can use a hot glue gun to stick the foam together and sandpaper to smooth out any rough edges. To create a natural-looking texture, you can use a rock-based aquarium-safe paint. Make sure to let the paint dry completely before placing the cave inside your fish tank.
It’s recommended to wash the cave thoroughly with fresh water before use to remove any leftover debris or paint residue. With these materials and tools, you’re ready to start building an attractive and functional cave for your aquatic pets. Why not give it a try and see the positive impact it can have on your aquarium?
Materials: resin or clay, plastic container, small rocks
“Materials: resin or clay, plastic container, small rocks” Before getting started on your crafting project, it’s essential to gather all the necessary materials and tools. For this particular project, you will need resin or clay, a plastic container, and small rocks. These simple and easily accessible materials can be found at most craft stores or online.
Resin and clay are both great options for creating a durable and long-lasting piece, while a plastic container is perfect for creating a mold for the resin or clay to take shape. Small rocks can also be added for texture and to add depth to your finished piece. Don’t forget any additional tools you might need, such as a stirring stick, measuring cups, and gloves.
By having everything ready beforehand, you can focus on the creative process and enjoy the satisfaction of creating something unique and beautiful.
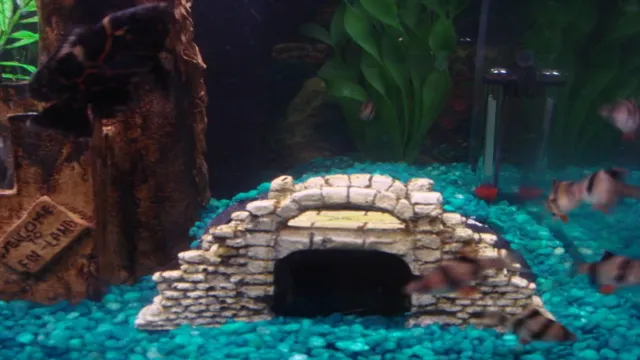
Tools: gloves, plastic wrap, spray paint
When taking on a DIY project that involves spray paint, there are several tools and materials that you’ll need to gather beforehand. Gloves are an essential item to have on hand to protect your skin from the harsh chemicals in the spray paint. Plastic wrap can help protect nearby surfaces from any potential overspray, while also making it easier to clean up afterwards.
And of course, you’ll need spray paint in the color(s) of your choice. Whether you’re looking to update an old piece of furniture or add some color to a room, having the right tools and materials will ensure that your project is a success. Just remember to follow safety guidelines and work in a well-ventilated area.
With the right prep and materials, you’ll be able to achieve that professional-looking finish you’ve been dreaming of.
Prepare the Materials
When it comes to making a cave for your aquarium, the first step is to gather the necessary materials. You will need a non-toxic silicone sealant, rocks or other materials to create the cave structure, and a cardboard box or plastic container to use as a mold. Start by selecting rocks or other materials with interesting textures and shapes that will provide a natural look to the cave.
Clean the rocks with hot water and let them dry. Next, lay out the rocks in the configuration you want for the cave and attach them together using the silicone sealant. Use the cardboard box or plastic container to create the cave mold by positioning it over the rocks, and applying pressure to ensure the sealant adheres properly.
After the sealant has dried, remove the mold and allow the cave to cure before inserting it into the aquarium. By preparing your materials ahead of time, you can ensure a successful and natural-looking cave for your aquatic pets to explore.
Mix the resin or clay according to instructions
Preparing the materials is the first and most crucial step in creating any resin or clay-based craft project. Before you start mixing the resin or clay according to instructions, make sure that the environment is clean and well-ventilated. Clean your workspace and tools thoroughly before starting to avoid dust, debris, or other contaminants that could compromise your work. (See Also: How to Make a Sealant for Aquariums at Home: A Step-by-Step Guide)
Once your workspace is clean, gather all the required materials, including the resin or clay, mixing tools, and any additional items you may need for your particular project. Then, read and follow the instructions carefully to mix the materials correctly. Remember to wear gloves and protective gear, as some materials can cause skin irritation or other health issues.
Following these simple tips before diving in can ensure that you complete your project with success.
Line the plastic container with plastic wrap
Preparing the materials is an essential step in creating a successful project. If you’re planning to line a plastic container with plastic wrap, there are a few things you need to prepare. Firstly, you’ll need to gather all the necessary materials, such as the container itself and the plastic wrap.
You’ll also need a pair of scissors to cut the plastic wrap to the size you need. Before you start lining the container, make sure to clean it thoroughly to ensure there’s no dust or debris. This will help the plastic wrap stick better to the walls of the container.
When you’re ready to line the container, place the plastic wrap inside and press it firmly against the walls, making sure it’s smooth and without any creases. You can also use your fingertips to push the wrap into all the corners. With these materials and preparations, you’ll be able to line the plastic container with plastic wrap easily and effectively.
Place small rocks in the bottom of the container
If you’re planning to create your own garden in a container, it’s important to properly prepare the materials. One crucial step is to place small rocks in the bottom of the container. This serves as a drainage layer, allowing excess water to escape and preventing root rot.
You can use any small rocks you have on hand, such as gravel or pebbles. Simply cover the bottom of your container with a layer about 1-2 inches thick. This will also help add stability to the container, ensuring it won’t tip over easily.
With this simple preparation step, your container garden will have a solid foundation for healthy plant growth. So gather up those small rocks and get started on your container garden!
Shape the resin or clay around the rocks to create the cave structure
Before you start shaping the resin or clay around the rocks to create the cave structure, it’s important to prepare all your materials. For resin, you’ll need to have a mixing cup, stir sticks, gloves, and resin itself. Remember to wear gloves and use a well-ventilated area when working with resin.
If you’re using clay, make sure you have enough to cover your rocks and a surface to work on. It’s also a good idea to have some sculpting tools and a spray bottle of water to keep the clay from drying out. In both cases, you should start by cleaning your rocks thoroughly, removing any dirt or debris that could affect the adhesion of the resin or clay.
Once your materials are ready, you can begin to shape the structure of your cave by layering the resin or clay over the rocks, creating texture and depth as you go. Take your time and be patient with the process, allowing each layer to fully dry or harden before adding another. With a little creativity and imagination, your cave will soon take shape, ready to be painted and decorated to suit your individual style and taste.
Let the Cave Dry and Cure
When creating a cave for your aquarium, it’s important to let it dry and cure properly. This will ensure that the cave is sturdy and safe for your fish. To start, choose a material that is safe for aquarium use and won’t alter the water chemistry.
Once you’ve created your cave, let it dry completely before placing it in the aquarium. This may take a few days to a week, depending on the size and material of the cave. Once the cave is dry, it’s recommended to let it cure for an additional week or two.
This will allow any remaining moisture to evaporate and prevent any potential harmful bacteria from growing. Once the cave is fully cured, it’s ready to be placed in the aquarium and enjoyed by your fish. With a little patience and care, your DIY aquarium cave will be a beautiful and functional addition to your underwater world.
Leave the cave to dry for at least 24 hours
Once you have finished constructing your cave, it is important to let it dry and cure properly. This might be the most challenging part of building a cave, as impatience can lead to cracks and leaks in your finished product. Before you start decorating or filling it with optimal equipment, make sure to leave the cave to dry for at least 24 hours to ensure that any damp areas dry out completely. (See Also: How to Add Drawers to Aquarium Stand: Step-by-Step Guide for Optimal Storage Solution)
Proper curing enables the concrete to reach its maximum strength and helps to prevent structural issues down the line. A thorough drying process will also prevent any water spots or stains from forming on the walls, which will guarantee a professional finish. So, resist the temptation to rush and let your cave sit and cure for at least 24 hours before continuing with the next step.
This minor delay will ensure your fruits are plentiful and that you can enjoy the fruits of your labour for a long time.
After drying, spray paint the cave to give it a natural look
After building your cave, the next step is to let it dry and cure properly before giving it a natural look with spray paint. It’s important to make sure that the cave is completely dry before attempting to apply any paint, as any moisture can affect the bonding of the paint to the surface and lead to peeling or flaking. Depending on the materials used to build the cave, this process can take anywhere from a few hours to a couple of days.
Be sure to keep the cave in a dry, well-ventilated area to speed up the drying process. Once the cave is fully dry, it’s time to move on to the final step of creating a natural-looking cave by applying some spray paint. Choose earthy tones like browns and greens to mimic the look of natural rocks and foliage.
With a steady hand, spray the paint lightly over the surface of the cave, focusing on the areas that would be in shadow. Remember to take your time and apply multiple thin coats rather than trying to cover the entire surface with one thick layer. With a little bit of patience and some spray paint, your artificial cave will look just like the real thing!
Place the Cave in Your Aquarium
If you’re looking to add a little extra excitement to your aquarium, creating a cave can be a great option for your aquatic pets. Not only do caves provide hiding places and a natural environment for fish, but they can also add an interesting visual element to your tank. Luckily, making a cave for your aquarium is a relatively easy process.
The first step is to choose a suitable material for the cave, such as aquarium-safe rocks, PVC pipes or even coconut shells. Once you’ve chosen your material, you can begin to shape it to your liking. Be sure to test the cave’s stability before adding it to your tank to ensure it doesn’t collapse or harm your fish.
Finally, you can place your new cave in your tank and enjoy watching your fish explore their new hiding spot. With a little creativity and patience, you’ll have a unique addition to your aquarium in no time!
Choose a spot in your aquarium that will support the weight of the cave
When adding a cave to your aquarium, it’s important to choose the right spot that can support its weight. It’s best to place the cave on a solid surface that won’t shift or move, ensuring the safety of your aquatic pets. If you have a substrate layer, make sure to place the cave on top of it, not just on the glass bottom.
This will provide stability and keep the cave from shifting. You also want to make sure that the cave doesn’t obstruct the flow of water in your tank. You can experiment with different locations to find the perfect spot for your cave.
Remember, it’s not just a decoration, it’s also meant to provide shelter and security for your fish. By putting some thought into where to place your cave, you can create a safe and comfortable environment for all your aquarium inhabitants.
Add water to your aquarium and gently place the cave in the tank
When it comes to setting up your aquarium, one of the essential elements to consider is providing your aquatic pets with a safe and comfortable hideout. This is where a cave-shaped ornament can come in handy! Before placing the cave in your aquarium, you want to make sure that you add enough water to the tank, so that it’s full enough for your fish to swim around freely. Once you’ve done that, you can then gently place the cave in the tank, taking care not to splash water around too much.
The key is to make sure that the cave is securely positioned to avoid any accidents, as you don’t want it toppling over and harming your fish in any way. With the right placement, your new cave ornament can provide your aquarium with a natural appearance while also creating a safe space for your fish to rest and play. Just remember to rinse the ornament before placing it in the tank, so that you don’t introduce any harmful bacteria to your aquarium.
Position the cave at an angle that allows fish to swim in and out comfortably
If you’re looking to create a cozy home for your fish in your aquarium, adding a cave will make all the difference. However, it’s important to position the cave in a way that will allow your fish to comfortably swim in and out of it. Placing it at an angle ensures that your fish won’t have to swim up vertically to enter the cave, making it easier for them to access it. (See Also: How to Clean Lid for Aquarium Hermit Crabs & Ensure a Healthy Habitat)
Additionally, when choosing a spot for the cave, take into consideration the flow of water in your aquarium. You want to make sure that the water flows smoothly around the cave, keeping it clean and free of debris. A well-positioned cave will not only provide a cozy retreat for your fish but can also add to the aesthetic of your aquarium, creating a natural and serene atmosphere.
So, go ahead and add that cave to your aquarium, just make sure to position it thoughtfully.
Conclusion
In conclusion, making a cave for your aquarium can be an enjoyable and worthwhile project for any aquarium enthusiast. With just a few simple materials, you can create a hidden sanctuary for your fish to explore and rest in. Not only will it enhance the aesthetic appeal of your aquarium, but it will also provide a source of stimulation and enrichment for your fish friends.
So, don’t be afraid to get resourceful – grab some rocks, glue, and imagination, and start crafting your very own aquatic abode today!”
FAQs
What materials do I need to make a cave for my aquarium?
You can use materials such as rocks, ceramic pottery, PVC pipes, and coconut shells to make a cave for your aquarium.
How do I prepare and clean the materials for making a cave?
Make sure to thoroughly rinse and clean the materials before placing them in the aquarium to prevent harmful chemicals or bacteria from affecting the aquatic life.
How do I secure the cave in my aquarium?
You can use aquarium safe glue or silicone to secure the materials together and prevent them from shifting or collapsing.
How big should the cave be for my aquarium?
The size of the cave should depend on the size of your aquarium and the fish or other aquatic life you have. Avoid making the cave too small or too large as it can affect the behavior of the aquatic life.
Can I make a cave for freshwater and saltwater aquariums?
Yes, you can make a cave for both freshwater and saltwater aquariums using appropriate materials that are safe for the aquatic life.
Can I buy pre-made caves for my aquarium?
Yes, there are many pre-made caves available in pet stores or online for aquariums. However, you can also create your own custom cave to suit your aquarium’s needs.
How many caves should I add to my aquarium?
It depends on the size of your aquarium and the number of fish or other aquatic life you have. Ideally, you should add multiple caves to create a natural environment for the aquatic life and provide them with hiding places and territorial boundaries.

