As an aquarium enthusiast, you naturally want your tank to be a safe and comfortable home for your aquatic pets. However, finding the right materials to decorate your tank with can be a daunting task. If you’re looking for an all-natural and aesthetically pleasing option, coconut shells might have caught your eye.
But are they safe for your aquarium? The answer is yes, but with some precautions. Coconut shells are a popular choice for aquarium decoration because they look great and provide hiding spots for shy fish. However, they need to be properly prepared before being added to your tank.
One of the main concerns with using coconut shells is that they may have residual chemicals from the coconut meat or oil processing. This means that soaking, cleaning, and sterilizing them is a necessary step before adding them to your aquarium. Ensuring that there is no debris, dirt, or other unwanted materials that could harm your aquatic pets should be your top priority.
Furthermore, it’s important to remember that coconut shells are more fragile than other aquarium decorations. They can easily crack or break, which can create sharp edges or splinters that could injure your fish. You must make sure that the coconut shells are smooth to touch before adding them to the tank.
In summary, coconut shells can make a beautiful and safe addition to your aquarium. If you prepare them properly and make sure no harmful residues are present, they can be an excellent natural decoration choice. Just make sure to handle them with care and take necessary precautions to avoid injuring your aquatic pets.
Introduction
Coconut shells can be an interesting addition to your aquarium décor while also providing a natural hiding spot for your fish. However, before adding them to your tank, it’s important to make sure they are safe for your aquatic pets. The first step is to thoroughly clean the shells with warm water and a scrub brush to remove any dirt or debris.
Then, soak the shells in a solution of vinegar and water for at least 24 hours to remove any possible bacteria or parasites. After soaking, rinse the shells thoroughly again with water and let them dry completely before adding them to your aquarium. It’s also important to check for any sharp edges or cracks in the shells that could harm your fish and sand them down if necessary.
By taking these few simple steps, you can enjoy the natural beauty of coconut shells in your aquarium while keeping your fish safe and healthy.
Coconut Shells in Aquariums
Coconut shells can be used as a decorative element in aquariums. They add a natural and tropical touch to the environment and can also serve as a hiding spot for fish and other aquatic creatures. When using coconut shells, it’s crucial to ensure they are properly cleaned and prepared before adding them to the aquarium.
One way to do this is by boiling them in water for an hour to remove any potential bacteria or pathogens. Additionally, coconut shells can alter the pH and hardness of the water, so it’s essential to monitor these levels closely and make adjustments as necessary. Overall, coconut shells can be a unique and functional addition to any aquarium, as long as they are properly cared for.
Preparation
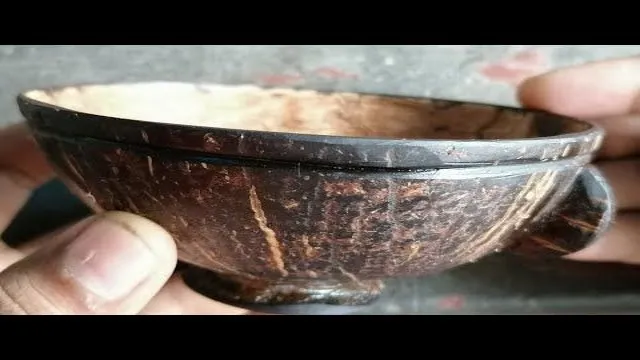
If you want to make a coconut shell safe for your aquarium, then there are certain steps you should follow to ensure the shell doesn’t harm your fish or plants. First, you need to clean the coconut shell thoroughly. Remove any remaining flesh or fibers from the inside and outside of the shell.
You can do this by scraping it with a knife or spoon. Next, you need to boil the coconut shell in water for at least thirty minutes to kill any bacteria or parasites that may be on it. After boiling, let it cool completely before placing it in your aquarium. (See Also: How to Get to Fort Fisher Aquarium: Your Ultimate Guide)
It’s also a good idea to soak the shell in freshwater for a few days before adding it to your aquarium. This will help release any remaining tannins in the shell that can discolor your water. By following these preparation steps, you can safely add a coconut shell to your aquarium as a unique and natural decoration for your aquatic pets.
Cleaning the Coconut Shell
Preparing the coconut shell for use in crafting or cooking requires thorough cleaning. The first step is to remove any external husk and fiber by scraping the surface with a sharp tool or knife. Once the shell is clean, it needs to be washed with soap and water, and then dried in the sun or a well-ventilated area.
Before any further processing, it’s essential to make sure there are no lingering bacteria or contaminants that could affect the quality of the project or dish. Cleaning the coconut shell effectively ensures it will be more durable and hygienic for any use. A quick and straightforward process, cleaning the coconut shell allows you to take advantage of its unique texture and properties in an array of applications, from decorative items to kitchen utensils.
A well-cleaned coconut shell also makes for an excellent alternative to plastic or other synthetic materials, helping to reduce waste and protect the environment. With proper cleaning, the possibilities for using coconut shells are endless.
Boiling the Coconut Shell
Boiling the coconut shell is an important step in preparing it for various uses. To do this, you’ll need to gather some dried coconut shells and a large pot of water. First, remove any of the remaining coconut meat from the shells.
Then, place the shells into the pot of water and bring it to a boil. Let the shells boil for about an hour, ensuring that they are completely submerged in the water. After that, remove the pot from the heat and let it cool down to room temperature.
Once the water has cooled, strain out the shells and rinse them thoroughly. This process helps to remove any impurities and bacteria from the shells, making them safe for use in crafts or as a natural source of activated charcoal. Boiling the coconut shells is a simple yet important step that should not be skipped.
Treatment
If you’re looking for an eco-friendly way to decorate your aquarium, adding coconut shells can be a great option. However, before placing the shells in the tank, it’s important to treat them to make sure they are safe for your aquatic pets. First, rinse the shells with warm water to remove any dirt or debris.
Then, soak them in a solution of water and vinegar for 24 hours. This will help to sanitize the shells and remove any lingering bacteria. After soaking, let the shells dry completely in a well-ventilated area for at least three days.
Once they’re dry, you can add them to your aquarium as a safe and natural decoration. Keep in mind that coconut shells may slightly lower the pH of your water, so it’s important to monitor your tank’s parameters regularly and adjust as needed. Overall, treating coconut shells before adding them to your aquarium can be a simple way to create a beautiful and natural underwater environment. (See Also: How to Find Decorations for Aquarium Natural Outside: A Comprehensive Guide)
Using Vinegar to Treat the Coconut Shell Surface
Coconut shell surface can be effectively treated with vinegar, a natural and inexpensive solution. Vinegar has acetic acid that works as a mild disinfectant, deodorizer, and cleaner. To treat the coconut shell surface, you can mix equal parts water and vinegar in a spray bottle.
First, clean the surface of any debris or dirt. Then, spray the vinegar solution all over the coconut shell and rub it using a soft brush. Let it sit for 10-15 minutes, giving the acetic acid enough time to break down any remaining dirt or organic material.
Afterward, rinse the shell under running water, and let it air dry. The vinegar treatment will remove any unpleasant odors, stains, or discolorations from the coconut shell surface, leaving it shiny and sanitized. You can use the treated coconut shell in various ways, such as making a decorative bowl, a planter, or a birdhouse.
Overall, using vinegar to treat coconut shell is an easy, natural, and eco-friendly way to enhance its appearance and hygiene.
Rinsing and Drying the Coconut Shell
After removing the coconut meat from the shell, the next step is to treat the shell to prepare it for crafting or other uses. To begin, rinse the shell thoroughly with warm water to remove any remaining residue. Next, let it dry naturally in the sun or through air-drying.
If you’re in a hurry, you can also dry the shell using an oven at a low temperature. This process helps to prevent any potential bacteria growth and ensures that the shell is fully ready for use. It’s essential to note that some people may find the odor unpleasant, but it will eventually dissipate over time.
Once the shell is dry, you can begin to craft with it or use it for other purposes. Remember to treat the shell with care and avoid cracking or damaging it during the process. Whether you’re creating a piece of art or using it for functional purposes, a treated coconut shell can be a beautiful and unique addition to any home or garden decor.
Conclusion
In conclusion, turning a coconut shell into a safe and stylish addition to your aquarium is easy as ABC – all you need is some elbow grease and a bit of creativity! Remember to carefully carve out any sharp edges, rinse thoroughly to remove any residual coconut debris, and let dry completely before placing into your tank. So go ahead and put the “nut” in coconut by transforming it into an aquarium gem that will make all your fishy friends green with envy!”
Final Thoughts and Precautions
When it comes to treating burst blood vessels on the face, there are a few things you can do to help reduce their appearance. One of the simplest methods is to apply a cold compress to the affected area for 10-15 minutes at a time. This can help to reduce inflammation and soothe the skin, while also constricting the blood vessels and reducing the appearance of redness.
If the problem persists, you may want to consider using a topical cream or ointment designed to help reduce the appearance of broken blood vessels. These products typically contain ingredients like vitamin K, arnica, and horse chestnut extract, all of which have been shown to improve skin tone and texture. In more severe cases, laser therapy may be necessary to remove the damaged blood vessels.
However, it’s important to consult with a dermatologist or other healthcare professional before undergoing any such procedure. By taking care of your skin and following these tips, you can help prevent burst blood vessels from occurring in the first place. (See Also: How to Clean Water Stains on Aquarium – A Step-by-Step Guide for Crystal Clear Tanks!)
FAQs
Can coconut shell be used in aquariums?
Yes, coconut shells can be used in aquariums as they are a natural decoration and provide hiding spots for fish.
How do I prepare a coconut shell for use in an aquarium?
First, clean the shell thoroughly to remove any dirt or debris. Then, boil it for about 10 minutes to kill any bacteria or parasites.
Can I use a coconut shell as a natural filter in my aquarium?
Yes, you can use a coconut shell as a natural filter by filling it with filter media such as activated carbon or sponge.
How often should I replace a coconut shell in my aquarium?
Coconut shells can last a long time in an aquarium, but it is recommended to replace them every 6-12 months to ensure they are not harboring harmful bacteria.
Are there any risks associated with using coconut shells in an aquarium?
While coconut shells are generally safe for aquariums, there is a slight risk of them leaching tannins into the water which can lower pH levels. This can be mitigated by soaking the shell in water for several days before use.
Can coconut shells change the water chemistry in my aquarium?
Yes, coconut shells can lower the pH levels in the water due to the release of tannins. However, this can be corrected by adding pH buffering agents or performing regular water changes.
How can I prevent algae growth on a coconut shell in my aquarium?
To prevent algae growth, try cleaning the shell regularly and avoiding placing it in direct sunlight. Also, consider reducing the amount of light in the aquarium or using an algae scraper to remove any buildup.

