Do you have an aquarium at home that you want to spruce up? Adding DIY ornaments can be a fun and creative way to create your own underwater world. Not only will it give your aquarium a unique touch, but it also provides a fun project for you to indulge in. With the wide range of materials available, you can let your creativity take over.
Whether you choose to create themed ornaments or unique structures, it’s all up to you. In this blog post, we’ll dive into tips for creating your own DIY aquarium ornaments and how to incorporate them into your underwater landscape. Let’s get started and bring some life to your aquarium!
Introduction
If you’re looking to add some personal touches to your aquarium, making your own ornaments is a great way to do so. Not only is it a fun and creative activity, but it also allows you to customize your tank to your liking. To make homemade aquarium ornaments, you’ll need a few key materials such as aquarium safe silicone, plastic molds, and decorations of your choice like rocks or plants.
First, mix the silicone according to the instructions and pour it into the mold. Then, add your chosen decorations and let the silicone dry. Once it’s fully cured, remove it from the mold and place it in your tank for a unique and personalized touch.
With a little bit of creativity and some basic materials, you can easily make your own aquarium ornaments at home.
Why Homemade Aquarium Ornaments?
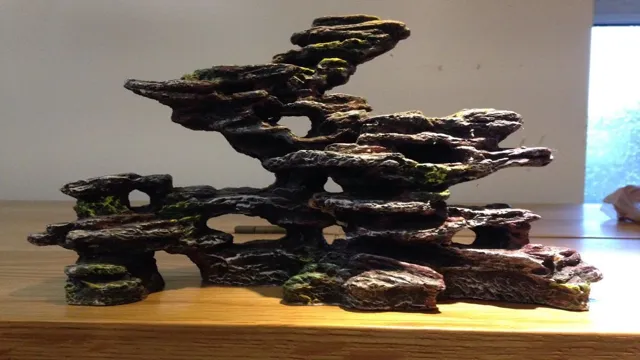
Aquarium ornaments are a great way to add personality and style to your aquatic environment. While there are many store-bought options available, creating your own homemade ornaments can be a fun and unique way to add character to your tank. Not only can you save money by making your own decorations, but you can also customize them to suit your specific tastes and preferences.
By using materials like rocks, driftwood, and even household items, you can craft one-of-a-kind decorations that your fish will love to swim around and explore. So why settle for generic store-bought ornaments when you can create something truly special for your aquarium? Give it a try and see the difference it can make!
Safety Precautions When Making Aquarium Ornaments
Aquarium ornaments are a great way to spruce up your aquatic environment and create a visually pleasing atmosphere for your fish and other aquatic creatures. However, it’s important to take safety precautions when making these ornaments to avoid causing harm to your pets. One of the most important things to keep in mind is the use of non-toxic materials.
Make sure to use materials that are safe for aquatic life, such as silicone sealant or aquarium-safe epoxy. Additionally, avoid using sharp or jagged objects that can harm your pets or damage their fins. A careful and intentional design can create a beautiful ornament while also ensuring the safety of your aquatic inhabitants.
By taking these precautions, you can confidently add unique and visually stunning ornaments to your aquarium without risking harm to your pets.
Materials and Tools
When making homemade aquarium ornaments, it’s important to gather the right materials and tools for the job. First and foremost, you’ll need a non-toxic silicone sealant to bond your chosen objects together. You may also want to consider using a waterproof, aquarium-safe paint to add color and designs to your ornaments.
As for the objects themselves, the options are endless! Some popular choices include driftwood, rocks, shells, and ceramic figurines. Just be sure to thoroughly clean and sanitize any non-natural materials before adding them to your aquarium. When it comes to tools, a pair of rubber gloves and a putty knife or spatula will come in handy for applying the silicone sealant.
Overall, the key to successful homemade aquarium ornaments is creativity and careful attention to detail. With the right materials and tools, you can craft one-of-a-kind decorations that will enhance the beauty and enjoyment of your aquatic environment for both you and your fish.
Selecting the Right Materials
When it comes to tackling any DIY project, selecting the right materials and tools is essential for achieving satisfactory results. The most important thing to consider is the durability and quality of the materials you’re going to use. Depending on the project, you might need different types of materials, from wood, metal, and glass to plastics and other synthetic materials. (See Also: How to Clean Aquarium Glass Top: Tips and Tricks for Sparkling Clear Glass)
You should also consider the tools you need and make sure you have the correct tools for the job. Having sharp blades, sturdy scissors, and precise measuring tapes are the basics that every DIY enthusiast should have in their toolbox. When selecting materials, it’s also essential to consider your budget and the overall design of your project.
You don’t want to overspend on materials that will not contribute to the overall quality of the project. Using high-quality materials can also ensure that your project lasts for as long as possible, giving you the best value for your money. Start small and work your way up by choosing easy-to-work-with materials that will increase your confidence and encourage you to aim for more challenging projects.
Essential Tools for Crafting Aquarium Ornaments
When it comes to creating beautiful aquarium ornaments, having the right materials and tools is essential. Firstly, you’ll need to choose the right base material. Many people opt for clay or resin, both of which are durable and easy to mold.
In addition, you’ll need a set of sculpting tools to help you create intricate shapes and designs. These can vary from simple knives to more complex tools like wire cutters and needle-nose pliers. Having a good set of brushes is also important, as you’ll need to paint and detail your ornaments to make them stand out.
Finally, you might want to invest in some silicone sealant to help secure your ornaments to the bottom of your tank. By having the right materials and tools, you’ll be able to craft beautiful and unique ornaments for your aquarium that both you and your fish will enjoy.
Step-by-Step Guide
For those looking to add some personal flair to their aquarium, making homemade ornaments can be a fun and rewarding project. First, gather some materials such as aquarium-safe silicone sealant, plastic plants, rocks, and gravel. Next, decide on the design of the ornament and sketch it out on paper.
Once the design is finalized, use the silicone sealant to glue the rocks and plastic plants together, making sure to leave enough space for fish to swim through. After the sealant is dry, rinse the ornament thoroughly with water before placing it in the aquarium. You can choose to paint the ornament with aquarium-safe paint or leave it natural.
Making homemade aquarium ornaments allows for creativity and customization, while also ensuring the safety of the fish in the tank. Give it a try and see the unique touch it adds to your aquarium setup!
Designing Your Ornament
Designing your ornament can be a fun and creative activity that allows you to express your unique style and personality. However, it can also be overwhelming if you don’t know where to start. To help you get started, here’s a step-by-step guide to designing your own ornament.
First, think about the theme or purpose of your ornament. Do you want it to be festive or sentimental? Next, choose your materials. Will you be using paint, glitter, beads, or other embellishments? Once you have your materials, start sketching your design on paper.
This will give you a better idea of how your finished product will look. After you have your design, start creating your ornament. Take your time and have fun with it.
Finally, add any finishing touches, such as a ribbon or hook, and display your creation proudly. Remember, the most important part of designing your ornament is to have fun and let your creativity shine.
Creating a Base
When creating a base, the first step is to choose a suitable location. Look for a place that is flat, stable, and far from any potential threats such as flooding or landslides. Next, clear the area of any debris or vegetation that could hinder construction.
It’s important to ensure that the foundation is level, so use a level tool for accuracy. The next step is to lay down a layer of gravel and tamp it down to create a solid base. Once the gravel is in place, add a layer of sand and tamp it down as well. (See Also: How to Make Fake Aquarium Plants: A Step-by-Step Guide for Stunning Underwater Décor)
The final step is to pour a concrete slab on top of the sand layer and allow it to cure completely before starting any further construction. With these simple steps, you can create a sturdy base for any project.
Adding Details
When it comes to adding details to your writing, it’s important to start by making a list of the key points you want to cover. Think about the who, what, where, when, why, and how of the topic you’re writing about, and make sure you have all the necessary information to convey to your readers. Once you have your key points in mind, it’s time to start expanding on them.
Use descriptive language and specific examples to create a vivid picture in your reader’s mind. Don’t be afraid to use analogies and metaphors to help convey your message. Just make sure they’re relevant and add value to your writing.
When you’re done, read through your work and make sure everything flows smoothly and is easy to understand. Remember that you’re trying to engage your reader, so stay focused on your audience and keep your tone conversational and friendly. With these tips, you’ll be able to add the perfect amount of detail to your writing and make it stand out from the rest.
Final Touches
Final Touches are the finishing touches that will elevate the overall look of any project. They are a crucial part of the process as they add the final details that make the project stand out. When it comes to final touches, it’s essential to pay attention to details.
Make sure that the end result is polished and perfect. You can add final touches by tweaking the colors, adjusting the proportions, or making small modifications that give the project a professional touch. It’s important to keep in mind that final touches take time, so be patient and meticulous.
As an analogy, think of final touches as the seasoning in a dish. The seasoning might be a small amount, but it can make a huge difference in the overall taste of the dish. So, give final touches the attention they deserve, and don’t underestimate their importance in creating a great end product.
Caring for Your DIY Aquarium Ornaments
If you’re looking to add a personal touch to your fish tank, making your own aquarium ornaments can be a fun and rewarding experience. However, it’s important to keep in mind that these homemade decorations will require some extra care to ensure they don’t harm your aquatic pets. One key factor to consider is the materials you use – avoid any that could potentially release harmful chemicals into the water.
Additionally, be sure to clean and sterilize your ornaments thoroughly before adding them to the tank. Regular maintenance is also crucial – keep an eye out for any signs of wear or damage, and remove any ornaments that have become broken or rough around the edges. By taking these precautions and giving your DIY decorations the care they need, you can create a beautiful and safe environment for your fish to thrive in.
Cleaning and Maintaining Your Ornament
Cleaning and maintaining your DIY aquarium ornaments is an essential aspect of keeping your aquarium healthy and visually appealing. Your ornaments can be made of different materials, each requiring different types of care. For instance, ceramic and plastic ornaments can be cleaned easily with a soft-bristled brush and mild soap.
However, detailed ornaments with intricate designs may require more attention, such as using a toothbrush to scrub crevices and corners. Regular cleaning of your ornaments helps prevent the buildup of grime, harmful bacteria, and algae. When these elements accumulate, they not only make your aquarium look unattractive, but they can also affect the water quality and hygiene of your fish.
To keep your ornaments in their best condition, avoid using harsh chemicals or abrasive materials, as they can damage the surface of the item. In conclusion, caring for your DIY aquarium ornaments is a critical factor in maintaining a healthy and visually appealing aquarium. Cleaning them regularly, using gentle cleaning products, and paying attention to detail will ensure that your ornaments last longer and keep your aquarium looking great.
So, don’t neglect to take care of your ornaments, and your fish will thank you for it. (See Also: How to Get Rid of Aiptasia in Aquarium: Proven Methods and Tips)
Placing and Arranging Your Ornaments in Your Tank
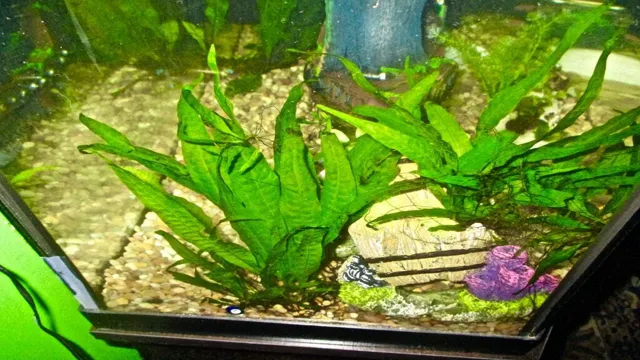
When it comes to placing and arranging DIY ornaments in your aquarium, it’s important to consider both the aesthetic appeal and the health of your aquatic pets. Start by selecting ornaments that are safe for your specific type of fish or other creatures, ensuring that they won’t leach harmful chemicals or disrupt your water chemistry. You can create a visually pleasing arrangement by varying the sizes, shapes, and colors of your ornaments, as well as incorporating plants or other natural decor.
Be sure to leave plenty of open swimming space for your fish, and avoid overcrowding or obstructing any filtration or heating equipment. Regular cleaning and maintenance of your ornaments will keep them looking their best, while also preventing any buildup of algae or harmful bacteria. Remember, a well-designed aquarium can not only be a beautiful addition to your home, but also a healthy and happy environment for your aquatic pets.
Conclusion
In conclusion, creating homemade aquarium ornaments is an exciting and satisfying hobby for any fish enthusiast. With a little creativity and resourcefulness, you can transform everyday items into beautiful and unique decorations that will enhance the beauty of your aquarium. So don’t be shy, get creative and start crafting your own aquarium ornaments today – your fish (and your guests) will thank you for it!”
FAQs
What materials do I need to make homemade aquarium ornaments?
You can use things like PVC pipes, rocks, clay, or even empty shells to make your own aquarium ornaments. Just make sure they are all aquarium-safe.
Is it safe to make homemade aquarium ornaments?
Yes, as long as you use aquarium-safe materials and properly clean and sterilize them before putting them into your aquarium.
Can I paint my homemade aquarium ornaments?
Yes, but only with aquarium-safe paint. Regular paint can be toxic to your fish.
How do I attach homemade ornaments to the aquarium?
You can use aquarium-safe glue or silicone to attach your homemade ornaments to the aquarium. Just make sure you allow enough time for it to dry or cure properly before putting it into the tank.
What are the benefits of homemade aquarium ornaments?
Homemade aquarium ornaments can be more cost-effective and unique compared to store-bought ornaments. It also allows you to personalize your aquarium and make it truly your own.
How often should I clean my homemade aquarium ornaments?
You should clean your homemade ornaments every time you do a water change or at least once a month. Use a soft brush and warm water to scrub away any algae or debris.
Can I make ornaments for a saltwater aquarium?
Yes, just make sure the materials you use are safe for saltwater aquariums and won’t affect the pH or salinity levels of your water.

