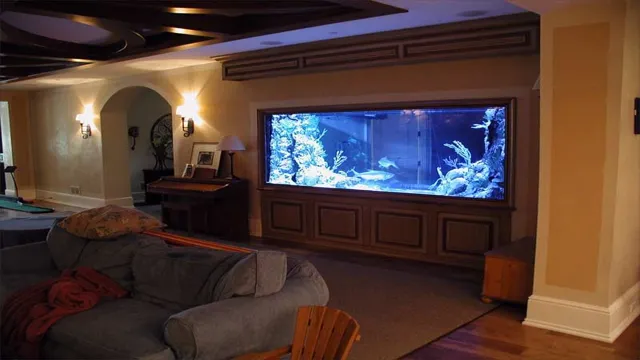
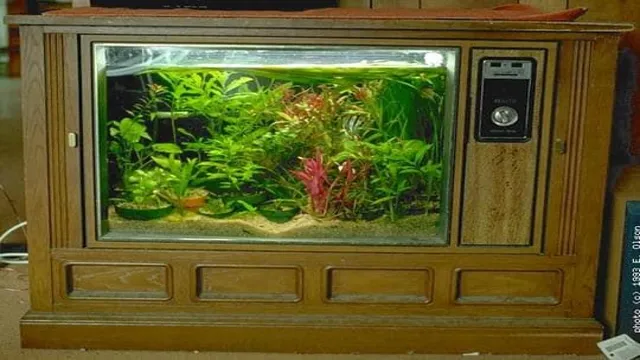
Looking for a unique and eye-catching addition to your home decor? Why not create your very own DIY mini bottle aquarium? With just a few simple materials, you can create a beautiful and calming underwater oasis that is sure to capture the attention of all who enter your home. This fun and easy project is perfect for both adults and kids and can be customized to match any style or color scheme. Plus, the end result is not only aesthetically pleasing but also provides a relaxing and soothing ambiance to any room.
So, let’s dive into the world of DIY mini bottle aquariums!
Materials Required
If you’re searching for a fun and creative way to use those extra glass bottles you have lying around, why not try making a mini bottle aquarium? You’ll need a few materials to get started, including small glass bottles, sand, decorative items like small rocks and shells, plants, and some small, colorful fish or shrimp. You can find everything you need at your local pet store or online. You’ll also need a sealant to keep the items inside the bottle securely in place.
Once you have your materials, start by adding a layer of sand to the bottom of your bottle. Then, add in your decorative items and plants, arranging them in a way that looks pleasing to the eye. Finally, carefully add in your fish or shrimp, making sure not to overcrowd the bottle.
Seal the bottle and voila! You now have a beautiful, one-of-a-kind mini aquarium that will brighten up any space in your home or office. With just a few materials and a little creativity, making a mini bottle aquarium can be a fun and rewarding project for all ages.
1. Small glass bottle
One of the primary materials you’ll need to get started with your DIY project is a small glass bottle. These versatile little containers can be used for a variety of purposes, from storing essential oils or homemade perfume to creating unique décor or gifts. To get started, you’ll need to find a high-quality bottle that fits your needs.
Look for options with a secure lid or closure to prevent leaks or spills, and consider the type of glass used – clear, frosted, or colored – to match your aesthetic preferences. Don’t forget to also consider the size of the bottle, as this will impact its overall functionality. Once you’ve found the perfect bottle, you’ll be ready to start filling it with your favorite materials and creating something truly special.
So, why not give it a try and see what creative ideas you can come up with?
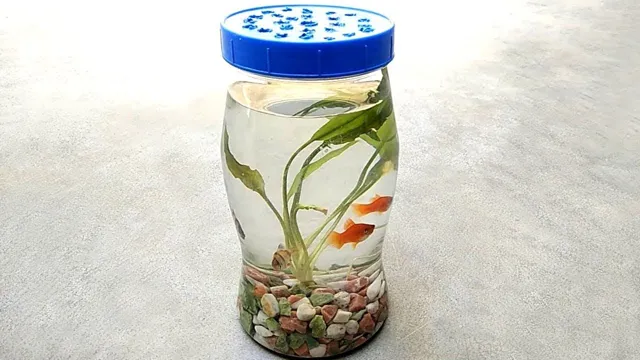
2. Aquarium plants and stones
Aquarium plants and stones are essential elements for creating a beautiful and healthy aquatic environment. To get started, you’ll need a variety of materials, including aquarium plants such as java ferns, anubias, and moss balls. To ensure healthy plant growth, consider investing in a quality substrate and using plant-friendly fertilizers.
In addition to plants, you’ll also need a selection of aquarium stones to create a natural-looking aquascape. Look for stones that are aquarium-safe and have a natural appearance, such as river rock or slate. When arranging your plants and stones, try to create a sense of balance and depth, using different colors and textures to add visual interest.
With a little creativity and attention to detail, you can create a stunning aquatic environment that your fish will love.
3. Water
When it comes to making pottery, water plays a crucial role. Not only is water used to mix clay and create the right consistency, but it’s also necessary for shaping and smoothing the clay during the pottery-making process. That’s why having a reliable source of water is essential for any pottery studio.
But not all water is created equal – if your local water source contains minerals or impurities, it can affect the quality of your clay and result in weaker pottery. That’s why many potters opt to use filtered or distilled water. Additionally, having a steady stream of hot water is helpful for cleaning tools and equipment.
So, when setting up your pottery studio, make sure to add a reliable source of clean water to your list of materials.
4. Aquarium decoration items (optional)
If you’re looking to add some flair to your aquarium, there are a variety of decoration options available to choose from. Some materials you may need include rocks, plants, sand, and driftwood. Rocks come in a variety of shapes, sizes, and colors, making them a versatile option for aquarium decoration.
Plants not only add beauty to your tank but also provide oxygen and shelter for your fish. Sand is an excellent substrate for aquariums and creates a natural look for your underwater environment. Driftwood provides a natural and rustic feel to your tank, while also providing a place for your fish to hide and explore.
Remember to choose aquarium-safe materials and avoid anything that may release toxins or harm your fish. While these decorations are optional, they can greatly enhance the beauty and enjoyment of your aquarium. (See Also: How to Make a Stunning Black Glass Background for Your Aquarium: Step-by-Step Guide)
Assembly Steps
If you’re looking for a fun and unique way to bring some aquatic life into your home, a mini bottle aquarium may be just the thing. To make one, you’ll need a clean glass bottle or jar, some sand or gravel, small aquatic plants, and miniature fish or shrimp. First, rinse the bottle thoroughly to remove any dirt or residue.
Next, add a layer of sand or gravel to the bottom of the bottle, followed by a layer of aquatic plants. Then, carefully add your fish or shrimp, being sure not to overcrowd the container. Finally, fill the bottle with water and seal the lid tightly.
Your mini bottle aquarium is now ready to display! Be sure to keep it in a spot with plenty of natural light and add fresh water periodically to keep your aquatic pets happy and healthy. With a little care and attention, your mini bottle aquarium can be a charming and fascinating addition to your living space.
1. Clean the bottle thoroughly
If you’re going to assemble a bottle, it’s important to start with a clean slate. So, the very first step is to make sure you thoroughly clean the bottle. This step is crucial as any contaminants or residue can impact the functionality of the bottle and, more importantly, your health.
So, it’s recommended that you use warm water and soap to clean the bottle. If it has a narrow neck, you can use a special bottle brush to scrub the inside. You can also use vinegar or baking soda as an alternative to soap.
Vinegar helps to kill bacteria and remove odors, while baking soda helps to remove tough stains. Once you’re done cleaning the bottle, rinse it thoroughly with hot water to ensure there’s no soap or other residue left. After that, you can begin the assembly process without any worries.
2. Add a layer of stones to the bottom of the bottle
When it comes to assembling a DIY terrarium in a bottle, the first step is to add a layer of stones to the bottom of the bottle. But why? Well, this layer serves two important purposes. Firstly, it provides drainage for any excess water that may collect in the bottom of the terrarium.
Without this layer, the water could build up and potentially drown the plants. Secondly, it helps to create a natural-looking substrate for the plants to grow in. The stones provide a stable base, which is especially important for delicate or shallow-rooted plants that may struggle to anchor themselves in loose soil.
When adding the stones, it’s important to choose ones that are small enough to allow for good water drainage but not so small that they will fall through any gaps in the mesh or fabric that will be placed over the stones. Once the stones are in place, you can move on to the next step of adding a layer of activated charcoal to help purify the terrarium.
3. Arrange the aquarium plants in the bottle
When it comes to assembling your DIY aquarium plant bottle, arranging the plants is the next step. This is where you can let your creativity flow and experiment with different layouts. Before arranging the plants, ensure that they are clean and free of any dirt or debris.
Begin by placing the tallest plants in the back of the bottle, then gradually move towards the front with smaller plants. You can also mix and match different types of plants to create a diverse aquatic landscape. Don’t be afraid to add in some decorative elements such as rocks or driftwood to create a more natural look.
Remember to leave enough space between the plants to allow for growth and make sure they are securely placed in the substrate to prevent them from floating to the surface. With a little bit of experimentation and creativity, you can create a beautiful underwater garden in your very own DIY aquarium plant bottle.
4. Fill the bottle with water
When you’re assembling a water bottle, the final step is to fill it with water. After all, what good is a bottle without something to drink? But before you start pouring, there are a few things to keep in mind. First of all, make sure your bottle is completely clean and dry.
Any leftover soap or moisture can affect the taste of your water, and may even breed bacteria over time. Once you’re sure the bottle is clean, find a source of potable water – whether it’s from a filter, tap, or bottled source. Slowly pour the water into the bottle, being careful not to spill or overflow it.
Depending on the size of your bottle and how thirsty you are, you might want to fill it all the way to the top or just partway. And remember, staying hydrated is vital for your health and wellbeing. So go ahead – fill ‘er up and drink away!
5. Add aquarium decoration items if desired
Now that your aquarium is fully set up, it’s time to add some decoration to make it more visually appealing and create a natural environment for your fish. Begin by choosing the right types of decoration items that match your aquarium size and fish species. Sift through the gravel at the bottom to remove any debris or dust, and then rinse off your chosen items thoroughly before placing them in the tank.
Consider using a variety of natural items such as pieces of driftwood, rocks, and plants to create an underwater landscape that mimics a natural habitat. You can also add artificial decorations such as miniature castles, ships, and volcanoes to give the aquarium a fun and festive look. Be sure not to overcrowd the tank, as this can create an unhealthy environment for your fish. (See Also: How to Make a Bubble Wall Aquarium: A Step-by-Step Guide for Aquatic Enthusiasts)
With these added decor items, your aquarium will not only provide a comfortable home for your aquatic pets but will also look beautiful and unique.
6. Screw the cap on tightly
When it comes to assembling your product, one of the essential steps that you should not forget is to screw the cap tightly. This seemingly simple task can make all the difference in preventing leaks and spills. After filling your container with your desired liquid or substance, ensure that the cap fits perfectly onto the opening.
Take note of any alignment markers or grooves to secure it correctly. Hold the container steady as you turn the cap clockwise until it is tight enough to withstand any jostling or movement. If it feels loose, then adjust the cap until it fits snugly onto the container.
Remember, accuracy is crucial to maintain the integrity of the product, and a tight cap ensures that the contents remain intact until they reach their final destination. So, don’t rush through this step, take your time and ensure that you screw the cap on tightly to avoid any leakage or spillage.
Maintenance Tips
If you’re looking for a fun and unique way to bring some marine life into your home, making a mini bottle aquarium is a great idea. First, you’ll need a clear glass or plastic bottle that has a lid. Next, add some sand and rocks to the bottom of the bottle and fill it with water.
You can also add plants or small figurines to give it a more personalized touch. When it comes to maintaining your mini aquarium, there are a few tips you should keep in mind. First, make sure to clean the bottle regularly to avoid any buildup of algae.
You can do this by using a sponge or a soft-bristled brush and warm water. It’s also important to monitor the temperature of the water and keep it at a consistent level. Finally, be sure to feed your fish appropriately and only add a few at a time to avoid overcrowding.
With these tips in mind, you’ll be able to enjoy your mini bottle aquarium for years to come!
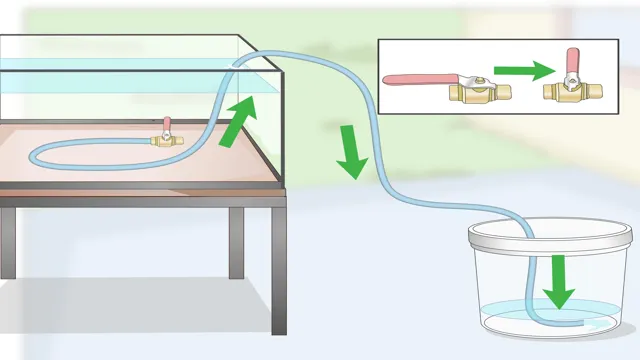
1. Change 10% of water weekly
As an aquarium owner, you want to make sure your aquatic pets are thriving and healthy. One important maintenance tip to keep in mind is to change 10% of your aquarium’s water on a weekly basis. Why is this crucial? Well, fish excrete waste, and it accumulates in the water over time, leading to a buildup of toxins that can harm your fish.
By regularly changing a portion of the water, you’re effectively diluting these harmful substances, keeping the environment clean and healthy for your animals. It’s also essential to make sure you’re using a dechlorinator, so any tap water you add doesn’t contain harmful chemicals. Remember, the health of your aquarium and fish is directly related to the quality of their habitat.
So, make sure you’re consistently performing water changes to ensure a safe and healthy environment for your aquatic companions.
2. Keep the bottle in indirect sunlight
When it comes to maintaining the freshness of your wine, it’s essential to keep the bottle in the right conditions. One of the best tips that many wine connoisseurs swear by is to keep the bottle away from direct sunlight. This is because direct sunlight can cause temperature fluctuations and even accelerate the aging process of the wine, negatively affecting its quality and taste.
Instead, it’s best to store your wine in a cool, dark place that’s away from sources of heat and light. Indirect sunlight in moderation can be fine, but it’s best to err on the side of caution and keep your wine in a cool, stable environment. By following these maintenance tips, you can ensure that your wine stays fresh and delicious for longer.
So, the next time you’re storing your favorite bottle of wine, keep it in mind to keep it away from direct sunlight to maintain its quality.
3. Do not overfeed the fish or add too many fish
When it comes to taking care of your fish, it can be tempting to feed them more than necessary or to add multiple fish to the tank. However, these practices can have negative consequences on your fish and the overall health of the tank. Overfeeding can lead to excessive waste buildup in the tank, which can harm your fish and the beneficial bacteria that keep the water clean.
It’s best to feed your fish small amounts multiple times a day and make sure they eat everything within a few minutes. Similarly, adding too many fish at once can unbalance the ecosystem and lead to overcrowding, which can cause stress, aggression, and disease. As a general rule, only add a few fish at a time and make sure they are compatible with the other fish in the tank. (See Also: How to Get to Long Island Aquarium from Manhattan: A Complete Guide)
By being mindful of how much you feed your fish and how many fish you add to your tank, you can ensure a healthy and thriving aquatic environment.
4. Clean the bottle every month with a brush and vinegar solution
When it comes to taking care of your reusable water bottle, regular maintenance is essential to keep it in top shape for daily use. One important maintenance tip is to clean the bottle every month with a brush and vinegar solution. Over time, bacteria and germs can build up inside the bottle, especially if it’s being used frequently.
Vinegar is a natural disinfectant and effectively kills most germs and bacteria, making it an excellent option for cleaning your water bottle. Simply mix equal parts vinegar and water, then use a bottle brush to scrub the inside of the bottle thoroughly. Rinse the bottle with water and let it air dry completely before using it again.
With regular cleaning, your reusable water bottle will continue to provide you with clean and safe drinking water for years to come.
Conclusion
In conclusion, creating your very own mini bottle aquarium is not only a fun and creative project but also a great way to bring a little piece of nature into your home or office. Assembling your aquarium requires a few basic materials and a whole lot of imagination. So, whether you’re an experienced fish tank owner or just looking for a unique DIY project, grab a bottle, some pebbles, a plant or two, and get ready to dive into the world of mini aquariums.
Just make sure not to invite any sharks, they tend to take up too much space!”
FAQs
What materials do I need to make a mini bottle aquarium?
You will need a small glass bottle, sand, small rocks or pebbles, aquatic plants, a small plastic fish, and water.
What kind of fish can I put in a mini bottle aquarium?
It is recommended to use a plastic fish or small figurine as live fish require proper filtration and care.
How do I add the sand and rocks to the mini bottle aquarium?
Carefully pour the sand into the bottle using a funnel. Then, add the rocks or pebbles on top of the sand. Make sure to leave enough room for the water and plants.
Can I use tap water for my mini bottle aquarium?
It is recommended to use distilled or filtered water, as tap water may contain harmful chemicals and minerals.
How often do I need to change the water in my mini bottle aquarium?
It is recommended to change the water every 2-3 weeks depending on the cleanliness of the water.
How much light does a mini bottle aquarium need?
Mini bottle aquariums need a moderate amount of light, as too much light can cause algae growth and too little light can prevent plant growth.
How do I clean my mini bottle aquarium?
To clean the aquarium, pour out the water and remove the plants and rocks. Rinse the bottle and accessories with warm water and a mild soap, then let them air dry before adding new water and plants.

