Aquariums are a delightful addition to any home décor. They bring a touch of nature inside and provide a soothing environment for the inhabitants of the house. However, if you’re looking for a way to take your aquarium game to the next level, then creating rock formations for it could do the trick.
These formations add depth, dimension, and a natural feel to your tank. Plus, they provide hiding places and spots for your fish to explore. Your aquarium rocks don’t have to be dull and lifeless.
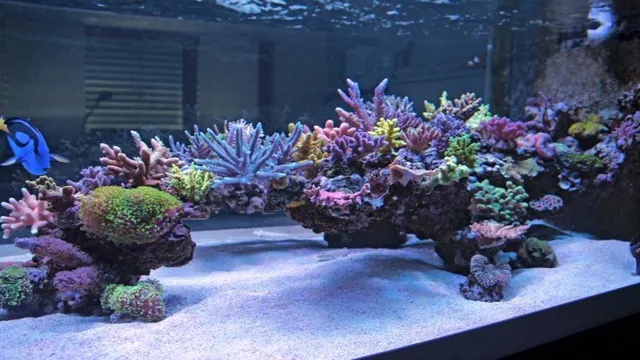
You can make them come alive by putting your creativity to work. With a little effort, you can create rock formations that look like they came straight out of a river or stream. Whether you want to recreate a rocky mountainous scene or coral reefs, you can achieve your desired look and feel with the right materials and techniques.
Creating rock formations for aquariums may seem like a daunting task, but it’s easier than you might think. All you need is a plan, some rocks, and the right tools to get started. When choosing rocks, make sure they’re aquarium-safe and don’t have any sharp edges that could harm your fish.
You can also use silicone sealant to hold the rocks together and create a stable structure. In the end, creating rock formations for your aquarium is a fun and creative way to enhance your fish tank’s aesthetic appeal. By putting in a little effort, you can create a beautiful underwater world for your fish to enjoy.
So, why not give it a try? Your aquarium will thank you for it, and you’ll love the way your tank looks.
Materials Needed
For aquarium enthusiasts, creating a natural-looking habitat for their fish and aquatic creatures is essential. Adding rock formations is a great way to achieve this look, and it’s also an enjoyable DIY project. To get started, you’ll need some essential materials, including rocks, aquarium-safe sealant, and a foam filler.
The rocks you choose should be non-toxic and free from any sharp edges that could harm your aquatic pets. When selecting sealant, make sure it is safe for use in aquariums to prevent any harm to your pets. Using a foam filler will aid in creating a solid foundation for the rocks and prevent any movement or shifts once submerged.
These materials are readily available at most hardware stores or online retailers. With these materials, you can now begin to create a natural-looking rock formation for your aquarium that your pets will love.
Rocks and Pebbles
When it comes to creating a rock garden, the materials you will need are pretty straightforward. The first thing is rocks and pebbles, of course! Look for natural stones, boulders, and river rocks in various sizes and shapes to create visual interest and depth. You can also mix in smaller-sized pebbles or gravel to create pathways or define specific areas within your garden.
If you want to add some color to your rock garden, consider using colored pebbles or stones like red, blue, or green. Don’t forget to also think about the texture of the rocks you choose. Some may be smooth and rounded, while others may be more jagged and angular.
Combining different textures can create a dynamic look within your rock garden. To move and place your rocks and pebbles, you’ll need some basic gardening tools like a shovel, rake, and wheelbarrow. By taking the time to choose the right materials, you can create a beautifully curated and low-maintenance rock garden that will add beauty and texture to your outdoor space.
Silicone Sealant
When it comes to sealing cracks and gaps in and around your home, silicone sealant is one of the most popular options available in the market. This material is highly durable, waterproof, and flexible, making it an ideal choice for various applications. To get started with your sealing project, you will need a few essential materials.
Firstly, you will need the silicone sealant of your choice. There are many different types available, such as general-purpose, high-temperature, or colored silicone. Make sure to select the one that best suits your needs.
Additionally, you will need a caulking gun to apply the sealant evenly and smoothly. You will also need a scraper or putty knife to remove any existing sealant or debris from the surface you plan to seal. Lastly, have a cloth or sponge handy to clean up any excess sealant and maintain the area’s cleanliness.
With these materials in hand, you will be ready to tackle any sealing project swiftly and with ease.
Utility Knife
Utility Knife When it comes to the materials needed to make a utility knife, there are a few key components to consider. First and foremost, the blade itself is one of the most important parts of any utility knife. These blades are typically made out of high-carbon steel or ceramic, both of which offer different benefits. (See Also: How to Clean Aquarium Surface: The Ultimate Guide to Maintaining a Crystal-Clear Tank)
High-carbon steel is known for its durability and sharpness, while ceramic blades are lighter in weight and require less maintenance. Along with the blade, the handle of a utility knife is also an important component. Handles can be made out of a variety of materials, including plastic, wood, or even metal.
The type of material used for a handle not only affects the look and feel of the knife, but also impacts its weight, balance, and overall durability. Other materials used in the construction of a utility knife may include screws, fasteners, and even adhesives to securely hold the blade in place. Ultimately, the choice of materials for a utility knife will depend on the intended use of the knife, as well as personal preferences in terms of design and functionality.
No matter what materials are used, a well-crafted utility knife is an essential tool in any toolbox.
Designing the Layout
If you’re looking to create an impressive visual impact in your aquarium, adding rock formations can be a great way to do so. One of the first things to consider when making these formations is the type of rock you want to use. Some popular options include lava rock, granite, and sandstone, which can all create unique textures and color variations.
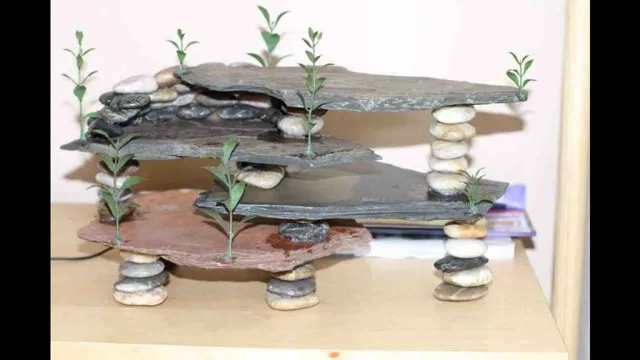
Once you have your rocks, it’s important to plan out the layout of your formation before placing them in your tank. Consider the size and shape of your aquarium, as well as the types of fish and plants you have, to ensure that your rock formation isn’t overcrowding the space. When arranging the rocks, try to create different levels and caves to offer hiding spaces for your fish.
Be sure to also leave adequate room for water flow and access for cleaning and maintenance. With a little planning and creativity, you can easily create stunning rock formations that will transform the look of your aquarium.
Sketching the Layout
Sketching the layout is a crucial step in the process of designing any physical space. This involves mapping out the placement of key elements such as furniture, decor, lighting, and other accessories. When sketching a layout, it’s important to consider the overall design aesthetic, functionality, spatial limitations, and the intended purpose of the space.
It’s essential to strike a balance between creativity and practicality to achieve an effective layout. For instance, if designing a living room, it’s vital to consider the available space and how to maximize it for optimum comfort and functionality. Sketching the layout helps to refine the focus of the project and ensures that the designer’s vision aligns with the needs and wants of the client.
By creating a detailed and accurate sketch based on the design brief, the designer can then proceed to make final adjustments that will bring the project to life. Overall, sketching the layout is a key component of the design process that sets the foundation for a successful project.
Choosing the Right Rocks
When it comes to designing the layout of your rock garden, it’s important to choose the right rocks. The size and shape of the rocks you select will determine the overall look and feel of your garden. For a natural and organic feel, consider using a mix of large and small rocks in varying shapes and textures.
To create a more structured look, opt for uniform shapes and sizes. It’s also important to consider the colors of the rocks you choose – warm, earthy tones like browns and grays are a popular choice for rock gardens. Ultimately, the right rocks for your garden will depend on the style and feel you’re going for, as well as the climate and environment where you live.
Placing Rocks for Stability
When it comes to placing rocks for stability in your garden or landscape, it’s important to plan out the layout before getting started. Consider the size and shape of the rocks, as well as the overall aesthetic you’re going for. Are you aiming for a naturalistic look, with rocks arranged to mimic a natural outcropping, or a more structured design with rocks placed in a specific pattern? Once you’ve got a plan in mind, start placing the rocks.
Begin with the largest ones and work your way down, fitting each rock snugly against the ones around it. Pay attention to the angle of each rock and be sure they’re stable before moving on to the next one. With careful planning and placement, your rock garden or landscape feature can provide both stability and beauty to your outdoor space.
Bonding the Rocks
If you’re looking to create a stunning underwater landscape, one essential aspect to consider is the rock formations in your tank. But, you can’t just place your rocks randomly in the aquarium as they can easily shift and crumble with the force of the water flow. Instead, you’ll need to bond your rocks together using safe cement or a sealant that won’t harm your aquatic pets.
Start by washing and drying the stones, then apply the cement on the underside of each rock and press them together firmly. Be patient and allow time for the cement to dry completely before placing the rocks in your aquarium. Once bonded, your rock formation will provide a natural look and provide hiding and resting places for your fish.
With patience and the right supplies, you can create a visually stunning and safe underwater environment for your aquatic pets to thrive in. So, go ahead, experiment with different rock formations, and create a unique display that will be the envy of every aquarium enthusiast.
Clean the Rocks
When it comes to creating an impressive aquascape, one thing that many hobbyists overlook is the importance of cleaning the rocks. Before you start bonding the rocks together, you need to make sure they are free from any dirt or debris. This will help ensure that the bond between the rocks is strong and long-lasting. (See Also: How to Make Aquarium Plants Grow Better: 7 Tips to Enhance Plant Growth)
To clean the rocks, start by rinsing them thoroughly under running water. Then, use a soft brush or toothbrush to scrub away any stubborn dirt or algae. If necessary, you can also use a dilute bleach solution to disinfect the rocks.
Just be sure to rinse them thoroughly afterwards to avoid any residue that could harm your aquatic inhabitants. By taking the time to properly clean your rocks before bonding them together, you’ll have a much better chance of creating a beautiful and functional aquascape that you can be proud of.
Apply the Silicone Sealant
When it comes to creating a natural-looking aquarium, bonding rocks to create a beautiful aquatic landscape is crucial. Applying silicone sealant to hold the rocks together is a great way to ensure that they remain in place, even when the water is flowing around them. To start with, make sure the rocks are clean and dry before you begin bonding them together.
Using a silicone sealant that is specifically designed for aquariums is essential. Carefully apply a bead of sealant along the edge of one rock and then press it firmly against the other. Make sure that the sealant is spread evenly and smoothly to avoid any air pockets from forming.
Allow the silicone to dry completely before proceeding with the next rock. Be patient, as it may take some time for the sealant to cure fully. Once the sealant is dry, the bonded rocks will stay in place and create a stunning feature in your aquarium.
By taking care in the bonding process, you can ensure that your aquarium looks beautiful for years to come.
Press and Hold the Rocks
Bonding the Rocks When it comes to creating a beautiful rock garden or water feature, one of the most important aspects is properly bonding the rocks together. One technique for achieving this is to press and hold the rocks firmly together until they begin to set. This may require some strength and patience, but it’s worth it to ensure a strong and secure bonding.
It’s important to keep in mind that different types of rocks will require different bonding techniques, so it’s always a good idea to do some research and consult with a professional if needed. Another option for bonding rocks is to use a specialized bonding agent, which can provide added strength and durability. Regardless of which technique you choose, taking the time to properly bond your rocks will not only enhance the appearance of your feature but also ensure that it stands the test of time.
Finishing Touches
If you are looking for an affordable and easy way to elevate the look of your aquarium, creating rock formations is a great option. There are a few key things to keep in mind when you begin this project. First, be sure to select safe, aquarium-friendly materials for your rocks.
Some rocks can release harmful chemicals or harden the water, which can harm your fish. Once you have your supplies, experiment with different shapes, sizes, and heights of rocks until you find the right combination for your aquarium. When you begin stacking your rocks, be sure to create plenty of hiding places and swimming areas for your fish.
Finally, consider adding plants, sand, or other natural elements to your rock formation to create a more realistic underwater environment. With a little creativity and patience, you can create a beautiful and functional rock formation for your aquarium that your fish will love.
Allow the Sealant to Dry
Once you have successfully applied sealant to your project, it’s important to allow it to dry thoroughly. This step is crucial because if you don’t wait for the sealant to completely dry, it may not provide the protective barrier you need. The length of time it takes for the sealant to dry can vary depending on the type of sealant and the temperature and humidity levels in the environment.
As a general rule, it’s best to wait at least 24 hours before using the area that has been sealed. This will ensure that the sealant has had ample time to cure and adhere properly. Remember, rushing the drying process could lead to the sealant cracking or not working effectively, which would defeat the purpose of applying it in the first place.
So, sit back, relax, and let the sealant dry naturally to ensure the best results.
Add Water and Arrange Fake Plants
Now that you have your beautiful fake plants in place, the last step is to add water and arrange them just right. This will give your space a more realistic and inviting feel. You can use a spray bottle to mist the leaves, or if your plants are in a vase or pot, just add some water to it.
Make sure not to overdo it though, as too much water can damage the plants and ruin the look. When arranging your plants, think about how they would naturally grow and try to mimic that as best as possible. You can angle some leaves or bend stems to create a more dynamic look. (See Also: How to Feed Zooplankton Aquarium and Keep Your Tank Clean)
And don’t forget to step back and admire your handiwork! With just a little bit of effort, you’ve transformed your space into a beautiful, green oasis.
Place the Rock Formation into the Aquarium
Now that you’ve designed the perfect rock formation for your aquarium, it’s time to place it inside! This step is crucial for creating the natural, organic look you’re going for. Start by ensuring that the rocks are clean and free of any debris or bacteria that could harm your fish. Gently lower the formation into the tank, being careful not to disrupt any of the plants or other decorations you have in place.
You may need to adjust the placement of the rocks a bit to make sure they’re stable and won’t shift around too much. But with a little bit of patience and some careful maneuvering, you’ll have a stunning centerpiece for your aquarium that your fish will love to swim around and explore. Just remember to keep an eye on the water quality and pH levels, as adding any new decorations to your tank can often cause a temporary imbalance.
With a little bit of monitoring and care, your new rock formation will be the perfect addition to your underwater paradise!
Conclusion
In conclusion, creating rock formations for aquariums is an art form that requires patience, creativity, and an eye for natural beauty. But don’t let those qualities intimidate you – with the right materials, tools, and a bit of inspiration, you can transform your aquarium into a stunning underwater landscape that will impress all who behold it. Just remember to experiment with different shapes, textures, and colors, and allow your imagination to run wild.
Whether you’re aiming for a zen garden aesthetic or a bustling coral reef scene, the possibilities are endless. So grab those rocks, fire up your imagination, and get ready to rock your aquarium like never before!”
FAQs
What materials can I use to make rock formations for aquariums?
Some materials commonly used are lava rock, slate, and reef rock.
How do I safely clean and prepare the rocks before using them in my aquarium?
Scrub the rocks with a aquarium-safe brush and rinse them thoroughly with water. Then, soak them for a few days in a bucket of water, changing the water daily.
Can I use rocks I find outside for my aquarium?
It is not recommended to use rocks found outside unless you have properly tested and confirmed they are aquarium-safe.
How do I stack rocks without them toppling over in my aquarium?
Use aquarium-safe epoxy glue or silicone to create a permanent bond between the rocks.
How many rocks should I use in my aquarium to create a natural-looking rock formation?
It depends on the size of your aquarium, but generally, using 3 to 5 rocks of varying shapes and sizes will create a natural-looking formation.
Will adding rocks to my aquarium affect the water chemistry?
Some rocks, like limestone, can raise the pH of your water. It’s important to research the type of rock you plan to use and how it may affect your water chemistry.
Can I create different types of rock formations in my aquarium, like caves or arches?
Yes, you can get creative and use epoxy glue or silicone to create different types of formations, but make sure they are stable and safe for your fish.

