As any pet owner knows, having an aquarium can be a rewarding experience, but it also requires some maintenance to keep those fish thriving. One of the most important parts of an aquarium setup is the filter cartridge. However, buying new cartridges can add up quickly, and not everyone wants to rely on store-bought options.
That’s where a DIY aquarium filter cartridge comes in! With a little creativity, you can make a filter cartridge that suits your tank’s needs and saves you some money in the process. In this blog, we’ll explore the benefits of DIY filter cartridges, how to make them, and some tips to get the most out of your homemade setup. So whether you’re a seasoned aquarium owner or just starting out, read on to learn more about this DIY solution to aquarium maintenance.
Introduction
If you’re a fish-keeping enthusiast, you’ll understand the importance of having a well-maintained aquarium and filter system. However, buying filter cartridges can be expensive in the long run. That’s why making your own aquarium filter cartridge is an excellent option.
Not only is it cost-effective, but it’s also eco-friendly as you can reuse and recycle materials. Making your own filter cartridge is a straightforward process that involves using high-quality filter media and a filter cartridge frame. You can use materials such as foam, floss, or charcoal to create your filter media.
The critical thing to remember when making your cartridge is to ensure that it fits correctly into your filter system. Once you’ve created your filter cartridge, you’ll need to rinse it thoroughly before inserting it back into your filter. By making your own aquarium filter cartridge, you can save money and tailor it to your aquarium’s specific needs while ensuring that your fish have a clean and healthy environment to thrive in.
Why Make Your Own Filter Cartridge?
Are you tired of continually buying filter cartridges for your water filtration system? Making your filter cartridge is an excellent solution to this problem. Creating your filter cartridges is a responsible and cost-effective solution that not only saves your money but also provides an effective water filtration process. Making your filter cartridge ensures that you have total control over the quality of the filtration process, the materials used in making it, and the replacement process.
By making your filter cartridges, you can customize the filtration process to your specific needs, saving money while getting the best quality water for your needs. Overall, making your filter cartridge is a great way to save money, ensure pure and safe water, and maintain control over the water filtration process.
Basic Components of a Filter Cartridge
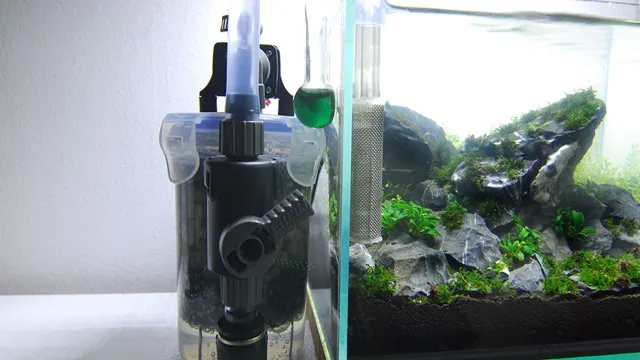
Filter cartridge A filter cartridge is an essential component of many filtration systems, and it is highly effective at removing impurities from water, air, and other fluids. Typically, a filter cartridge consists of a cylinder-shaped container, made from a wide variety of materials, including paper, synthetic polyester, or ceramic. The cartridge’s job is to trap contaminants in between its layers, ensuring that the fluid passing through it is purified and free from unwanted particles.
Additionally, filter cartridges are designed to last a considerable amount of time before they need replacement, which makes them a cost-effective solution when compared to other filtration methods. Therefore, if you’re looking for an efficient and practical way to filter out impurities from your fluids, look no further than a filter cartridge.
Materials Needed
If you’re a fish enthusiast, then having an aquarium filter cartridge is a must. While buying these cartridges is an easy option, making your own can be a fun and rewarding activity. Before starting, gather all the necessary materials, such as polyester batting or filter floss, carbon, and plastic mesh.
You’ll also need some scissors, a ruler, and a marker. The first step is to cut your polyester batting or filter floss in the shape and size of your aquarium filter. After measuring the size on the plastic mesh, cut the mesh with your scissors.
Now, put the cut floss or batting on top of the mesh and wrap it around. Use the marker to mark where the mesh overlaps. Cut off the excess batting or floss and insert the mesh into the aquarium filter.
Finally, add carbon to the mix and put the filtered cartridge back into your aquarium filter. With a little bit of effort, you’ll have a brand new aquarium filter cartridge made by you that works just as well as the store-bought ones.
Filter Media Options
When it comes to choosing the right filter media for your aquarium or pond, there are a variety of options to choose from. Some of the most common materials used include foam, ceramic, and bio balls. Foam is a popular choice because it captures large debris and is easy to clean. (See Also: How to Program National Geographic Aquarium Light: A Step-by-Step Guide.)
Ceramic rings are great for biological filtration and house beneficial bacteria that break down harmful toxins. Bio balls have a unique design that promotes water flow and oxygenation, making them ideal for mechanical and biological filtration. Additionally, some aquarium enthusiasts opt for filter floss or polyester pads to help maintain water clarity.
Ultimately, the best filter media for your setup will depend on your needs and preferences. Are you looking for mechanical, biological, or chemical filtration? Are you housing delicate or aggressive fish? Considering these factors will help you make an informed decision and keep your aquatic pets healthy and happy.
Other Supplies Needed
When preparing for a DIY project, it’s essential to have all of the necessary supplies ready to go. In addition to the actual materials you’ll be working with, there are a few other items you might need to consider. First and foremost, safety should always be a top priority.
Depending on the project, you may need to invest in safety gear like gloves, goggles, and masks. Additionally, you’ll likely need a variety of tools to get the job done, such as a hammer, screwdriver, drill, or saw. Don’t forget about the little things too, like nails, screws, glue, and tape.
It’s always better to have these items ready to go before starting your project to avoid any hiccups along the way. With all of these supplies on hand, you’ll be ready to tackle any DIY project with confidence and ease.
Step-by-Step Instructions
If you’re looking to make your own aquarium filter cartridge, it’s easier than you might think! The first step is to gather your materials. You’ll need filter floss, activated carbon, and a plastic container with a lid. Cut the filter floss to fit the container, leaving enough room for the activated carbon.
Next, fill the container with the appropriate amount of activated carbon and pack it evenly. Then, place the filter floss on top, making sure it covers the entire layer of activated carbon. Press the floss down lightly, but don’t pack it too tightly.
Finally, put the lid on the container and your homemade aquarium filter cartridge is ready to go! It’s important to replace your filter cartridge regularly to ensure that your aquarium remains clean and healthy for your fish. With a little DIY know-how, you can save money and maintain the health of your aquarium at the same time.
Step 1: Prepare the Filter Media
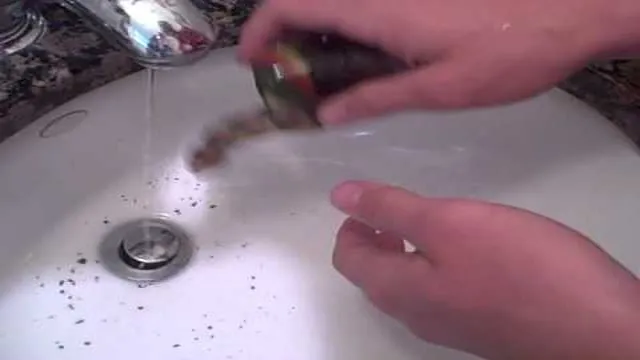
To get the most out of your aquarium filter, it’s important to properly prepare the filter media before installation. The first step is to rinse the media thoroughly under running water to remove any loose debris. This will prevent any particles from clogging up the filter and interfering with its effectiveness.
If you’re using activated carbon, it’s a good idea to soak it for a few hours in a bucket of dechlorinated water. This will help to remove any impurities and ensure that the carbon is ready to absorb harmful chemicals from the water. Once you’ve rinsed and soaked the filter media (if necessary), it’s ready to be placed in the filter and connected to your aquarium system.
With these simple steps, you can be confident that your filter will do its job properly and keep your aquarium water clean and healthy for your fish and other aquatic creatures.
Step 2: Cut Filter Media to Size
Once you’ve measured and marked out the filter media for your aquarium, it’s time to cut it to size. Whether you’re using filter floss, sponge, or any other type of filter media, it’s important to make sure your cut is precise in order to achieve maximum filtration effectiveness. Start by using a sharp pair of scissors or a utility knife to cut the media along your marked lines.
Depending on the density of the media you’re working with, you may need to make multiple passes to ensure a smooth cut. It’s crucial to avoid any jagged edges or loose fibers that could potentially break off and enter your aquarium, so take your time and make any necessary adjustments until you’re satisfied with the final result. Remember, a little bit of extra effort at this stage can go a long way towards keeping your aquarium clean and healthy.
Step 3: Insert the Filter Media
Now that you have assembled your filter, it is time to insert the filter media. This is an essential step in creating clean and healthy aquarium water for your fish. First of all, make sure that you have chosen the right filter media for your aquarium. (See Also: How to Decrease Nitrate in Saltwater Aquarium: Ultimate Guide for Aquarium Owners)
There are several types of filter media available, such as sponge, activated carbon, and biological media. Choose the media based on your aquarium’s size, type of fish, and their waste production. Once you have chosen the proper filter media, insert it into your filter.
Begin by adding the biological media, followed by the mechanical or chemical media. It is important to keep in mind that the media’s placement may differ based on the filter type, so consult your filter’s manual for proper placement instructions. Do not forget to rinse the media with dechlorinated water before inserting it, as it will remove any dust or debris that could clog the filter.
When the media is inserted, close the filter and start it. It may take some time for the filter to filter your aquarium water completely, so be patient. In summary, following these steps will ensure that your filter functions effectively and provides clean and healthy water for your aquatic pets.
Step 4: Secure the Filter Cartridge
After successfully placing the filter cartridge in your filter housing, the next step is to secure it in place. To do this, carefully align the cartridge with the grooves in the housing. Once in place, turn the cartridge clockwise until it locks into place.
This ensures that the cartridge stays firmly in place and prevents any water from bypassing the filter. It’s important to ensure that the filter is properly secured to avoid any leaks or damage to the filter housing. Don’t over tighten the cartridge as it may cause damage.
With this simple process, you can ensure that your filter works effectively to provide clean water. Remember, a secured filter cartridge is the key to the longevity of your filtration system.
Maintenance and Cleaning Tips
If you’re an aquarium owner, you know the importance of having a good filter to keep the water clean and healthy for your fish. While replacing filter cartridges can be costly and wasteful, it’s surprisingly easy to make your own at home. All you need is some filter media, such as polyester batting or foam, and an old cartridge to use as a template.
Simply cut the media to fit the cartridge, layering it as desired for the best filtration results. Then, just insert the homemade filter cartridge into the filter and you’re good to go! By making your own cartridges, you can save money and reduce waste while still providing your fish with the clean, healthy water they need to thrive.
How Often to Clean Filter Cartridge
When it comes to maintaining your filter cartridge, it’s crucial to stay on top of regular cleaning. Ideally, you should clean your filter cartridge at least once a month, especially during peak swimming season. This will ensure that your pool or spa stays clean and healthy for swimmers.
However, if you notice that your water is cloudy or murky, you may need to clean your filter cartridge more frequently. A dirty filter cartridge can lead to decreased water circulation and reduce the effectiveness of chemicals used to treat your pool or spa. It’s also important to note that cleaning your filter cartridge involves more than just rinsing it off with a hose.
Instead, you’ll need to use a filter cleaner solution to remove debris and buildup from the filter fibers. By staying vigilant about your filter cartridge maintenance, you can keep your pool or spa water sparkling clean all season long.
Steps to Clean Filter Cartridge
If you want to keep your pool sparkling clean, then regular maintenance and cleaning of the filter cartridge is a must. Here are some easy steps you can follow to keep your filter cartridge maintained and clean. Firstly, turn off the pool pump and remove the cartridge from the filter housing.
Then, rinse it with a garden hose, making sure to remove and clean any debris caught in the pleats. For a deeper clean, soak the cartridge in a filter cleaner solution for a few hours, then rinse thoroughly again with a garden hose. Finally, reinstall the cartridge, restart the pool pump, and check the pressure gauge to ensure the filter is clean and functioning effectively. (See Also: How to Assemble Jepo AP115F Aquarium Liquid Filter: Step-by-Step Guide)
Regular cleaning of your filter cartridge can help prolong its lifespan and ensure crystal clear water in your pool. So, take some time to maintain and clean your filter cartridge, and you’ll save yourself from headaches down the road.
Conclusion
In conclusion, creating your own aquarium filter cartridge is not only a cost-effective solution but also a fun DIY project to try out. With just a little creativity, you can transform regular household items into an effective filtration system for your underwater friends. So, ditch the overpriced store-bought cartridges and dive into the world of DIY aquatic maintenance.
Your fish will thank you for it!”
FAQs
What materials do I need to make my own aquarium filter cartridge?
To make your own aquarium filter cartridge, you will need filter floss, activated carbon, plastic mesh, and scissors.
Is it difficult to make your own aquarium filter cartridge?
No, it is not difficult to make your own aquarium filter cartridge as long as you have the right materials and follow the proper instructions.
Why should I make my own aquarium filter cartridge instead of buying one?
Making your own aquarium filter cartridge can be more cost-effective, customizable, and environmentally friendly than buying pre-made ones.
Can I reuse my homemade aquarium filter cartridge?
Yes, you can rinse and reuse your homemade aquarium filter cartridge as long as it hasn’t lost its filtering effectiveness.
How often should I replace my homemade aquarium filter cartridge?
It is recommended to replace your homemade aquarium filter cartridge every 2-4 weeks or sooner if it becomes visibly dirty or less effective.
How do I assemble my homemade aquarium filter cartridge?
Cut the plastic mesh to fit the size of your filter, layer the filter floss and activated carbon over the mesh, fold it to create a sandwich-like shape, and secure with the cutout tabs on the sides.
Can I customize the size and shape of my homemade aquarium filter cartridge?
Yes, you can customize the size and shape of your homemade aquarium filter cartridge to fit into any type of filter or filtration system.

