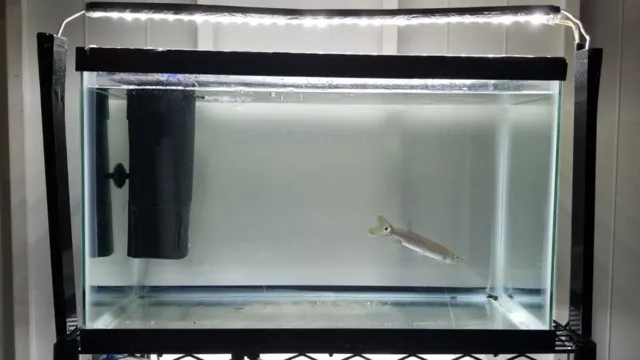
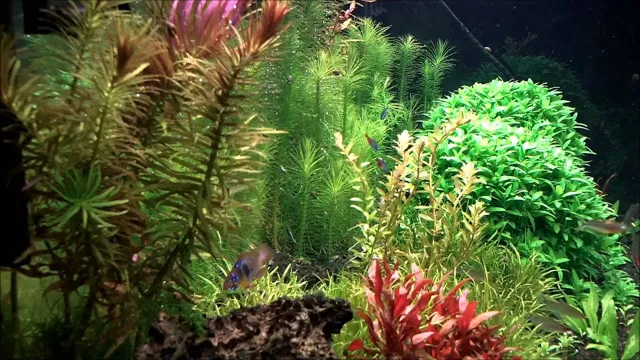
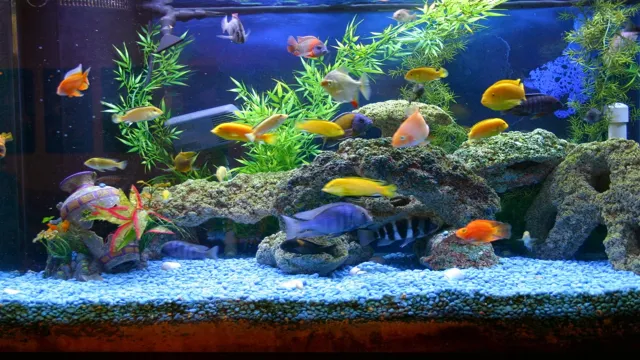
If you’re a fan of aquariums, you know that a well-lit tank can completely transform the look and feel of your underwater world. But with so many options on the market, finding the perfect lighting for your aquarium can be a daunting task. Luckily, making your own aquarium lighting may just be the solution you’ve been looking for.
Not only is DIY aquarium lighting a cost-effective alternative to store-bought options, but it also allows you to customize your lighting to suit your specific needs and preferences. Whether you have a saltwater tank or a freshwater tank, you can create a stunning lighting setup that highlights the beauty of your aquatic plants and fish. And don’t worry if you’re not a DIY expert – making your own aquarium lighting is easier than you might think.
With just a few materials and a little bit of know-how, you can create a lighting system that rivals any commercial product on the market. Plus, the sense of satisfaction that comes from creating something with your own two hands is unmatched. So, whether you’re looking to save some money, flex your DIY muscles, or simply want a lighting setup that’s tailored to your aquarium, making your own aquarium lighting is a fun and rewarding project you won’t regret.
Benefits of DIY Aquarium Lighting
Are you looking for a way to save money on aquarium lighting? Why not try making your own! DIY aquarium lighting can not only save you some cash, but it can also be a fun and rewarding project. When making your own aquarium lighting, you have the freedom to customize the lighting to fit the specific needs of your tank and its inhabitants. You can experiment with different colors, brightness levels, and even add features like timers and dimmers.
Additionally, DIY aquarium lighting can be more energy-efficient than store-bought options, which is better for both your wallet and the environment. So why not give it a try? With a little research and some creativity, you may just end up with the perfect lighting setup for your aquarium.
Increased Customization
When it comes to aquarium lighting, DIY options are becoming increasingly popular for several reasons. One of the main benefits of customizing your own aquarium lighting is the increased level of personalization it provides. Not only can you tailor the lighting to suit the specific needs of your aquatic plants, but you can also opt for unique colors and effects that may not be available with pre-made lighting fixtures.
Additionally, DIY lighting projects often allow for more control over intensity, which can be especially important for reef tanks. By taking on a DIY project, you have the opportunity to create a lighting setup that is uniquely tailored to your aquarium’s needs, and that can truly enhance the beauty of your underwater world. So, why not give it a try and see just how much of a difference custom lighting can make?
Cost-Effective
DIY aquarium lighting can be a cost-effective option for aquarium enthusiasts. It’s no secret that setting up and maintaining an aquarium can be an expensive hobby. However, with a little bit of DIY skills and knowledge, the cost of aquarium lighting can be greatly reduced.
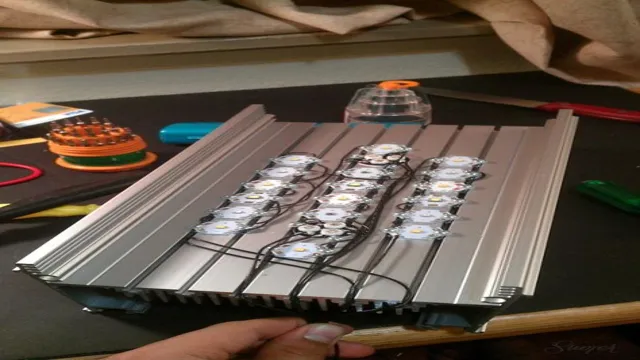
By building your own LED lights, for example, you can save a lot of money and have a lighting system that is customizable to your aquarium’s needs. Additionally, DIY aquarium lighting gives you the freedom to experiment with different types of lighting and colors, which can enhance the beauty of your aquarium. So, if you’re looking for a way to save money on aquarium lighting without sacrificing quality, consider the benefits of DIY.
Improved Lighting Performance
One of the biggest benefits of creating your own DIY aquarium lighting is the improved lighting performance. Traditional aquarium lighting systems can be expensive and may not provide the specific spectrum and intensity of light that your aquatic plants or animals need. By designing and building your own lighting system, you can customize the spectrum and intensity of light to exactly match the needs of your aquarium inhabitants.
This customization can lead to healthier and happier fish and plants, as well as more vibrant colors and growth. Plus, with the ability to control the lighting schedule, you can replicate the natural light cycle of your fish’s habitat. As a result, they will feel more at home and will be less stressed, which can ultimately lengthen their lifespan.
So, if you want to take the health and well-being of your aquarium inhabitants to the next level, DIY aquarium lighting is definitely worth considering.
Materials Needed to Make Aquarium Lighting
If you’re interested in creating your own aquarium lighting, you’re in luck! This project is not only feasible but can also save you money in the long run. To start, you’ll need a few materials, including LED strips, a power supply, and a heat sink. LED strips come in various colors and wattages, so it’s essential to choose the right ones for your aquarium’s needs.
The power supply will ensure that your lighting system operates smoothly. It’s important to get a power supply that can handle the wattage of your LED strips. Finally, a heat sink is necessary to dissipate the heat generated by the LED strips.
Without a heat sink, your LED strips could overheat and fail prematurely. Once you have your materials, assembling the lighting system is relatively straightforward. With a little bit of effort and some guidance, you can have your very own custom aquarium lighting in no time.
LED Strips
LED strips So, you want to make your own aquarium lighting? Great choice! Not only is it a cost-effective option, it also allows you to customize the lighting to your liking and the needs of the fish and plants. To get started, you will need a few materials. First and foremost, you’ll need LED strips.
These come in a variety of colors and sizes, so be sure to choose the ones that will work best for your aquarium setup. You’ll also need a power supply to run the LED strips, as well as a controller if you want to be able to adjust the brightness and color of the lights. Additionally, you’ll need some sort of housing or casing to protect the LED strips from water damage and to secure them in place above the aquarium.
With these materials in hand, you’ll be well on your way to creating your very own custom aquarium lighting setup.
Power Supply
Power Supply When making aquarium lighting, one of the essential components is the power supply. A power supply is responsible for providing the required voltage and current to the lighting system. It serves as the primary source of power and ensures that the lights operate correctly. (See Also: How to Make Homemade Aquarium Heater: A Step by Step Guide)
There are different types of power supplies available in the market, such as AC-DC power supplies, DC-DC converters, and LED drivers. It is essential to choose the appropriate power supply for the lighting system based on its requirements, including the type of lights used, their wattage, and voltage rating. It is also important to ensure that the power supply is compatible with the control system and wiring.
A reliable and high-quality power supply will help to ensure that the aquarium lighting system functions efficiently and safely.
Aluminum Channel
Aluminum Channel When it comes to constructing aquarium lighting, you’ll need several materials to get the job done right. One crucial component is aluminum channel. This material is ideal for aquarium lighting since it is both lightweight and durable.
It’s also resistant to rust and corrosion, making it a go-to choice for many aquarium hobbyists. Aluminum channel can be easily cut to fit your specific lighting needs and provides a sleek appearance to your aquarium setup. Plus, it helps to disperse heat from the light source, keeping your aquarium at an optimal temperature for your aquatic creatures.
By utilizing aluminum channel in your aquarium lighting construction, you can rest assured that your setup will look great and function even better.
Wiring and Soldering Tools
When it comes to making your own aquarium lighting, having the proper wiring and soldering tools is imperative. To start, you’ll need a soldering iron and solder wire. These tools allow you to join electrical components together by melting solder wire onto them.
Additionally, you’ll need wire strippers to remove the insulation from the wire ends, making it easier to connect them to the components. A wire cutter is also necessary to trim off any excess wire. To ensure that your wiring is secure, use heat-shrink tubing or electrical tape to insulate the connections after soldering.
This protects the wires from moisture and prevents any short circuits. With these tools, you’ll be able to create customized aquarium lighting that is safe and reliable for your aquatic friends.
Step-by-Step Guide to Making Aquarium Lighting
If you’re looking to create a custom aquarium lighting system, it’s easier than you might think! By making your own aquarium lighting, you can save money and create a system that perfectly suits your needs. To start, you’ll need a few key components. First, choose the type of LED lights you want to use – you can find a variety of options that are designed specifically for aquarium use.
Next, you’ll need a power supply and wiring to connect your lights. Then, consider adding a timer or dimmer switch to give you more control over the lighting. Once you have all your components, it’s time to assemble the lighting system.
Attach the lights to a fixture that can be mounted on top of your aquarium, then connect the wiring and power supply. Finally, test your lighting system to make sure everything is working correctly. With a little bit of time and effort, you can create a custom aquarium lighting system that will keep your fish happy and healthy!
Step 1: Design the Layout
Aquarium lighting is a critical component for any aquarium enthusiast, as it provides the necessary lighting for both aquatic plants and animals. Before diving in, it’s important to design the layout of the lighting system. Start by assessing the size of your aquarium and the specific needs of the environment.
Consider the type of plants and animals you want to keep and research the lighting requirements they need to thrive. Once you have a solid understanding of the requirements, you can start selecting the appropriate lighting fixtures. Choose the right bulbs and wattage, and distribute them evenly across the aquarium, ensuring that all areas receive the necessary light.
The layout should also account for the aesthetics of the aquarium, balancing the practical needs with the overall style of the tank. Properly designing the layout of your aquarium lighting is crucial to creating a healthy and visually appealing environment for both plants and animals.
Step 2: Cut the Aluminum Channel and LED Strips
Now that you have gathered all the necessary materials and tools, it’s time to move on to Step 2: cutting the aluminum channel and LED strips. This step can be a bit tricky, so make sure to take your time and measure carefully to avoid any mistakes. First, measure the length of your aquarium and mark it on the aluminum channel.
Use a saw to carefully cut the channel to the correct length. Next, you’ll need to cut the LED strips to fit inside the channel. Measure the length of the channel and subtract about 1 inch from that measurement.
This will allow room for the end caps. Use scissors to make the cut. You can also use a hot glue gun to secure the LED strips to the bottom of the channel.
It’s important to make sure the LED strips are evenly spaced and have no gaps in between them. Once everything is cut and secured, it’s time to move on to the next step. Stay tuned for Step 3: wiring the LED strips. (See Also: How to Get Rid of Brown Algae in Marine Aquarium: Effective Tips and Tricks)
Happy crafting!
Step 3: Solder the LED Strips
After figuring out the wiring and testing the LED strips, it’s time to solder everything together to create your custom aquarium lighting. This step requires a steady hand and precision as you connect the strips according to your design. Start by making sure your workspace is clean, well-lit, and organized.
Lay out the LED strips and follow your wiring diagram closely to avoid mistakes. Use a soldering iron and rosin-core solder to attach the wires to the pads on the strips. Be careful not to overheat the pads or burn the wires, as this can damage the LED strip and ruin your hard work.
Double-check your connections before moving on to the next strip. Once you’ve soldered all the strips together, test the lights again to make sure they’re working correctly. If everything looks good, you’re almost done! In the final step, we’ll attach the lights to the aquarium and make some final adjustments.
Step 4: Install the Power Supply
Now that you have prepared the frame and attached the LED lights, it’s time to install the power supply for your aquarium lighting. This component is responsible for converting AC voltage to DC, which is used to power the LEDs. To begin, choose a location for the power supply that is well-ventilated and away from water.
Then, connect the AC power cable to the power supply and plug it into a surge protector. Next, attach the DC output cables to the LED controller and ensure each wire is securely fastened. Once the cables are connected, test the lighting system to make sure it is working properly.
If all is well, neatly organize and hide the cables within the frame or cover. With the power supply installed, your custom aquarium lighting system is now complete and ready to showcase your aquatic environment in the best light possible.
Step 5: Install the Lighting Fixture
Making aquarium lighting can be a fulfilling project, especially when it comes to installing the lighting fixture. Step five in the process involves mounting the fixture onto the aquarium. First, ensure that the light is unplugged for safety reasons.
Then, carefully place the fixture onto the tank and secure it in place using clamps or other attachments. It’s crucial to ensure that the fixture is stable and won’t accidentally fall into the water. Next, connect the electrical wiring to the power source and turn the light on to ensure that it’s working correctly.
Make sure to follow all safety guidelines when working with electricity to avoid any accidents. With the light securely installed, you can now sit back and enjoy the beautiful illumination it brings to your aquarium.
Tips for Successful DIY Aquarium Lighting
If you’re looking to save some money and make your own aquarium lighting, there are a few tips to keep in mind for a successful DIY project. First and foremost, do your research. Make sure you understand the lighting needs of your specific fish and plants in order to give them the best possible environment.
Choose LED lights, as they are energy-efficient and have a longer lifespan. Consider the size and shape of your aquarium when deciding how many lights you’ll need and where to position them. Don’t forget to create a timer system so that the lights turn off and on automatically, mimicking a natural sunrise and sunset.
By following these tips and taking the time to plan out your project, you can make your own aquarium lighting that is both effective and cost-efficient.
Choose High-Quality Materials
When it comes to DIY aquarium lighting, choosing high-quality materials is crucial. Not only will it ensure that your lighting system lasts longer, but it can also help prevent accidents and fires. When selecting materials, make sure to choose ones that are specifically designed for aquarium use.
This includes waterproof or water-resistant materials, such as cables and connectors, as well as high-quality LED bulbs and drivers. Remember that the safety of your fish and other aquatic creatures should always be a top priority, so don’t skimp on the quality of your DIY aquarium lighting materials. By investing in high-quality materials, you can create a beautiful and safe environment for your aquatic pets to thrive in.
Ensure Proper Wiring and Soldering
Proper wiring and soldering are crucial to the success of your DIY aquarium lighting project. It’s easy to overlook these important steps, but they can make all the difference in the safety and effectiveness of your lighting system. Make sure you have the right tools and equipment, such as wire strippers and a soldering iron, and take the time to carefully read through the instructions before beginning.
When wiring your lighting system, ensure that all connections are tight and secure, and that no wires are exposed or touching each other. Soldering should also be done carefully and correctly to avoid any potential hazards. By taking the time to properly wire and solder your DIY aquarium lighting system, you can ensure that your fish and plants are getting the best possible light and that your aquarium is safe and secure. (See Also: How to Bring Down NO3 Levels in Aquarium: Tips and Tricks)
Test the Lighting Fixture Before Installation
If you’re planning on installing DIY aquarium lighting, it’s important to test the lighting fixture before actually installing it. This will give you an idea of how the light will look in your tank, and whether it produces the correct amount of light for your aquatic plants or fish. To do this, simply set up the lighting fixture and turn it on.
Observe the color temperature of the light and how it illuminates the tank. You may also want to measure the light intensity using a PAR meter, to ensure that it is sufficient for the needs of your aquarium. By testing the lighting fixture beforehand, you can make any necessary adjustments and ensure that your DIY lighting installation is a success.
So, before you start drilling or modifying your tank, take some time to test out your lighting fixture and make any necessary tweaks. Your aquarium inhabitants will thank you!
Regularly Clean and Maintain the Lighting Fixture
Regular cleaning and maintenance of your aquarium lighting is critical to the well-being of your fish and plants. The following tips will help ensure that your DIY aquarium lighting is a success. Firstly, be sure to clean the light fixture regularly to prevent the build-up of algae or other debris that can block the light’s output.
Make sure you turn off the light and unplug it before removing any accumulated debris. Secondly, ensure that all the components of your lighting system are functioning correctly. Check the bulbs for damage, and replace them regularly to maintain the correct level of light intensity.
Lastly, consider replacing your light fixture if it is outdated or has suffered damage, as this can have a detrimental effect on the health of your aquarium inhabitants. By following these simple tips, you can keep your DIY lighting system working efficiently and ensure your aquarium thrives.
Conclusion
In conclusion, creating your own aquarium lighting may seem like a daunting task, but with a little bit of creativity and skill, it can be an illuminating experience. From LED strips to fluorescent bulbs, the possibilities are endless. So, don’t be afraid to dive into DIY and light up your aquatic world with a personalized touch.
And remember, sometimes the brightest ideas come from taking a chance and swimming against the current.”
FAQs
What kind of lighting is best for aquarium plants?
LED lighting is considered the best for aquarium plants since it is energy-efficient, customizable, and provides the right light spectrum for plant growth.
Can I use regular household light bulbs for my aquarium?
No, regular household light bulbs are not suitable for aquariums since they do not provide the right spectrum of light needed for fish and plant health.
What is the ideal color temperature for aquarium lighting?
The ideal color temperature for aquarium lighting is between 6500K to 10000K, as it provides the natural daylight spectrum needed for plant and fish health.
How many hours a day should I keep my aquarium lights on?
The ideal duration for keeping your aquarium lights on is 8-10 hours per day. However, it also depends on the type of fish and plants you have in your aquarium.
Can I DIY my own aquarium lighting?
Yes, you can DIY your own aquarium lighting using LED strips, drivers, and fixtures with basic electrical knowledge and safety precautions.
What is the difference between freshwater and saltwater aquarium lighting?
Saltwater aquarium lighting requires higher intensity lighting, while freshwater aquariums require lighting with a lower intensity.
How do I choose the right LED lighting for my aquarium?
Consider the size of your aquarium, the type of plants and fish you have, and the spectrum of light needed for their growth to choose the right LED lighting for your aquarium.

