How to Clean a Second Hand Aquarium Filter and Keep Your Tank Healthy
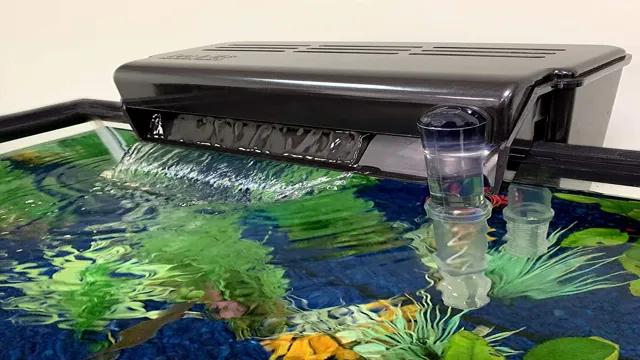
Have you recently acquired a second-hand aquarium filter and not sure how to clean it? Don’t worry, we’ve got you covered! A dirty filter can cause harm to your aquatic pets and also decrease the efficiency of the filter, leading to poor water quality. In this blog, we will guide you through the steps of how to properly clean a second-hand aquarium filter, ensuring that your fish are happy and healthy. So grab your cleaning supplies and let’s dive in!
Gather Necessary Materials
If you’ve recently acquired a second-hand aquarium filter, it’s important to clean it before installing it in your aquarium. To do this, gather all the necessary materials you’ll need. Start with gloves to protect your hands from any harmful chemicals, as well as a bucket or container to hold the filter components while you clean.
You’ll also need a soft-bristle brush or sponge, vinegar or bleach, and a source of running water to rinse the components thoroughly. Take the time to read through any manufacturer instructions or recommendations before cleaning, as each filter may require different cleaning methods. Once you have everything, you’re ready to begin the cleaning process and prepare your filter for use in your aquarium.
Remember, keeping your filter clean and well-maintained is vital to the overall health of your aquatic friends, so don’t overlook this important step.
Materials include: filter, bucket, vinegar, sponge, toothbrush
To start filtering the fish tank water, it’s necessary to gather a few key materials. First, get a filter, which will be the main tool in this process. Next, grab a bucket that’s large enough to hold the tank’s water volume, as we’ll need to pour it in and out as we clean.
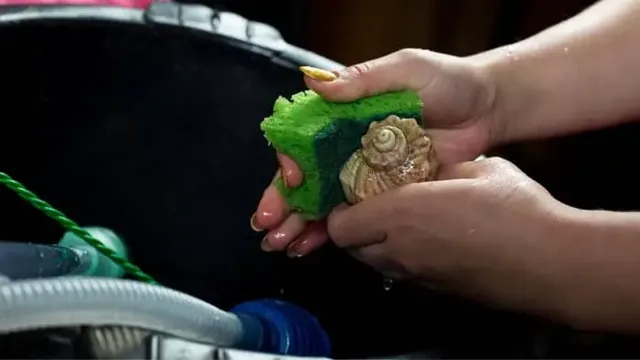
You’ll also need vinegar, which will be used to soak the filter and clean the tank walls. A sponge is great for wiping down any algae or debris on the tank’s interior, while a toothbrush comes in handy for particularly stubborn bits. By having these materials on hand, you’ll be well-equipped to keep your fish tank clean and maintained.
Disassemble the Filter
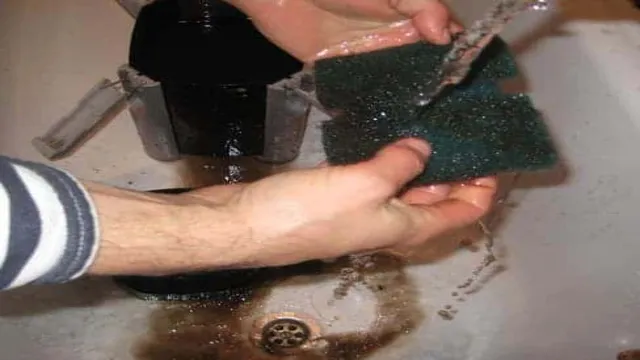
So, you picked up a second-hand aquarium filter and now it’s time to give it a good cleaning before use. The first step is to disassemble the filter. Take a close look at the filter and locate any screws, clips or fasteners holding its components together and remove them.
As you dismantle the filter, keep the pieces organized so that it’s easier to put everything back together once you’re done. Once you’ve taken it apart, inspect each piece of the filter for any signs of damage or discoloration. Don’t use any damaged or broken parts as they will not work as effectively.
Before you move on to the next step, wipe down all the parts of the filter with a clean, damp cloth to remove any excess dirt or grime. By disassembling and cleaning each part thoroughly, you’ll ensure that your second-hand aquarium filter will perform optimally once you put it back together.
Remove filter media, impeller, and other parts
When it’s time to clean your aquarium filter, one crucial step you need to take is to disassemble it. To get started, you should remove the filter media, impeller, and other parts from the filter. This will make it easier for you to clean each part thoroughly.
First, take out the filter media, which can include foam pads, sponges, or filter cartridges. These should be rinsed out in aquarium water and replaced if necessary. Next, remove the impeller, which is responsible for pumping water through the filter.
This part can get clogged with debris and should be carefully cleaned with a soft brush. Finally, take apart any other parts that can be removed, such as the intake tube and outflow nozzle. Clean each piece with a gentle brush to remove any dirt or buildup.
By disassembling your aquarium filter, you’ll be able to clean it more effectively, giving your fish a healthier environment to live in.
Clean the Filter and Parts
One of the crucial steps in preparing a second-hand aquarium filter for use is to clean it thoroughly. Start by unplugging the filter and disassembling the parts. Carefully remove the filter media and gently rinse it in a bucket of aquarium water.
Don’t use tap water as chlorine or chloramine present in it can harm the beneficial bacteria growing inside the filter. Clean the filter and its parts using a soft-bristle brush and a mild soap solution, followed by a thorough rinse. Don’t use harsh chemicals as they can harm the filter components and aquatic life.
Scrutinize the filter’s impeller for any signs of damage or blockage. If it’s dirty, clean it with a brush or a cotton swab. Remember to inspect the filter’s intake tube and all tubing connections for cracks or splits.
Checking and cleaning the filter regularly will maintain the aquarium’s water quality and keep its inhabitants healthy.
Rinse parts and soak in vinegar solution for 30 minutes
If you want your coffee maker to produce a perfect cup of coffee every time, it’s important to clean it regularly – and that includes not just the exterior but also the interior parts, like the filter and the carafe. One effective way to ensure deep-cleaning is to soak the parts in a vinegar solution for 30 minutes. But before you do that, you need to rinse them to get rid of any loose dirt or grime.
This preliminary step ensures that the vinegar solution can penetrate the parts more easily and work its magic. Once the parts are rinsed, you can proceed to soak them in the solution – which consists of equal parts of water and vinegar – for half an hour. The vinegar helps to dissolve any mineral buildup or stains that have accumulated over time, leaving your coffee maker sparkling clean.
After the soak, all you need to do is rinse the parts once more and air-dry them before putting them back into the coffee maker. Remember to do this cleaning routine once a month to keep your coffee maker in tip-top condition.
Scrub with sponge or toothbrush, paying attention to crevices and corners
When it comes to maintaining your filter and its parts, cleaning is key! You’ll want to start by scrubbing off any dirt or debris with a sponge or toothbrush. Pay extra attention to crevices and corners where dirt can build up. Then, it’s time to clean the filter itself.
Remove it from the machine and rinse it off with water. Use a soft brush to scrub off any remaining debris. For heavily soiled filters, you may need to soak it in a cleaning solution for a few minutes before rinsing.
Additionally, don’t forget about the other parts of your filter, like the filter basket and brush roll. These areas can accumulate dirt and debris quickly and should be checked regularly. Keeping your filter and its parts clean will not only improve the performance and lifespan of your machine, but it will also ensure that the air in your home stays clean and healthy for you and your family.
So, take the time to clean your filter and parts regularly and enjoy a cleaner and healthier home environment!
Rinse and Reassemble the Filter
Once you’ve successfully dismantled your second-hand aquarium filter, the essential step of cleaning and rinsing the filter begins. First, carefully remove the filter media and rinse it with running tap water. Make sure not to use hot water, as that could kill any beneficial bacteria present in the media.
Once you’ve thoroughly rinsed the media, wipe down the inside of the casing with a clean towel or sponge. Make sure to remove any remaining debris or buildup. Then, reassemble the media in the filter according to the manufacturer’s instructions.
Once reassembled, fill the filter with water and test it to make sure it’s running correctly. As you take on the responsibility of cleaning an old filter, it’s important to understand that keeping it clean is vital to the health of your fish. By cleaning the filter regularly, your fish will thank you with a healthy living environment full of crystal clear water.
Rinse all parts thoroughly with clean water
After cleaning the filter with soap and water, it’s essential to rinse all parts thoroughly with clean water. If any soap residue is left behind, it can interfere with the filter’s performance and even pose a risk to your health. Rinse all the parts thoroughly using running water until you see no more soap suds.
To be sure, submerge the pieces in a bowl of clean water to ensure that there is no remaining soap. Once you have rinsed all the pieces, set them aside to air dry. After the filter has dried, you should reassemble it by putting all the pieces back together, making sure that they are correctly aligned.
Then, put the filter back in its designated location, close any access panels, and turn your system back on. Regularly cleaning and maintaining your filter is extremely important in ensuring that your HVAC system runs efficiently and keeps the air in your home or office clean and healthy.
Reassemble the filter and replace any worn or damaged parts
After removing all the parts of the filter and cleaning each one separately, it’s time to rinse and reassemble the filter. Before putting everything back together, take a close look at each piece to ensure there are no signs of wear or damage. If you do notice anything, replace those parts with new ones before continuing.
When you’re ready to start reassembling, first rinse all the pieces thoroughly with clean water to make sure there’s no residue left behind. Then, carefully replace each piece in the order that you removed them, following any specific instructions from the manufacturer. Double-check that each part is secured tightly and in the correct position before turning the filter back on.
Taking the time to properly reassemble your filter will help ensure its longevity and keep your water clean and healthy. Remember, regular filter maintenance is key to successful aquarium ownership!
Test and Monitor the Filter
Once you’ve cleaned and reassembled a second-hand aquarium filter, it’s important to test and monitor it to ensure it’s functioning properly. Fill the aquarium with water and turn the filter on, observing its noise level and flow rate. If it’s significantly louder or weaker than expected, disassemble and inspect it again to make sure all parts are properly connected and intact.
Keep an eye on the water quality over the next few days, watching for any noticeable changes in clarity or chemical composition. It’s also a good idea to conduct regular checks on the filter to ensure it’s not getting clogged with debris or becoming less effective over time. By staying vigilant and proactive with your filter maintenance, you can keep your aquarium clean and healthy for its inhabitants.
Test the filter to ensure proper function after reassembly
After reassembling your filter, it’s important to test it to ensure that it’s functioning properly before using it. Testing and monitoring your filter is a vital step in ensuring that the water in your pool or aquarium stays clean and safe for your fish and other aquatic creatures. One way to test your filter is to monitor the water flow and pressure.
A lack of water flow or pressure could indicate a clog in the filter. Additionally, it’s important to check the water quality regularly to make sure that the filter is effectively removing debris and contaminants from the water. If you notice that the water quality is deteriorating despite the filter being cleaned and reassembled, it might be time to replace the filter media.
By regularly testing and monitoring your filter, you can ensure that your aquatic environment remains healthy and enjoyable for all its occupants.
Regularly monitor the filter for any signs of clogging or malfunction
As important as it is to install the right air filter for your home, it’s equally crucial to test and monitor it regularly to ensure that it’s functioning correctly. Clogged or malfunctioning filters not only result in poor air quality but also contribute to higher energy bills, decreased efficiency, and potential damage to your HVAC system. To test your air filter, start by inspecting it visually for any signs of debris buildup or visible damage.
You can also hold it up to a light and see if any light passes through; if it doesn’t, it’s time to replace it. Additionally, checking your filter’s pressure drop can also indicate potential clogs. This involves measuring the difference in pressure between the air intake and output of the HVAC unit when the filter is clean and comparing it to its current reading.
Make sure to monitor your filter’s condition every one to three months and replace it as soon as possible if any problems arise. By doing so, you’ll not only save money on your energy bills but also breathe cleaner air and extend the life of your HVAC system.
Conclusion
In conclusion, cleaning a second hand aquarium filter is essential for the health and happiness of your aquatic pets. With a little bit of effort and some elbow grease, you can transform a dirty and neglected filter into a sparkling clean machine that will keep your fish healthy and happy for years to come. So don’t be afraid to roll up your sleeves, grab a scrub brush, and get to work – your fish will thank you!”
FAQs
What materials do I need to clean a second hand aquarium filter?
To clean a second hand aquarium filter, you will need a bucket, clean water, aquarium-safe cleaning solution, scrub brush, and gloves.
How often should I clean my second hand aquarium filter?
The frequency of cleaning your second hand aquarium filter depends on its type and the size of your aquarium. Generally, it is recommended to clean the filter every 2-4 weeks.
Can I use household cleaning solutions to clean my second hand aquarium filter?
No, it is not recommended to use household cleaning solutions to clean your second hand aquarium filter as they contain chemicals that can be harmful to aquatic life. Instead, use an aquarium-safe cleaning solution.
Should I take apart my second hand aquarium filter before cleaning it?
Yes, it is recommended to take apart your second hand aquarium filter before cleaning it. This will allow you to clean every part properly, removing any debris or buildup.
How long does it take to clean a second hand aquarium filter?
The time it takes to clean a second hand aquarium filter depends on its type and size. Generally, it can take anywhere from 30 minutes to an hour.
How do I know if my second hand aquarium filter needs cleaning?
You can tell if your second hand aquarium filter needs cleaning if the water flow is reduced, the water becomes cloudy or has a foul smell.
Can I reuse the old filter media in my second hand aquarium filter after cleaning it?
Yes, you can reuse the old filter media in your second hand aquarium filter after cleaning it, as long as it is not damaged or deteriorated. However, it is recommended to replace the filter media every 6-12 months for optimal filtration.

