How to Clean Black Aquarium Sand: Tips and Tricks for a Sparkling Aquarium

If you’re the proud owner of a black aquarium with sand at the bottom, you know just how stunning it can look. The natural look of black sand can give off a strikingly beautiful and sophisticated vibe to your aquarium. However, just like any other type of aquarium sand, it can eventually develop a buildup of debris and algae.
This not only makes your black sand look unappealing but can harm your aquatic pets as well. Cleaning black aquarium sand is a task that every aquarium owner should know how to do. But, it’s not as simple as just scooping it out and rinsing.
You want to make sure the cleaning process is thorough and safe for your fish. It can also be time-consuming if not done effectively. Don’t worry, cleaning black aquarium sand doesn’t have to be a painfully long process.
With the right tools and techniques, the process can simply be a quick yet essential cleaning procedure. In this blog, we’ll cover easy-to-follow steps for keeping your black aquarium sand clean and healthy for your aquatic pets. From identifying when your sand needs cleaning, the tools you’ll need, and how to clean your black aquarium sand like a pro.
Keep on reading to learn how to keep your beautiful black sand aquarium looking pristine.
Why Clean Black Aquarium Sand?
If you’re wondering how to clean black aquarium sand, you’re in the right place. It’s essential to clean your aquarium’s sand regularly to avoid the accumulation of waste and debris that can harm your aquatic pets. The black aquarium sand, although incredibly gorgeous, can make it difficult to notice the dirt and fish waste that accumulates on its surface, making it crucial to clean it regularly.
Using a siphon hose is one of the best ways to clean your aquarium’s sand. It will help you remove all the dirt and debris without disturbing your fish. Additionally, it’s best to do partial water changes regularly to promote the health of your fish and maintain optimal water conditions.
Cleaning your black aquarium sand might seem like a daunting task, but with the right tools and techniques, it’s a quick and easy process that your fish will surely appreciate.
Remove Debris and Waste
One crucial aspect of maintaining a healthy and clean aquarium is removing debris and waste from black aquarium sand. Many aquarium owners overlook the importance of this task, but it plays a critical role in keeping your aquarium inhabitants healthy and happy. Accumulated debris and waste in your aquarium can trigger harmful bacteria growth, which can lead to dangerous infections for your fish and other aquatic creatures.
Additionally, waste buildup can cause unpleasant odors and unsightly appearances in your aquarium. Removing debris and waste is a simple yet crucial task that can be done using a siphon or a gravel vacuum. By regularly cleaning your black aquarium sand, you can ensure a clean and healthy aquarium environment for your aquatic pets.

Maintain Water Quality
Maintaining the water quality in your aquarium is crucial, not just for the health of your fish but also for the overall aesthetic appeal of your tank. One crucial aspect of keeping your water quality in check is cleaning your black aquarium sand. Why? The answer is simple – sand, just like any other substrate, collects debris and waste as it settles at the bottom of your aquarium.
Over time, this waste buildup can lead to harmful bacteria growth and ammonia buildup, which can be disastrous for your aquatic pets. Cleaning your sand regularly helps remove these accumulations, keeping your water safe from harmful toxins and maintaining a healthy environment for your fish to live in. So, don’t forget to add sand cleaning to your routine aquarium maintenance schedule to maintain optimal water quality and keep your fish happy and healthy.
Supplies You Will Need
If you want to keep your aquarium looking pristine, you need to keep the black sand clean. Properly cleaning black aquarium sand requires a few essential supplies. You will need a siphon or aquarium vacuum, a bucket, a water siphon or clean hose, and a scraper or brush.
A siphon or aquarium vacuum makes it easy to remove debris that has sunk into the sand. A bucket is necessary for draining off the dirty water. A water siphon or clean hose allows you to add fresh water to the aquarium once you’ve completed the cleaning process.
A scraper or brush can help to remove tough algae deposits or other stubborn debris. With these supplies, you can easily keep your black aquarium sand clean and your aquatic environment happy and healthy.
Water
Water is perhaps the most important resource you need to survive no matter where you are, whether that’s on a camping trip or surviving in a disaster zone. So, what supplies will you need to make sure you always have access to clean water? First, you’ll need a reliable water filtration system that can filter out harmful bacteria and parasites, as well as any other impurities in the water. You can choose a simple water filtration straw or a larger filtration system that can provide clean water for a group of people.
Another important supply is a water storage container, which will allow you to store enough water for drinking, cooking, and cleaning. Look for a durable container that’s easy to clean, such as a heavy-duty plastic or stainless steel container. Finally, don’t forget to pack water purification tablets or drops, which can be used to treat water that’s been contaminated with chemical pollutants.
With these essential supplies, you can be sure to always have access to clean water no matter where your adventures take you.
Bucket
When it comes to preparing for emergencies, having a bucket with necessary supplies can be a lifesaver. But what exactly should you put in your emergency bucket? Start with some basic supplies like a first aid kit, flashlight, and extra batteries. You’ll also want to include a supply of non-perishable food items, like energy bars or canned goods, as well as a few liters of water.
A multi-purpose tool and some duct tape can also come in handy. If you’ll be outside, add a poncho, heat blanket, and some hand warmers to stay dry and warm. And don’t forget to include any necessary medications.
Keep your bucket in an easy-to-reach place, such as by the front door or in the trunk of your car, so you can quickly grab it in case of an emergency. With these essential items, you’ll be prepared for whatever comes your way.
Gravel Vacuum or Siphon
When it comes to maintaining a clean and healthy aquarium, using a gravel vacuum or siphon is essential. Both of these tools can effectively remove debris from the bottom of your tank, but which one should you choose? Well, it depends on your personal preference and the specific needs of your aquarium. To use a gravel vacuum, you’ll need a few supplies, including the vacuum itself, a bucket, and a hose.
The vacuum works by using suction to pull debris and waste out of the gravel and into the bucket. On the other hand, a siphon requires similar supplies, but instead of using suction, it relies on gravity to pull water out of the tank and into the bucket, effectively removing any debris along with it. Both options are relatively easy to use and can help maintain the overall health and cleanliness of your aquarium.
So, whether you choose a gravel vacuum or siphon, remember to use it frequently to keep your aquatic friends happy and healthy.
Scrub Brush or Toothbrush
When it comes to cleaning small and hard-to-reach spaces, a scrub brush and toothbrush can both get the job done. But which one should you use? Well, it depends on the surface you’re cleaning and the level of grime and buildup. For tougher grime and buildup, a stiff bristle scrub brush is often the best option.
If you’re cleaning a more delicate surface, such as a wooden piece of furniture or a soft fabric, a toothbrush with soft bristles may be the better choice. Regardless of which tool you choose, there are some supplies you’ll need to get started. These include a bucket, cleaning solution, and protective gloves.
It’s also important to select the appropriate cleaning solution for the surface you’re cleaning. Using the wrong solution could end up damaging or discoloring the surface. So, always be sure to read the label and follow the instructions carefully.
With the right supplies and tools on hand, you’ll be able to tackle any cleaning job effectively and efficiently.
Step-By-Step Cleaning Process
Cleaning black aquarium sand can be a challenging task, but with the right approach, it can be done with ease. The first step is to remove any debris, dead plants, or waste from the aquarium. This can be done by using a net or a vacuum.
Next, take out about 10-15% of the water from the aquarium and set it aside. Then, using a siphon hose, start removing more water from the aquarium until you have removed about 50% of the water. Be careful not to disturb the sand during this process.
Now it’s time to clean the sand. Use a colander or a strainer to sift through the sand, removing any remaining debris, dead plants or waste. You can repeat this process as many times as you need until the sand is completely clean.
Once the sand is clean, add the water that you set aside. Then fill the tank with the correct amount of water, using a dechlorinator and aquarium salt if needed. Voila, your black aquarium sand is now ready for your beloved fish to enjoy!
Step 1: Turn Off Equipment and Remove Fish and Plants
Cleaning your fish tank is an important part of keeping your aquatic pets happy and healthy. The first step in the cleaning process is turning off all equipment and removing your fish and plants. This ensures that they are safe and won’t be harmed during the cleaning.
It’s important to keep them in a container with some of their tank water to minimize stress. Once everything is turned off and removed, you can begin draining the water into a separate container and disposing of any debris or waste that has accumulated. It may take a few rounds of draining and cleaning to remove all the dirt and grime, but a clean tank is worth the effort.
Remember to replenish with fresh water and add any necessary water treatments before adding your fish and plants back in. Taking these steps will help keep your fish tank clean and your aquatic pets healthy.
Step 2: Siphon the Sand
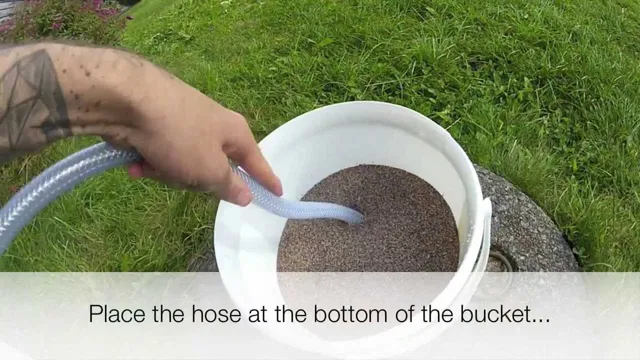
After draining the dirty water, the next step is to siphon the sand from your aquarium substrate. This task may seem intimidating, but it is essential in maintaining a clean and healthy environment for your aquatic pets. To start, you will need a siphon tube and a bucket.
To create suction, place one end of the tube in the aquarium and the other end in the bucket. You can use your mouth to start the flow of water by sucking on the tube, or you can use a pump to do the job. Gently stir the sand with your hand to loosen any debris before siphoning it up.
Continue siphoning until you have removed the desired amount of sand. Remember not to remove too much at once, as this can harm your fish and other inhabitants. Siphoning sand is a simple but crucial step that ensures a healthy and beautiful aquarium.
Step 3: Rinse the Sand
After letting the sand soak in water for a few hours, the next crucial step in cleaning sand is to rinse it thoroughly. The goal is to remove any debris, dust, or dirt that might still be lingering to ensure the sand is as clean as possible. To do so, gently stir the sand around while running water over it until the water runs clear.
You can use a fine mesh strainer or cheesecloth to minimize the possibility of losing any sand while rinsing it. Remember, it’s essential to repeat this process a few times until all the debris and dirt have been removed. This step is critical to make sure that the sand is suitable for your needs and not harmful to aquatic life.
With regular sand cleaning, you can ensure the longevity of your aquarium or terrarium, enabling your pets to thrive in a clean environment.
Step 4: Scrub Tough Stains
When it comes to cleaning, tough stains can be a real headache. But don’t worry, there’s a solution! After completing the third step of vacuuming and dusting, it’s time to tackle those stubborn stains. The first thing to do is identify the type of stain you’re dealing with.
Different stains require different treatments, and using the wrong method can lead to further damage. Once you know what you’re dealing with, you can select the appropriate cleaning agent. Be sure to follow any instructions on the label and wear gloves if necessary.
Next, apply the solution to the affected area and let it sit for a few minutes. If the stain is still there, use a soft-bristled brush to gently scrub it away. Avoid using abrasive materials that can damage the surface.
Lastly, rinse the area with clean water and blot it dry with a clean cloth. Voila! Your surfaces will be looking as good as new. Remember, taking the time to properly clean tough stains will save you time and money in the long run.
Keyword: tough stains.
Step 5: Replace the Sand and Reintroduce Fish and Plants
After completing the previous steps of cleaning your fish tank, it’s time to move onto replacing the sand and reintroducing your fish and plants. Firstly, remove the old sand and dispose of it safely. Next, rinse the tank thoroughly before adding the new sand.
You can choose from different types of sand such as coral sand, pool filter sand, or aquarium sand. Make sure to add the sand evenly and fill the tank up with water. It’s essential to wait for the water to settle down before reintroducing your fish and plants.
Check your water pH levels and adjust accordingly to ensure the new conditions will be suitable for your aquatic friends. Finally, add your fish and plants, making sure not to overcrowd the tank. By completing these steps, you’ll have a clean and healthy fish tank that your fish will love!
Maintaining Clean Black Aquarium Sand
If you have black aquarium sand in your tank, it can be a visually stunning addition to your aquatic display. However, it’s important to keep it clean to maintain a healthy and beautiful environment for your fish. To clean black aquarium sand, start by using a gravel vacuum to remove any debris or waste.
Be careful not to suck up any sand, and move the vacuum slowly to ensure you get all the debris. If you notice any stubborn spots, use a toothbrush or a sponge to gently scrub them away. But be sure not to use any soap or cleaning agents.
Rinse the sand thoroughly with water until it runs clear, then repeat the process if necessary. Lastly, consider using a protein skimmer to remove any excess waste or organic matter that may contribute to the sand’s discoloration. With the right care, your black aquarium sand can remain an impressive focal point of your aquarium for years to come.
Regular Water Changes
Regular Water Changes If you’re looking to maintain clean black aquarium sand, regular water changes are a must. Not only do they remove any debris or waste that may have accumulated, but they also ensure that the water is balanced and free of harmful chemicals. Set a schedule for weekly water changes and stick to it to keep your aquatic environment healthy and tidy.
Make sure to use a siphon to remove any uneaten food, dead plant matter, or waste from the substrate. This will prevent the buildup of bacteria and other undesirable substances that can negatively impact your fish and their environment. By making regular water changes a part of your aquarium maintenance routine, you can enjoy a vibrant and thriving underwater world where your fish can thrive.
Routine Cleaning
Maintaining clean black aquarium sand is essential for the health and well-being of your fish. A routine cleaning can help to remove any debris or waste that has accumulated on the sand surface. To maintain clean black aquarium sand, start by using a siphon to vacuum any food particles, waste, or debris sitting atop the sand.
Be careful not to let the siphon nozzle get too close to the sand as it could easily suck up some of the sand. The vacuuming will help to remove the visible debris, and regular vacuuming will keep the sand looking great. In addition to vacuuming, take your time and stir the sand surface to loosen and dislodge any built-up debris.
Doing this on a regular basis will help keep the sand clean and free of debris and prevent bacteria and algae build-up. By taking the time to carry out routine cleaning, you can maintain your aquarium, keep your fish healthy, and have an aesthetically pleasing display.
Monitoring Water Parameters
Maintaining black aquarium sand can be a daunting task, but it is essential to keep it clean for your fish to thrive. Monitoring the water parameters is crucial to ensure the sand remains in pristine condition and the aquarium’s overall health is maintained. One way to monitor water parameters is by using test strips that can indicate the levels of ammonia, nitrite, and nitrate in the water.
High levels of ammonia and nitrite can be harmful to your fish, while nitrate levels can lead to algae growth. It’s also essential to keep an eye on the pH level of the water and ensure it remains between 0 and
0. Regular water changes can help maintain good water quality and prevent a buildup of harmful chemicals in the water. By taking these steps and monitoring the water parameters, you can ensure your black aquarium sand stays clean and your fish live happy and healthy lives.
Avoid Overfeeding Fish
Maintaining clean black aquarium sand is essential for the health and happiness of your fish. One of the key ways to keep it clean is by avoiding overfeeding your fish. It might be tempting to give your fish a little extra food, but uneaten food will quickly sink to the bottom and contaminate the sand.
This can lead to a build-up of harmful bacteria and toxins that can harm your fish. To prevent this, only feed your fish what they need and make sure they eat it all. Another way to keep the sand clean is by regularly cleaning your aquarium.
Use a siphon to vacuum up any debris or waste, and make sure to change the water regularly. By following these simple steps, you can ensure that your fish have a clean and healthy environment to thrive in.
Conclusion
Cleaning black aquarium sand may seem like a daunting task, but with the right tools and techniques, it’s a breeze. Just remember to take it slow and steady, and don’t be afraid to get your hands dirty (or sandy). In the end, a sparkling clean black sand substrate will not only give your fish a healthier environment, but will also make your aquarium look like a million bucks.
So why settle for a murky tank when you can have a crystal-clear oasis for your finned friends? Get cleaning and watch your aquarium shine!”
FAQs
Why is black sand popular in aquariums?
Black sand is popular in aquariums because it creates a stunning visual contrast with colorful fish and plants.
How often should I clean my black aquarium sand?
It is recommended to clean your black aquarium sand every two weeks to prevent the buildup of harmful chemicals and waste.
Can I use a regular aquarium vacuum to clean black sand?
Yes, you can use a regular aquarium vacuum to clean black sand, but it is important to be gentle to avoid disturbing your fish and plants.
Should I remove my fish and plants before cleaning black aquarium sand?
It is not necessary to remove your fish and plants before cleaning black aquarium sand, but it is important to be cautious and avoid harming them.
How do I clean stubborn stains or algae from black aquarium sand?
You can clean stubborn stains or algae from black aquarium sand by using a gravel cleaner, toothbrush, or by adding a natural algae remover.
Is it safe to use chemicals on black aquarium sand?
It is generally safe to use chemicals on black aquarium sand, but it is important to read and follow the instructions carefully to avoid harming your fish and plants.
Can I reuse black aquarium sand from a previous tank?
Yes, you can reuse black aquarium sand from a previous tank, but it is important to clean and sterilize it properly before using it in a new tank.


