How to Clean Gravel Aquarium with a Siphon: Tips and Tricks for a Sparkling Clean Tank

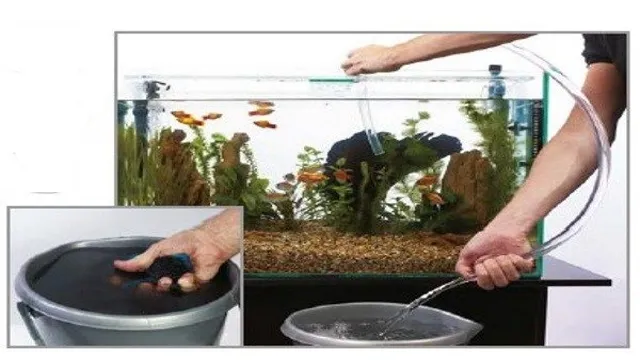
Have you recently set up an aquarium with gravel substrate and noticed that it’s becoming dirty and collecting debris? Not to worry, it’s an altogether common problem and can be resolved with the right tools and methods. A siphon is a perfect tool for keeping your aquarium clean and healthy. By using a siphon, you’ll be able to remove the debris that has accumulated in the gravel, at the same time removing any aquarium water in the process.
This will help ensure that the water in your aquarium is free from harmful pollutants and bacteria that could affect the health of your aquatic pets. In this article, we’ll take a look at how to clean gravel in an aquarium with a siphon.
Materials Needed
If you own an aquarium with gravel at the bottom, you know how important it is to keep it clean. One of the easiest ways to maintain a clean aquarium is by using a siphon to remove debris and waste from the gravel. To get started, you’ll need some basic materials, such as a siphon, a bucket, and clean water.
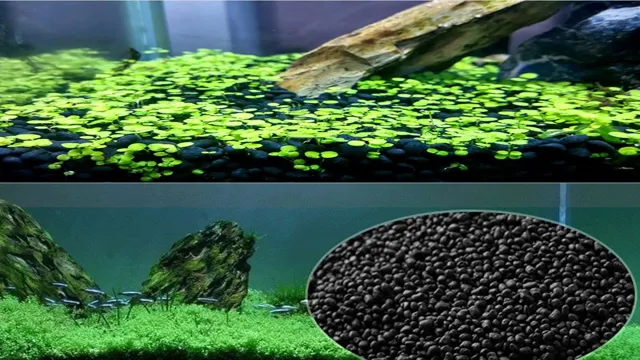
You can purchase a siphon from any pet store or online retailer, and it should come with a rigid tube and a flexible hose. It’s also a good idea to have some aquarium sand or vacuum pellets on hand to help clean the gravel and keep it free from harmful bacteria. Once you have all of your materials ready, you’re ready to start cleaning your aquarium and keeping your fish happy and healthy.
So go ahead and give it a try! You’ll be amazed at how easy it is to clean your aquarium with a siphon.
Gravel siphon
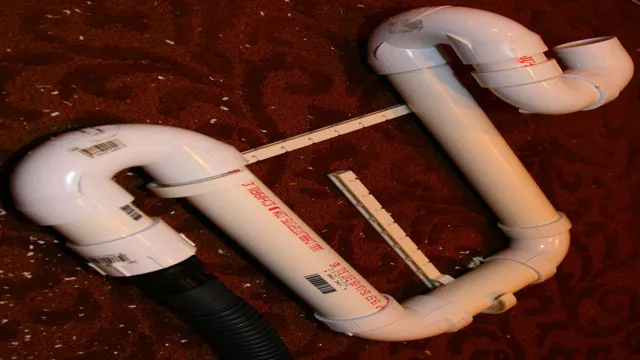
A gravel siphon is an essential tool for aquarium maintenance, and in order to create one, you will need a few materials. Firstly, you will need a length of PVC tubing, the length of which will depend on the depth of your aquarium. You’ll also need a gravel vacuum head, which can be found at most pet stores, and a length of airline tubing to connect the two.
In addition, you will need a bucket to collect the dirty water and a sink or drain to dispose of it. Once you have gathered all these materials, you can begin constructing your gravel siphon. Simply attach the airline tubing to the gravel vacuum head, and then connect the other end of the airline tubing to the PVC tubing.
Place the vacuum head over the gravel, and suck on the other end of the PVC tubing until the water begins to flow. The dirty water will be drawn up through the tubing and into the bucket, leaving your aquarium clean and sparkling. With these materials, you’ll be on your way to maintaining a healthy and beautiful aquarium in no time.
Bucket
For anyone looking to construct a DIY bucket, there are a few essential materials that will be necessary to ensure it is built to last. Firstly, you’ll want a sturdy plastic bucket that can withstand the test of time. You can easily find buckets at any hardware or home improvement store.
Next, you’ll need a lid for the bucket, which can also be found at most hardware stores. If you’re looking to add extra security to the bucket, a locking lid could also be a good investment. Additionally, a handle will be necessary to easily transport the bucket, so be sure to grab one that is durable and can securely attach to the bucket.
Finally, if you’re planning on using the bucket for gardening or other outdoor activities, consider coating the inside with a layer of protective paint or sealant to prevent water damage and ensure it lasts for years to come. By gathering these materials, you’ll be able to construct a functional and long-lasting bucket for any project you have in mind.
Clean water
When it comes to clean water, there are a few materials that are crucial to ensuring that water is safe for consumption. The first material that most people think of is a water filtration system, which can remove impurities such as sand, sediment, and chlorine from tap water. This system can be as simple as a basic pitcher filter or as complex as a reverse osmosis system.
Another important material for clean water is a water testing kit. This kit can determine the levels of different contaminants in the water, such as lead and bacteria. It’s important to note that not all kits are created equal, so it’s important to do research and choose one that is accurate and reliable.
Other materials that may be necessary for clean water include a water softener to remove mineral deposits, a UV sterilizer to kill harmful pathogens, and even a rainwater harvesting system to collect and filter rainwater for household use. By using these materials, you can ensure that your water is safe and clean for you and your loved ones to use.
Preparing for Cleaning
Cleaning your gravel aquarium with a siphon can be an effective way to remove any built-up debris, uneaten food, or fish waste that can harm your fish or plants. Before you start the cleaning process, it’s important to prepare your aquarium and your cleaning tools properly. First, turn off the filter and heater to avoid any accidents during the cleaning process.
Next, fill a bucket with water from the aquarium to use for cleaning and replacing the water later. Then, take the siphon and prime it by filling the tube with water until it begins to flow out of the other end. Now you’re ready to place the siphon into the gravel and start the cleaning process.
Remember to work in sections and only remove a portion of the water at a time to avoid any undue stress on your fish and plants. With these simple steps, you can maintain a healthy and happy aquarium for your aquatic pets.
Turn off filter and heaters
To properly clean your aquarium and maintain a healthy environment for your fish, it’s essential to prepare by turning off any filters and heaters. This ensures that the water temperature remains consistent and prevents any damage to the equipment during the cleaning process. However, before turning them off, ensure you unplug them and let them cool down to avoid any accidents.
Turning off the filters also allows the debris and waste to settle, making it easier to remove during the cleaning process. Keep in mind that turning off the filters and heaters for an extended time can be harmful to your fish, so it’s recommended to complete the cleaning process as quickly and efficiently as possible. Overall, preparing adequately before cleaning your aquarium will help ensure that your fish remain healthy and happy.
Unplug all electrical equipment in the tank
Before starting the cleaning process, it’s crucial to unplug all electrical equipment in the tank. This includes filters, heaters, and lights. Not only is it safer to clean the tank without any electrical current, but it also protects your equipment from any potential damage.
The last thing you want is to accidentally damage your filter or heater during the cleaning process. And even if you are just wiping down the glass, it’s always better to err on the side of caution. Additionally, removing all electronics can help you get a better sense of the tank’s condition.
You might notice some areas that need extra attention, like a buildup of debris in the corner or some grime around the heater. Once everything is unplugged and out of the way, you’ll be ready to start preparing your tank for cleaning. So take a few minutes to ensure that everything is safely disconnected and unplugged – it will save you a lot of hassle in the long run.
Remove any decorations or plants that may be in the way
When it comes to preparing for cleaning, it’s important to remove any decorations or plants that may be in the way. This step is crucial to ensure that your cleaning process is as efficient as possible. Not only can decorations and plants hinder your ability to clean surfaces thoroughly, but they can also be easily damaged during the cleaning process.
To avoid this, take a few minutes to remove any small decorative items, such as picture frames or candles, and larger items such as furniture or potted plants. This will give you ample space to move around and clean all areas of your room without accidentally knocking something over or damaging an important decorative piece. By taking this small step, you’ll be giving yourself the best chance at a successful and stress-free cleaning experience.
Cleaning the Gravel
Cleaning the gravel in your aquarium is an important task that should never be overlooked. Gravel provides a natural habitat for beneficial bacteria, which helps maintain a healthy ecosystem for your fish. Using a siphon is the most efficient and effective way to clean your gravel.
Start by turning off your equipment and removing any decorations from the tank. Place the siphon into the gravel and start to suck out any debris. Work in a methodical and thorough way, moving the siphon across the gravel bed.
Be careful not to suck up any sand or other substrate – the gravel should be the only material in the siphon. Continue until you’ve removed all debris from the entire aquarium. Replace any decorations and turn your equipment back on.
By cleaning your gravel regularly, you’ll ensure that your fish stay healthy and thrive in their environment.
Place the siphon into the tank and make sure it’s touching the gravel
When it comes to maintaining a healthy fish tank, it’s important to regularly clean the gravel. Not only does this help remove built-up debris and waste, but it also promotes the growth of healthy bacteria that can break down harmful substances in the water. To clean the gravel, you’ll need a siphon hose and a bucket for the dirty water.
Place the siphon into the tank and make sure it’s touching the gravel. Then, using suction, start to remove the dirty water and debris that has settled in the gravel. It’s important not to remove too much water at once, as this can disrupt the delicate balance of the tank.
Instead, try to remove around 20-25% of the water at a time. Repeat this process until the water runs clear and the gravel looks clean. This will not only keep your fish healthy, but it will also help to keep your tank looking great.
So, next time you’re doing your aquarium maintenance, don’t forget to give your gravel some attention!
Start the siphon by sucking on the end of the tube until water begins to flow
Cleaning the gravel in your aquarium is an important task that must be done regularly to ensure that your fish are living in a healthy environment. Gravel is home to a lot of beneficial bacteria that help break down waste and keep the water clean. However, over time, debris can accumulate in the gravel and affect water quality.
To clean the gravel, start by siphoning the debris using a gravel vacuum. A gravel vacuum is a special type of siphon that is designed to remove debris from the gravel without removing the gravel itself. Start the siphon by sucking on the end of the tube until water begins to flow.
Move the vacuum over the gravel slowly, being careful not to disturb the plants or decorations. Continue siphoning until you have removed about 20-30% of the water from the tank. Repeat this process about once a week, or as often as needed, to keep the gravel clean and healthy for your fish.
Regular gravel cleaning will also prevent harmful bacteria from growing in the aquarium and will keep the water clear and odor-free. Don’t forget to replace the water you removed with fresh, dechlorinated water!
Move the siphon around to remove debris and waste from the gravel
One of the most important tasks in maintaining a healthy aquarium is cleaning the gravel. Over time, debris and waste can accumulate in the gravel, causing harmful ammonia and nitrate levels to rise. To clean the gravel, you will need a siphon.
Start by placing the siphon in the water and sucking the air out of the tube until the water begins to flow. Move the siphon around to remove debris and waste from the gravel. Be careful not to remove too much water or disturb the plants and fish inside the tank.
Repeat this process until the water in your aquarium looks clean and clear. Regularly cleaning the gravel is essential to the health and wellbeing of your aquatic pets. Neglecting this task could lead to harmful bacteria and disease build-up, which could put your marine life at risk.
It’s important to check your gravel frequently and clean it accordingly, preferably once a month, depending on your aquarium’s size and the number of inhabitants. By doing this, you’re providing a conducive environment for your aquatic friends to thrive. In conclusion, cleaning the gravel in your aquarium is an essential task that should never be overlooked.
While it may take some time, it is a straightforward process that can be done effortlessly with a siphon. Regularly cleaning the gravel ensures that your aquarium stays clean, healthy, and free of harmful bacteria. Don’t wait until it’s too late to clean your aquarium gravel; start today and keep your aquatic pets happy and healthy!
Empty the bucket of dirty water once it’s full and continue until the desired amount of cleaning is achieved
Cleaning the gravel in your aquarium is an essential task to ensure your aquatic pets live in healthy and clean surroundings. To clean the gravel, start by turning off any filters or pumps to avoid disturbing the gravel. Then, using a gravel vacuum, start siphoning the water from the aquarium.
Move the gravel vacuum across the surface of the gravel, pulling out any dirt or debris, until the bucket is half full. Once the bucket is half full, empty the dirty water and repeat the process until you have removed the desired amount of dirty water. If you have heavily populated aquariums, it’s recommended to clean 25% of the water each week, but if you have fewer fish, you may only need to do a full water change once a month.
Cleaning the gravel regularly eliminates any accumulated waste and debris, keeping your aquarium water sparkly clean and reducing stress for your fish. By following this simple and easy process, your aquarium will remain a healthy and clean environment for your aquatic pets to thrive. Remember, a clean aquarium equals happy fish!
Finishing Up
Now that you’ve successfully learned how to clean gravel in your aquarium using a siphon, it’s time to finish up and give your fish a clean and healthy environment to thrive in. Before you turn everything back on, take a moment to double-check that you’ve removed all debris and have thoroughly siphoned the gravel. Make sure to fill up the tank with freshly treated water and add any necessary water conditioners.
Lastly, set up your filter and heater, and let the water circulate for a few hours before adding your fish back in. It’s important to remember to do regular maintenance, including partial water changes and gravel cleanings, to keep your aquarium clean and healthy for your fish. By using a siphon regularly, you can prevent debris build-up and ensure a happy, thriving aquatic environment for your pets.
Refill the tank with clean water gradually
As you near the end of your cleaning process, it’s important to remember to refill your tank with clean water gradually. This will prevent any leftover dirt or debris from getting sucked up into your equipment, ensuring that your next cleaning job is just as successful as the last. It’s essential to be patient during this step, taking the time to carefully add clean water bit by bit until your tank is full.
Rushing this process can lead to unnecessary mess and potentially even damage to your equipment. Think of it like a car engine – you wouldn’t fill it up with gas super quickly, would you? Take care to fill it up steadily to ensure that everything runs smoothly. After you’re finished, be sure to dispose of any leftover dirty water in the proper manner and store your equipment in a safe and secure location.
With these steps, you’ll be well-equipped for your next cleaning venture.
Add water conditioner as necessary
As you approach the end of your aquarium setup, it’s essential to add water conditioner as necessary. This final touch ensures that the water is safe and healthy for your fish to live in, so don’t skip it! The water conditioner will help eliminate any chlorine or chloramine that could harm your fish or other aquatic life. You can find many different types of water conditioners on the market, so be sure to choose one that’s suitable for your aquarium size and needs.
Follow the instructions closely to ensure that you’re using the correct amount for your water, and always test the water quality after adding conditioner to ensure that it’s safe for your aquatic pets. With the water conditioner, you can sit back and relax, knowing that your aquarium is set up for success!
Plug in all electronic equipment and turn on filter and heaters
Now that you’ve filled up your aquarium with water and added all the necessary accessories, it’s time to finish up by plugging in all electronic equipment and turning on the filter and heaters. This step is crucial to ensure the water is properly filtered and heated to the appropriate temperature for your fish to thrive. It’s important to carefully read and follow the instructions that came with each piece of equipment, making sure they are all functioning correctly before turning them on.
You may want to double-check the temperature of the water with a thermometer to ensure it matches the temperature you set on your heater. Once everything is set up, sit back and watch as your fish swim happily in their new home. With proper care and attention, your aquarium can provide a beautiful and peaceful addition to your home for years to come.
Replace decorations and plants back into the tank
Once the cleaning process is complete, it’s time to start adding back in the decorations and plants that were removed at the start. This is the fun part, as you get to rearrange everything to your liking! Remember to wash each piece thoroughly before placing it back in the tank. Make sure the plants are healthy and free of debris, and consider adding in some new ones to spruce up the tank.
As you add things back in, be mindful of creating hiding places for your fish and providing plenty of swimming space. This step is crucial for ensuring your underwater environment is both pretty and functional. Overall, taking the time to properly clean and rearrange your aquarium can make for a happy and healthy fish population.
Dispose of dirty water properly
As you wrap up your outdoor activities, it is essential to clean up and dispose of dirty water properly. Leaving it on the ground or dumping it in an unauthorized area can cause harm to the environment and wildlife. Always choose a dumping location that is far away from any water source, especially if the water is contaminated with chemicals or pollutants.
It is also crucial to avoid pouring dirty water down the drain as it can contaminate the water system. Instead, you can filter the water using coffee filters or cheesecloth to remove any debris and then dispose of it in a designated area. Remember, properly disposing of dirty water is a significant part of leaving no trace, protecting the environment, and keeping our water safe.
Conclusion
In the world of aquarium maintenance, a siphon is your best friend when it comes to cleaning the gravel. With a simple combination of gravity, suction, and a little elbow grease, you can rid your aquarium of unsightly debris and keep your fishy friends happy and healthy. However, while cleaning with a siphon may seem like a breeze, it’s important to remember to go slow and steady to avoid stirring up too much detritus at once.
So, grab your siphon, roll up your sleeves, and get to work, because a clean gravel aquarium is just a few suctioned tugs away!”
FAQs
What is a gravel siphon and how does it work for cleaning an aquarium?
A gravel siphon is a tool used to vacuum debris and waste from the bottom of an aquarium. It works by creating suction through a tube that allows water and debris to flow out of the tank and into a bucket or sink.
How often should gravel be cleaned in an aquarium?
It is recommended to clean aquarium gravel once a month or every two weeks, depending on the number of fish in the tank and how much they eat.
Can I use tap water to clean my aquarium gravel with a siphon?
It is not recommended to use tap water when cleaning aquarium gravel because the chlorine and other chemicals in the water can harm the fish. Use dechlorinated water or water that has been conditioned specifically for aquarium use.
What should I do with the debris that I vacuum out of the aquarium with the siphon?
The debris should be disposed of outside of the house or apartment building. It is not recommended to flush it down the toilet or drain as it can clog pipes.
Is it necessary to remove fish from the tank when using the gravel siphon?
It is not necessary to remove fish from the tank when using the gravel siphon, but it is important to be gentle and not disturb the fish too much as it can cause undue stress.
Can gravel siphons be used in saltwater aquariums?
Yes, gravel siphons can be used in saltwater aquariums, but care should be taken to ensure that the water being suctioned out does not contain any important live organisms or coral.
Should the gravel siphon be cleaned after each use?
Yes, the gravel siphon should be cleaned after each use to prevent buildup and the introduction of harmful bacteria into the aquarium. Clean with warm soapy water and let dry between uses.

