How to Drill an Acrylic Aquarium: A Comprehensive Guide for Beginners
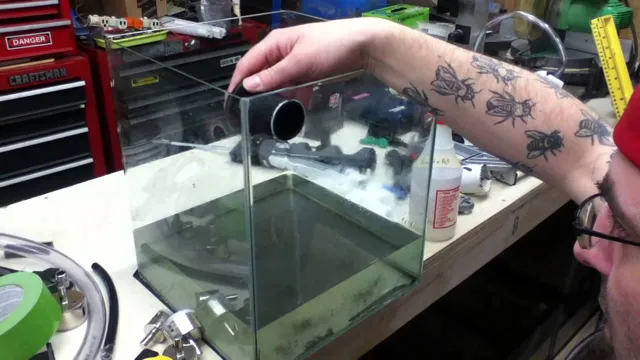
Drilling a hole in an acrylic aquarium can be a daunting task for any aquarium-enthusiast, but with the right tools and techniques, it can be a simple and straightforward process. Acrylic aquariums are becoming increasingly popular due to their high clarity and durability, but drilling them requires a specific approach to avoid cracking or damaging the material. How can you drill an acrylic aquarium safely and without any issues? In this blog, we will provide step-by-step instructions on how to drill an acrylic aquarium, as well as tips and tricks to ensure your aquarium remains in pristine condition throughout the process.
Gathering Supplies
Drilling an acrylic aquarium can be a tricky task, but with the right supplies and techniques, it can be done with ease. First and foremost, you’ll need a drill bit specifically designed for acrylic materials. Using a regular bit can cause cracks and damage to the surface.
Additionally, it’s crucial to have a steady hand or a drilling guide to ensure that you drill in the exact spot you need. A protective layer between the drill and acrylic is also recommended to prevent any scratches or scuffs from occurring during the drilling process. Finally, gather a damp cloth and some rubbing alcohol to clean the surface and remove any residue before and after drilling.
With these supplies in hand, you’ll be on your way to drilling a successful hole in your acrylic aquarium.
Acrylic aquarium
When it comes to setting up an acrylic aquarium, one of the most important steps is to gather all the necessary supplies. First and foremost, you will need the aquarium itself, which can be purchased in various sizes and styles to suit your needs. You will also need a filter system to keep the water clean and a heater to maintain a consistent temperature.
To add some decoration to your tank, consider getting some gravel or sand, plants, and ornaments. And of course, don’t forget the fish! Research the types of fish that can thrive in your aquarium size and water temperature before making any purchases. By gathering all the necessary supplies beforehand, you’ll be well on your way to creating a beautiful acrylic aquarium that both you and your fish will enjoy.
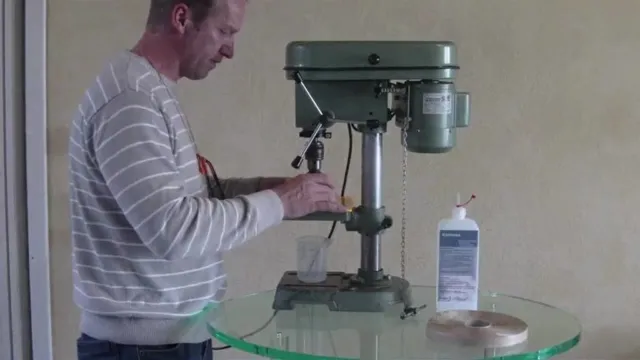
Drill bits
When it comes to DIY home improvement projects, having the right tools is crucial for success. One of the most important tools you’ll need is a drill, but just having a drill isn’t enough. You also need to make sure you have the right drill bits for the job.
There are a variety of drill bits available, each designed for specific materials and tasks. For example, if you’re working with wood, you’ll want to use a spade bit, while a masonry bit is better for concrete. It’s also important to consider the size of the drill bit and the type of chuck it will fit into.
Gathering a variety of different drill bits in various sizes and types will ensure that you’re prepared for any task that comes your way. Don’t be caught off guard without the right tools – make sure you have a set of quality drill bits on hand for all your DIY needs.
Measuring tape
When it comes to getting accurate measurements, a measuring tape is an essential tool to have in your arsenal. Before you start any project that requires precise measurements, it’s important to gather all the necessary supplies, and a measuring tape should be at the top of your list. You don’t want to be in the middle of your project and realize that you don’t have a way to measure correctly! Measuring tapes come in a variety of lengths, with the most common being 25 feet long.
However, if you need to measure longer distances, you can find tapes that are 100 feet or even longer. Most measuring tapes have a lock button that holds the tape in place when extended, allowing you to get accurate measurements without the tape retracting. When choosing a measuring tape, consider the type of project you will be working on.
If you’re measuring a curved surface, a flexible tape measure may be more ideal than a rigid one. Additionally, consider the width of the tape, as a wider tape may be easier to read for some people. Overall, having a measuring tape on hand is a must for anyone looking to take on a DIY project or make precise measurements for any reason.
With so many options out there, it’s just a matter of finding the one that works best for you and your needs.
Protective gear
When it comes to protective gear, it’s always better to be safe than sorry. Gathering the necessary supplies for any activity is crucial, and having the right protective gear is no exception. The keyword here is “right” – not all gear is created equal, so be sure to do your research and invest in gear that is appropriate for the activity you plan to engage in.
For example, if you’re planning to ride a bike, you’ll need a helmet. But not just any helmet – one that fits properly and protects your head from impact. Similarly, if you’re planning to go rock climbing, you’ll need a harness, climbing shoes, and a helmet, among other things.
Don’t skimp on quality when it comes to protective gear – your safety could depend on it. With the right gear, you’ll be able to engage in your activity with confidence, knowing that you’re well-protected.
Preparing the Aquarium
If you’re thinking about upgrading your aquarium and need to drill a hole in your acrylic tank, there are a few key things you should consider to ensure success. Firstly, it’s important to use the right drill bit for the job. A diamond-coated drill bit designed specifically for drilling acrylic is the best choice. (See Also: How to Prepare Aquarium Sand for Tank: A Step-by-Step Guide)
Additionally, ensure that your tank is firmly supported and that you have a steady hand as you begin to drill. Mark the spot where you want to drill using a waterproof marker and, as you start drilling, apply consistent, gentle pressure. Once you’ve drilled through the acrylic, use a plastic scraper to remove any debris that has accumulated on the surface of the tank.
Take your time and be patient throughout the process, and you’ll have a perfectly drilled aquarium in no time!
Cleaning the surface
Preparing an aquarium for your fish is an essential task, and it all starts with cleaning the surface of the tank. A dirty tank can lead to unhealthy living conditions for your fish and ultimately impact their health and lifespan. Start by wiping down the exterior of the tank with a damp cloth to remove any dust or debris.
Then, remove any decorations, plants, or substrate from the inside of the tank and clean them thoroughly with warm water and a mild detergent. Take extra care not to scratch the inside of the tank while cleaning. Use an algae scraper to clean the inside of the tank, being sure to remove any residue or buildup.
Once the tank is clean and dry, it’s ready to be filled with water and prepared for your fish. It’s essential to take the time to properly clean and prepare your aquarium to give your fish the best chance of living a healthy and happy life.
Marking the drilling spot
When it comes to setting up a new aquarium, it’s important to properly prepare the tank for its new inhabitants. One crucial step is marking the drilling spot where you will install the overflow box. Before doing so, you’ll need to measure and plan out the placement of the box, taking into account any obstacles such as tank braces or other equipment.
Once you’ve determined the best spot, use a pencil or marker to clearly mark it on the outside of the tank. This will help ensure that the hole is drilled in the right location and the overflow works correctly. When ready to start drilling, be sure to use a diamond-edged hole saw and plenty of water to prevent the glass from cracking.
By properly marking the drilling spot, you can help ensure the success of your aquarium setup and give your fish a happy and healthy home.
Positioning the aquarium
When preparing for a new aquarium setup, one of the key factors to consider is the positioning of the tank. A suitable location is crucial for the well-being of your aquatic pets and the overall success of the aquarium. Firstly, the tank should be kept away from direct sunlight and heat sources, as these can cause fluctuations in water temperature and algae growth.
It’s also important to ensure the surface the aquarium will sit on can handle the weight of the tank and its contents. A sturdy, level surface is essential to prevent any potential accidents and ensure the tank remains stable. Additionally, the tank should be easily accessible for maintenance purposes and placed in a visible area for daily enjoyment.
Finding the optimal positioning for your aquarium may take some trial and error, but it’s worth investing the time and effort for a happy and healthy aquatic environment.
Drilling Process
Drilling an acrylic aquarium can be a daunting task, but with the right tools and technique, it can be done easily. The first thing to consider when ready to drill is the size and location of the hole. It’s best to plan it out ahead of time to ensure accuracy and avoid any mistakes.
The next step is to gather the necessary tools such as a drill bit made specifically for acrylic, some masking tape, and a drill equipped with a stabilizer. Before drilling, it’s essential to clean and dry the area thoroughly to prevent the drill from slipping. Once everything is in place, begin drilling slowly and steadily, applying moderate pressure and constant cooling water to avoid melting the acrylic.
With some patience and careful attention, the process can be completed successfully. Remember to wear protective gear and take regular breaks to avoid fatigue and ensure safety. By following these steps, drilling an acrylic aquarium can be a smooth and stress-free experience, allowing you to customize your aquarium to your liking.
Starting the drill
Starting the drill is an essential aspect of the drilling process. Before commencing the drilling operation, the driller must ensure that all the necessary tools, equipment, and safety gear are at the drill site. It is also imperative to perform a pre-inspection check of the equipment to confirm that everything is in good working condition.
Once everything is set up and ready to go, the driller will position the drill in the predetermined location and begin the drilling process. The driller must pay close attention to the speed and pressure of the drill bit to ensure that the drilling is progressing smoothly and without any complications. It is also important to monitor the temperature of the drill bit and adjust the drilling process accordingly. (See Also: How to Prepare Almond Leaves for Aquarium: A Step-by-Step Guide)
Starting the drill requires a combination of expertise, precision, and safety awareness to ensure that the drilling process is successful and productive.
Applying steady pressure
When it comes to the drilling process, applying steady pressure is crucial for success. From beginning to end, steady pressure must be maintained in order to efficiently and accurately drill holes. This process requires finesse and precision, as too much pressure can cause the drill bit to overheat and too little pressure can result in an incomplete hole.
By applying steady and consistent pressure, the drill bit is able to penetrate the material with ease. This technique allows for a clean and precise hole to be made, without any splintering or cracking. To achieve the best results, it’s important to find a balance between pressure and speed, as the two components work together to produce the desired outcome.
Overall, the drilling process requires patience and attentiveness, but with the right technique and careful execution, perfectly drilled holes can be achieved.
Clearing debris
When it comes to the drilling process, clearing debris is an important step that should not be overlooked. Drill bits can pick up debris such as rocks, clay, and soil, which can hinder the drilling process or even damage equipment. That’s why it’s crucial to remove debris from the borehole regularly.
One method of doing this is by using air or water to flush out the debris. In some cases, a tool known as a bailer can also be used to scoop out the debris. Another important aspect of clearing debris is ensuring that the surrounding area is free from obstacles that could cause issues during the drilling process.
This might include removing trees or other structures, or even altering the terrain to create a clear path. By taking the time to clear debris and ensure a safe and clear drilling environment, you can help ensure a successful drilling project.
Finishing Touches
Once you have completed drilling all the necessary holes for the filter and other accessories, it’s time to add those finishing touches to your acrylic aquarium. Start by cleaning up any remaining debris and dust from the drilling process. Using a clean soft cloth, wipe down the entire tank with warm soapy water.
Rinse well and wipe dry with a microfiber cloth to avoid any scratches or streaks. Next, install the filter and any other equipment needed, making sure to follow the manufacturer’s instructions carefully. Finally, fill up your aquarium with water and let it cycle for a few days before introducing any fish or live plants.
By following these simple steps, you’ll have a beautifully drilled acrylic aquarium ready to showcase your underwater world.
Smoothing the edges
When it comes to designing a product, it’s not just the big features that matter. The little details can make all the difference in creating a seamless and polished final product. That’s why smoothing the edges is so important.
It’s the finishing touches that turn a good product into a great one. By eliminating any rough edges or jagged corners, your product will look and feel more professional and well-done. This attention to detail can be especially important in industries where aesthetics matter, such as fashion or graphic design.
Even in areas where functionality is the top priority, smoothing the edges can make a big difference in user experience. So don’t overlook these little details – they could be the key to taking your product to the next level.
Washing the aquarium
When it comes to washing your aquarium, it’s important not to overlook the finishing touches. One of the most crucial steps in the process is cleaning the exterior of the tank. Smudges and fingerprints can build up on the glass and detract from the beautiful aquatic environment you’ve created.
To clean the exterior of the tank, you can use a soft cloth and a mild glass cleaner. Avoid using any harsh chemicals or abrasive materials that could scratch or damage the glass. Additionally, you may want to consider giving the aquarium accessories a quick wipe down, such as the hood, light fixtures, and filter. (See Also: How to Make a Coconut Hut for Aquarium: A Step-by-Step Guide to DIY Coconut Hut!)
These small touches will give your aquarium the polished look it deserves and help keep it looking beautiful for weeks to come. Remember, a little extra effort goes a long way when it comes to maintaining your aquarium.
Setting up the accessories
Now that you have your new gadgets all set up, it’s time for some finishing touches – accessories! Adding accessories such as covers, cases, and screen protectors will not only keep your devices protected but will also enhance their overall appearance. For smartphones, there are a variety of cases available ranging from slim and clear to bulky and colorful. If you’re someone who drops their phone frequently, opt for a shock-absorbent case.
For tablets, a sturdy cover with a built-in stand is essential for hands-free use. Screen protectors are also a must-have to prevent scratches and cracks. Additionally, investing in wireless charging pads and portable power banks will ensure that your devices stay charged throughout the day.
Accessories not only provide protection but also add a personal touch to your devices, making them stand out from the rest while staying functional. So, don’t forget the accessories to complete your tech setup!
Conclusion
Congratulations! You’ve successfully learned how to drill an acrylic aquarium without cracking and ruining your investment. Remember, always be patient and take your time. Just like acrylics, good things come to those who wait.
So go ahead and put your new knowledge to the test, and get ready to impress your fish friends with an aquarium that’s both functional and fashionable. Happy drilling!”
FAQs
What special tools are required to drill an acrylic aquarium?
To drill an acrylic aquarium, you will need a drill press, a carbide drill bit, masking tape, a ruler, and a center punch.
What is the best way to mark the drill points on an acrylic aquarium?
To mark the drill points on an acrylic aquarium, use a ruler to measure and mark the spot with masking tape. Then, use a center punch to create a dimple in the tape, which will guide the drill bit.
How do I prevent the acrylic from cracking or melting while drilling?
To prevent cracking or melting, it’s important to keep the acrylic cool by applying water or a water-based lubricant to the drill bit while drilling. Use a slow, steady pressure and avoid high speeds.
How many holes should I drill in my acrylic aquarium for filtration and equipment?
The number of holes needed will depend on the size and type of equipment you plan to use. Generally, one or two holes are needed for an overflow box and a return line. Additional holes may be needed for other equipment such as a protein skimmer or a refugium.
Can I use a regular drill bit to drill an acrylic aquarium?
No, it’s important to use a carbide drill bit specifically designed for drilling acrylic. Regular drill bits may cause the acrylic to crack or melt due to the heat generated by the friction.
What should I do if I accidentally crack the acrylic while drilling?
If the crack is small, it may be possible to repair it with acrylic glue. However, if the crack is large or extends to the edge of the aquarium, it may be best to replace the panel to avoid further damage or leaks.
Are there any safety precautions I should take when drilling an acrylic aquarium?
Yes, it’s important to wear eye protection, gloves, and a dust mask to avoid inhaling or getting debris in your eyes. Additionally, keep the area well-ventilated and avoid overheating the acrylic by using a slow, steady pressure.


