How to Make Waterproof Light for Aquarium: A Guide to Creating Safe and Effective Lighting
Do you have an aquarium, and are you tired of dealing with poorly-designed, leaky lighting fixtures that ruin your underwater oasis? Fear not, fellow fish enthusiast! With a few simple steps, you can create a waterproof light for your aquarium that will not only look the part but also keep your fish and plants happy and healthy. Firstly, you need to assess your aquarium’s needs. The type of lighting required depends on several factors, including the size of the tank, the types of plants and fish living in it, and the depth of the water.
Once you have determined the specifics, you can start looking into the materials necessary for your DIY lighting project. One of the simplest ways to create a waterproof light for your aquarium is to use LED strip lighting. These are low-cost, energy-efficient, and provide a wide range of colors, making it easy to create the perfect atmosphere for your aquatic pets.
Requiring only minimal assembly, these lights can be easily attached to the walls of your tank and even customized to your liking. An alternative for those who prefer a more hands-on approach is to craft your own waterproof light using waterproof housings, LED bulbs, and some electrical components. While it may require more time and effort, creating your own light can give you more control over the brightness and color selection, and ensure that it fits the dimensions of your aquarium.
With a little creativity and the right tools, making a waterproof light for your aquarium needn’t be a daunting task. It can add life to your tank, provide a beautiful addition to your room, and most importantly, give your aquatic creatures the optimal environment they need to thrive. So, why not give it a go and start creating your own bespoke lighting fixture that’s sure to be the envy of your fellow fishkeepers!
Understanding the Importance of Waterproofing
If you’re looking to create a waterproof light for your aquarium, there are a few things you need to consider. First and foremost, you need to understand the importance of waterproofing. Water and electricity don’t mix, so it’s essential to ensure that any electronic devices near your aquarium are waterproof.
A waterproof light will not only help to illuminate your aquarium, but it will also prevent electrocution or short circuits from occurring. When it comes to creating a waterproof light, there are a few different approaches you can take. You can purchase a waterproof light specifically designed for aquariums, or you can waterproof a standard light yourself.
Either way, it’s critical to make sure that all the connections are sealed using waterproof materials to avoid any unwanted accidents. Overall, taking the time to waterproof your aquarium light is crucial for the safety of your aquatic pets and the functionality of your aquarium.
Preventing Electrical Hazards
Preventing electrical hazards is crucial in ensuring the safety of both individuals and property. And one of the most important measures you can take to minimize the risk of such dangers is waterproofing. Waterproofing is essential, especially in areas where water and electricity come in close proximity, such as bathrooms, kitchens, swimming pools, and outdoor areas.
It serves as a protective barrier that prevents water from entering electrical devices, appliances, and wiring, which could cause short circuits, electrocutions, or fires. By waterproofing your electrical systems, you create a secure environment that reduces the risk of electrical accidents and ensures the reliable operation of your devices and appliances. With waterproofing, you can enjoy peace of mind knowing that your home or workplace is a safe, comfortable, and functional space where you can live and work with confidence.
So don’t take any chances when it comes to electrical safety – make sure you invest in waterproofing today!
Protecting Your Fish
When it comes to protecting your fish, waterproofing should be at the top of your priority list. Fish tanks require a lot of water, which means there is a greater risk of leaks and water damage. If left unchecked, water damage can lead to significant problems, including mold growth, structural damage, and even electrical hazards.
This is why it is essential to use waterproofing products that will create a seal that prevents water from seeping into places it doesn’t belong. A waterproof seal ensures that your fish and their aquatic habitat stay safe, secure, and dry. One great product for protecting your fish is a waterproofing membrane.
This material is designed to adhere to surfaces such as concrete, wood, and metal, creating a waterproof barrier that protects against the elements. By taking the time to invest in the right waterproofing solutions, you can ensure that your fish thrive in a secure and stable environment.
Materials and Tools You’ll Need
To make a waterproof light for your aquarium, you will need a few basic materials and tools. First, you will need a waterproof LED light strip, which can be purchased online or from a hardware store. You will also need a power supply that is suitable for your specific LED light strip.
It is important to choose a power supply that is rated for outdoor or underwater use to ensure safety and prevent damage to your aquarium. In addition to these items, you will need a pair of wire cutters, wire strippers, and electrical tape. These tools will be used to connect the LED light strip to the power supply and ensure that all connections are secure and waterproof.
With the right materials and tools, making a waterproof light for your aquarium can be a simple and affordable DIY project that will provide enhanced lighting for your aquatic pets.
LED Strips or Bulbs
When it comes to adding some lighting to your home, LED strips and bulbs are two popular options. Both offer a range of benefits, including being energy-efficient and cost-effective. However, the decision between the two ultimately depends on personal preference and the location where the lighting will be installed.
If you plan to install lighting in a specific area, such as under cabinets or within a bookshelf, LED strips may be the better choice. These thin, flexible strips can easily be cut to size for a custom fit and provide an even distribution of light. For larger areas, such as a living room or bedroom, LED bulbs may be the best option.
These bulbs are available in a range of lumens and colors, allowing you to choose the perfect brightness and ambiance for your space. Regardless of which option you choose, there are a few materials and tools you’ll want to have on hand. First, you’ll need to determine the length of your LED strip or the number of bulbs required, as well as how to power the lights.
You may also need wire connectors, a power supply, or a dimmer switch, depending on the specific setup. A ladder, drill, and screwdriver may also be necessary for installation. Overall, both LED strips and bulbs offer a versatile and stylish way to add some lighting to your home.
By considering your lighting needs and having the right materials on hand, you can easily create the perfect ambiance for any room. So go ahead and get creative – the possibilities are endless!
Waterproof Casing or Cover
If you’re planning on taking your devices near the water, whether it be to the beach or on a boat, it’s important to have a waterproof casing or cover to protect them from potential water damage. To create a casing or cover, you’ll need a few materials and tools. First, you’ll need a waterproof material, such as a plastic bag or a waterproof phone case.
You’ll also need scissors, a ruler, and some tape. If you want to get creative, you can also use some colorful duct tape to give your casing or cover a bit of personality. Simply measure and cut the material to fit your device and tape it together to keep it secure.
With a little bit of effort and the right materials, you can keep your devices safe and dry while enjoying water activities.
Electrical Wiring and Connectors
When it comes to electrical wiring and connectors, having the right materials and tools is crucial. One of the main materials you’ll need is wire, which comes in a variety of gauge sizes and types, such as solid or stranded wire. You’ll also need connectors, which join wires together, such as wire nuts or crimp connectors.
Other essential materials include cable ties, electrical tape, and conduit. As for tools, you’ll need wire cutters, strippers, and pliers for working with wire. A multimeter is also helpful for testing circuits.
Don’t forget to also have a good pair of safety gloves, goggles, and a voltage tester to ensure your safety while working with electricity. By having all of these materials and tools on hand, you’ll be prepared to tackle any electrical wiring project that comes your way.
Soldering Iron and Solder
If you’re planning to work with electronics, learning to solder is essential. Solder is a metal alloy that melts at low temperatures and is used to join components together. To do this, you’ll need a soldering iron and solder.
A soldering iron is a tool with a heated metal tip, and it’s used to melt the solder so that it can join the different components. Solder, on the other hand, is a metal alloy that’s melted onto the components to create a strong bond. When choosing a soldering iron, you’ll want to consider the wattage, tip size, and temperature range.
For solder, there are various types to choose from, such as lead-based and lead-free. Lead-based solder is more affordable, easier to work with, and has a lower melting point. Lead-free solder is safer for the environment and has a higher melting point, making it more suitable for high-temperature applications.
It’s essential to select the right type of solder for your project as the wrong type can lead to weaker connections and malfunctioning devices. With the right tools and materials, you’ll be ready to start soldering like a pro!
Step-by-Step Guide to Creating a Waterproof Light
If you want to create a waterproof light for your aquarium, there are a few easy steps you can follow. First, gather all the necessary materials, including a waterproof LED strip, a power supply, and a plastic tube. Next, measure the length of the plastic tube to fit the area you want to illuminate and cut the LED strip to the same length.
Then, attach the LED strip to the plastic tube using waterproof adhesive. After that, connect the power supply to the LED strip and test it to make sure it’s working properly. Finally, seal the ends of the plastic tube with waterproof silicone to ensure it’s fully waterproof.
Once you’ve completed these steps, you’ll have a reliable and waterproof light for your aquarium that will help your plants and fish thrive. Happy crafting!
Step 1: Measure and Cut the LED Strips
If you’re looking to brighten up your outdoor surroundings, creating a waterproof light can be a fun and useful project. To get started, the first step is to measure and cut the LED strips. Make sure to measure the area where you want to install your light and cut the strips accordingly, being careful not to damage any of the components.
It’s a good idea to use waterproof LED strips to ensure they can withstand any weather conditions. Once the strips are cut, you can begin to attach them to your chosen surface using adhesive tape or brackets. With the right preparation and care, you can create a customized waterproof light that will add both functionality and ambiance to your outdoor space.
Step 2: Solder the LED Strips Together
To make a waterproof light, one of the essential steps is to solder the LED strips together. This is an important process because it ensures that the LEDs are connected correctly and securely. To begin, you will need to gather all the necessary tools and materials, including soldering iron, solder wire, soldering paste, and LED strips.
The first step is to strip the wires of the LED strips, and then solder them together according to the manufacturer’s instructions. It’s important to note that you should be careful while soldering because the LED strips are fragile, and excessive heat can damage them. After you have soldered the strips together, you can test them to ensure that they are working correctly.
If everything is okay, you can then attach a waterproof covering to protect the lights from moisture, dust, and other elements. By taking this essential step, you can create a durable and reliable waterproof light that will serve you well for years to come.
Step 3: Add Electrical Wiring and Connectors
Once you have your waterproof housing and LED light set up, it’s time to add electrical wiring and connectors to power it up. You’ll need to make sure you have the proper wiring, typically 18-22 gauge wires, and waterproof connectors. First, connect the wiring to your LED driver and waterproof the connections with heat shrink tubing or special sealant.
Then, connect the other end of the wiring to your power source, whether it’s a battery or AC adapter. Make sure all the connections are secure and waterproofed to avoid any short circuits or water damage. Finally, test your light to make sure everything is working correctly before sealing up the housing.
With all the steps in place, you’ll have a durable and efficient waterproof light ready for any wet environment.
Step 4: Place LED Strips in Waterproof Casing or Cover
To make your LED lights waterproof, you need to place them in a waterproof casing or cover. This step is crucial because water can damage the electrical components of the LED strips, rendering them useless. You can use a flexible and transparent silicone casing or a hard plastic casing to protect your LED strips.
The most important thing to remember is to ensure that the casing is completely sealed and waterproof. You can do this by using silicone sealant or waterproof tape to seal any gaps in the casing. Don’t forget to test the LED strips before sealing them in the waterproof casing to ensure that they are working correctly.
With the right casing and sealant, you can enjoy your waterproof LED lights for a long time in any weather condition.
Testing Your Waterproof Aquarium Light
Creating a waterproof light for your aquarium is essential in keeping your aquatic pets healthy and well-lit. Testing it is equally important to ensure that it functions correctly and poses no danger to your fish. There are a few ways to test your waterproof aquarium light.
One way is to submerge it in water and monitor it for an extended period. If it continues to function and there is no sign of water seeping in, it is safe to use. You can also perform a voltage test to ensure that there are no electrical faults.
Additionally, checking the seal and ensuring there is no corrosion will guarantee your light stays waterproof, so your fish stay safe and healthy. Remember, creating a waterproof light for your aquarium is easy as long as you follow the correct steps, including proper testing.
Checking for Leaks and Electrical Hazards
If you’re setting up an aquarium, safety is paramount, and that means ensuring that all electrical components are in good condition and working safely without risk of leaks or short-circuits. One element that needs a careful check is the waterproof aquarium light. Although it’s waterproof, that doesn’t mean it can’t develop cracks or other damage that could put you and your fish at risk.
One of the easiest ways to check for issues is to do a visual inspection for any visible cracks or signs of wear and tear. But to be sure, you should also test the light before using it. Turn off the power supply and disconnect the light from its electrical source.
Then, use a multimeter to test the light for continuity and resistance. If everything checks out, your waterproof aquarium light is safe to use, and you can continue setting up your aquarium with peace of mind.
Ensuring Proper Lighting and Efficiency
When it comes to keeping an aquarium, proper lighting is essential for both the health and aesthetics of your fish and plants. Regular maintenance and testing of your waterproof aquarium light are necessary to ensure its efficiency and lifespan. By checking the light’s brightness and color spectrum, you can determine if it’s emitting enough light for the aquatic life in your tank and adjust accordingly.
Don’t forget to inspect the wiring and connections for any signs of damage or wear, as this can greatly affect the lamp’s performance. Keeping your waterproof aquarium light in top working order will not only benefit your aquatic life but also enhance the overall ambiance of your tank. So, don’t neglect this vital component of your aquarium system, and enjoy the beauty of your underwater world with confidence.
Conclusion and Final Thoughts
In conclusion, making a waterproof light for your aquarium doesn’t have to be a daunting task. With a little bit of creativity and some basic tools, you can create a lighting system that not only illuminates your fish tank but also keeps it safe from water damage. Remember to choose the right materials, seal all the connections properly, and make sure your light source is suitable for aquatic life.
With these tips in mind, your fish will be swimming in style in no time. So go ahead, dive into the DIY world and let your creativity shine, just like your new waterproof light!”
FAQs
What materials are needed to make a waterproof light for an aquarium?
To make a waterproof light for an aquarium, you will need waterproof LED strip lights, a power supply, a waterproof casing or housing, and mounting brackets.
How do you install a waterproof light for an aquarium?
First, attach the mounting brackets to the waterproof casing or housing. Then, attach the waterproof LED strip lights to the brackets. Finally, connect the power supply and make sure everything is securely in place before placing the light over the aquarium.
Can any LED strip lights be used for aquarium lighting?
No, not all LED strip lights are suitable for aquarium lighting. You must ensure that the LED strip lights are waterproof and have a color temperature suitable for aquatic plants and fish.
How do you ensure the waterproof light doesn’t overheat and damage the aquarium?
Choose LED strip lights that don’t generate excessive heat and ensure that they are installed correctly with proper ventilation to prevent overheating.
Do waterproof lights require special maintenance for aquariums?
Regular cleaning of the waterproof light and its casing is needed to prevent algae growth. Also, inspecting the light and its connections for damage is recommended.
How can you customize the color and intensity of the waterproof light for your aquarium?
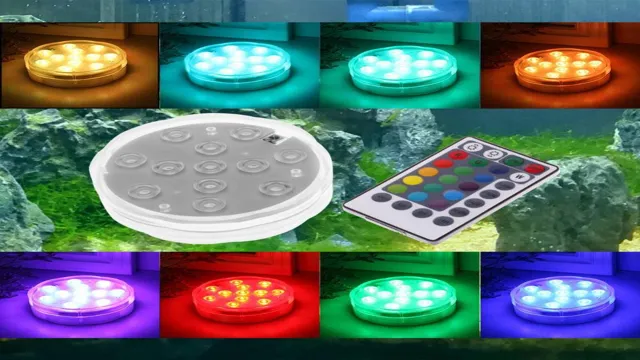
Some waterproof LED strip lights come with remote controls that allow you to adjust the color and brightness of the light. Alternatively, you can purchase a separate color control device to customize the light settings.
How do you ensure that the waterproof light for your aquarium is safe for your aquatic pets?
Use waterproof LED strip lights that are specifically designed for aquariums and ensure they have a low voltage, which will reduce the risk of electrical shock to your fish.

