How to Print Aquarium Backgrounds: A Step-by-Step Guide for a Stunning Tank Look
Have you ever looked at your aquarium and thought, “this could use a little something extra”? Well, look no further than printing your own aquarium backgrounds! Not only is it a fun DIY project, but it allows you to customize your aquarium to your liking. Plus, with the right materials and techniques, the end result can look just as good as store-bought backgrounds. In this article, we’ll walk you through the process of how to print your own aquarium backgrounds, including what supplies you’ll need, how to choose a design, and tips for getting the perfect application.
So grab a cup of coffee and let’s dive in!
Choose Your Design
If you’re looking to add some flair to your aquarium, printing out a custom aquarium background is a great way to do it. But if you’ve never done it before, you may be wondering where to start. First, you’ll need to choose the design you want to use.
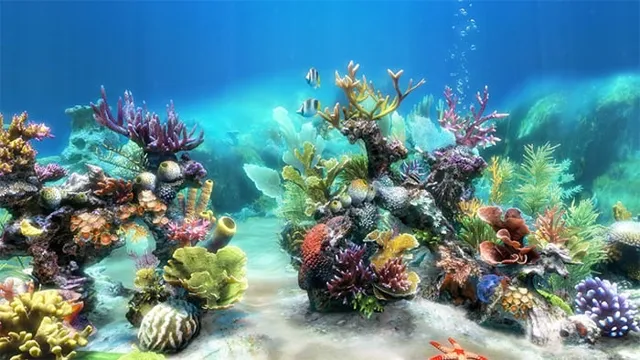
Do you want something that mimics the natural environment of your fish, like a coral reef or a rocky riverbed? Or do you want something more abstract or artistic, like a psychedelic swirl or a geometric pattern? Whatever you choose, make sure it’s something that you love and that will complement the rest of your tank’s decor. Once you’ve chosen your design, you’ll need to print it out and attach it to the back of your aquarium. There are a few different ways to do this, but one popular method is to use wallpaper paste or adhesive tape.
With a little bit of effort, you can create a stunning custom background that will make your aquarium stand out and delight both you and your fish.
Research and select a high-quality image of your preferred aquarium background.
When it comes to choosing an aquarium background, the possibilities are endless! There are numerous options available in terms of design, color, and material. The first step in selecting your preferred aquarium background is to consider the type of fish and plants you have in your tank. For example, if you have brightly colored fish or plants, you may want to opt for a more subdued background to prevent overwhelming the eye.
Conversely, if your fish or plants are more muted in color, you could select a more vibrant background to provide your tank with some visual interest. When browsing through different designs, it’s important to select a high-quality image that will not deteriorate in water or fade over time. Investing in a durable and long-lasting background will ensure that your tank remains visually appealing for years to come.
Overall, choosing an aquarium background is a fun and exciting process that allows you to unleash your creativity and add a personal touch to your aquatic environment.
Ensure the chosen image has a high enough resolution for a clear print.
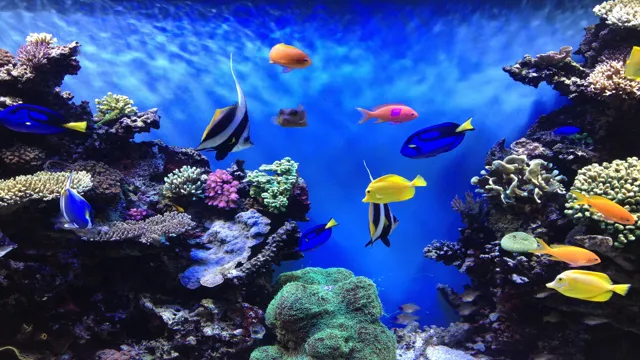
When choosing a design for any print project, it’s important to consider the resolution of the image. You want to make sure that the image you choose has a high enough resolution to ensure a clear and crisp print. Low-resolution images will suffer from pixelation and blurriness when printed, which can ruin the overall effect of your design.
To avoid this, always select images with a resolution of at least 300 dpi (dots per inch), especially if you plan to print in a larger size. Keep in mind that some online images may look fine on your computer screen, but they may not have a high enough resolution for print. When in doubt, it’s always better to err on the side of caution and choose a higher resolution image.
Remember that a high-quality image can make all the difference in the final result of your print project, so take the time to choose your design carefully.
Print on Appropriate Material
Printing aquarium backgrounds is a fun and creative way to personalize your fish tank. However, to ensure that your design lasts and stands up to wear and tear, it’s important to print on appropriate material. One great option is vinyl, which is a durable and waterproof material that can resist fading over time.
Before printing, make sure to clean the surface of your tank thoroughly to remove any dirt or debris. Then, measure the space you want to cover and cut your vinyl accordingly. To apply the vinyl, peel off the backing and carefully position it onto the tank, smoothing out any air pockets as you go.
With proper application and the right material, your printed aquarium background can bring life and personality to your underwater oasis.
Choose a material appropriate for your printer, such as specialty paper or transparency sheets.
When it comes to printing, it’s not just about the printer you’re using but also about the material you’re printing on. To ensure high-quality prints, it’s crucial to choose the appropriate material for your printer. Using specialty paper or transparency sheets that are specifically designed for your printer can help you achieve the desired results.
These materials have the right texture, thickness, and coating to work effectively with your printer and produce professional-looking prints. Printing on inappropriate materials can lead to smudging, bleeding, or fading of colors, resulting in subpar prints that may not serve your purpose. For instance, if you’re printing on regular paper that’s not suited for your printer, you may end up with prints that look blurry or dull.
This can be disappointing, especially if you’ve spent a lot of time and effort designing your prints. Therefore, it’s important to invest in the right materials for your printer to ensure consistency and quality in your prints. You can consult your printer manual or manufacturer’s website to determine the compatible materials for your printer.
It’s also a good idea to experiment with different materials to find out which ones work best for your printing needs. By choosing the appropriate material for your printer, you can enhance your printing experience and achieve prints that meet your expectations.
Ensure the material is large enough for your aquarium size.
When it comes to printing material to use for your aquarium, it’s crucial to ensure that it’s appropriately sized. The last thing you want is to print something that doesn’t fit the dimensions of your tank. This can result in an unsightly appearance, and may even cause harm to your fish.
When selecting a material, it’s important to consider both the size and quality of the material. Make sure that the material is durable enough to withstand the conditions of your aquarium, such as temperature and humidity. You should also consider using a high-quality ink to produce vibrant prints that won’t fade easily.
Additionally, it’s a good idea to choose materials that are easy to clean, as algae and other deposits can quickly accumulate on the surface. By selecting an appropriate material for your aquarium, you can ensure that your tank looks great and your fish thrive in a healthy environment.
Print the Design
If you’re looking to liven up your aquarium and create a unique underwater world, an aquarium background is a great place to start. But once you’ve found the perfect design, how do you actually print it? The first step is to make sure the design is in the correct format – most printing services will require a high-resolution image in either JPEG or PNG format. Once you have your file in the correct format, you can take it to a local office supply or printing store, or you can check out online printing services.
Many online printing services offer customizable options, including the size and material of your background. TIP: Be sure to measure the size of your aquarium before printing, so you can get the perfect fit. With a printed aquarium background, you’ll be able to create a stunning underwater world for your fish to enjoy, making your aquarium the envy of all your friends.
Load your chosen material into the printer.
Once you have completed your design and prepared your 3D printer, it’s time to load your chosen material into the printer and start printing. This is a crucial step in the 3D printing process as the quality of your final product will largely depend on the type of material you use. First, make sure the printer is turned on and ready to go.
Then, locate the spool holder on the printer and insert your material spool. You may need to consult your printer’s manual to determine the correct orientation for your spool. Next, feed the material into the printer’s extruder so that it can be melted and deposited layer by layer to form your 3D object.
Most printers have a loading mechanism that will guide the material through the extruder, but again, check your printer’s manual for specific instructions. It’s important to note that not all materials are created equal. Different materials have different properties and strengths, so choose the material that is best suited for your intended use.
For example, PLA is great for creating decorative objects, while ABS is better for objects that require durability and impact resistance. In conclusion, loading your material into the printer is a simple but essential step in the 3D printing process. Take your time and choose your material carefully for optimal results.
Happy Printing!
Press print button and wait for the image to be printed.
Printing your design work can be a thrilling experience! There is something truly special about seeing a physical copy of your hard work in front of you. If you’ve never printed a design before, don’t worry, it’s a relatively simple process. First, make sure your printer is connected and has enough ink and paper.
Open the design file on your computer and double-check the settings to ensure that everything is correctly aligned and ready to print. Press the print button and wait for the image to be printed. Depending on your printer’s speed, this could take a few seconds or a few minutes.
Once the printing process is complete, take a moment to appreciate your work and examine it for any errors or inconsistencies. If you notice any issues, you can make adjustments and try to print again. Overall, printing your design is an exciting step in the creative process, and it allows you to showcase your hard work in a tangible way.
So go ahead and give it a go – you might be surprised by how satisfying it can be!
Apply the Background
Printing aquarium backgrounds is a creative way of enhancing the look of your aquarium. It is also an excellent way to showcase your personality through the design of your fish tank. To apply a background, first, you need to measure the dimensions of your tank and get a background that fits perfectly.
Once you have the background, clean the outer surface of the tank and spray some water to dampen it. Then, remove any bubbles by smoothing out the background with your hands. Finally, use a razor blade to trim off any excess material.
Printing your own background also gives you more options to be creative. You can use photos, graphics, or even create your own design. Overall, adding a background to your aquarium can make it more aesthetically pleasing and a joy to look at.
Clean the outside of your aquarium glass so that it is free of dirt.
Cleaning the outside of your aquarium glass is vital to keeping your fish healthy and happy. A dirty aquarium can cause stress and even illness in your aquatic pets. So, if you want to brighten up your fish tank, it’s essential to start with a clean slate.
The first step is to apply a background to your aquarium glass. A solid background will help to hide any imperfections or scratches that may be on the glass, giving your aquarium a professional look. Applying a background can be as simple as using a solid-colored poster board or purchasing a pre-printed design from your local pet store.
Once you have your background in place, it’s time to start cleaning the glass. Use a soft cloth or sponge to wipe down the outside of the aquarium. Avoid using harsh chemicals or strong soaps, as these can be harmful to your fish.
Instead, a mixture of warm water and vinegar can be used to gently scrub away any dirt or algae. Rinse the glass thoroughly with clean water and dry it off with a clean towel. With your aquarium glass now sparkling clean, your fish will thrive in their beautiful and healthy environment.
Place the printed design facing against the aquarium glass.
To create a stunning aquarium that will be the envy of all your friends, it’s essential to add a beautiful background that matches the style and atmosphere you want to create. Once you’ve chosen your design, it’s time to apply it to the glass. But how do you ensure it stays put? Here’s where the key phrase comes in: place the printed design facing against the aquarium glass.
This means that the inked side should be pressed against the glass rather than placed on the outside. Doing so will not only ensure a tight fit but also prevent damage to the printed design. When placing the background on the glass, it’s best to start at the bottom and work your way up.
This allows you to smooth out any bubbles or creases as you go along, ensuring a flawless finish. Don’t use too much force though; the last thing you want to do is break the glass. A gentle touch is all that’s needed to ensure the background stays in place.
Once you’ve applied the background, step back and admire your handiwork. You’ll be amazed at how much of an impact a good background can make to your aquarium. Not only will it add depth and interest, but it will also provide a beautiful backdrop for your fish.
So go ahead, experiment with different designs and colors and create the aquarium of your dreams.
Secure the design in place using tape or adhesive.
When it comes to creating a visually appealing design, it’s essential to make sure all the elements are secured in place correctly. Using tape or adhesive, you can guarantee that the design won’t move or shift while you work on it, giving you the freedom to focus on your artwork. Before starting, it’s important to ensure that the surface you are working on is clean and dry.
Next, apply the tape or adhesive to the back of your design and carefully place it in the desired location. Press down firmly, ensuring it’s fully secure before moving onto the next element. There’s nothing worse than designing something that falls apart, so by taking the time to secure it, you ensure that your design will last and look great.
Remember, while it can be tempting to rush through the process, taking your time and making sure everything is secure will save you from potential headaches down the line. Don’t be afraid to experiment with different types of tape or adhesives to find what works best for you, but make sure to choose one that won’t damage your surface or design. With a little bit of time and attention, your design will look professional and eye-catching in no time!
Conclusion
In conclusion, printing aquarium backgrounds couldn’t have been simpler! With the right materials and a bit of creative inspiration, you can transform your fish tank into an underwater paradise in no time. Just make sure to select high-quality images, use waterproof paper, and adjust your printer settings to match the dimensions of your tank. Whether you choose vibrant coral reefs, serene kelp forests, or majestic shipwrecks, your aquatic friends are sure to love their new backdrop.
Happy printing, and may your fish always be happy and well-decorated!”
FAQs
What is an aquarium background?
An aquarium background is a decorative element that is placed at the back of an aquarium to enhance its appearance.
What materials are aquarium backgrounds made of?
Aquarium backgrounds are commonly made from PVC, vinyl, or polyester materials.
How do I measure the size of my aquarium for a background?
Measure the length and height of the back of the aquarium to determine the size of the background you need.
Can I use any type of background for my aquarium?
It is recommended to use backgrounds that are designed specifically for aquariums to ensure they are safe for aquatic life.
How do I install an aquarium background?
Most aquarium backgrounds come with adhesive backing and can be easily attached to the back of the tank. Some may require the use of aquarium-safe silicone.
Can I remove and reuse aquarium backgrounds?
Some aquarium backgrounds can be removed and repositioned, while others are meant to be one-time use only. Be sure to read the product instructions before purchasing.
Are there different types of aquarium backgrounds available?
Yes, there are many different types of aquarium backgrounds available, including natural landscapes, abstract designs, and 3D backgrounds.


